Cub cadet commercial z-wing – Cub Cadet Z-Wing User Manual
Page 29
Cub Cadet Commercial Z-Wing
25
12.8. Disconnect the front of the actuator:
•
Remove the hairpin clip from the clevis pin that
secures the front of the actuator to the frame of
the mower.
•
Hold the actuator to keep it from rotating.
•
Drive the clevis pin up, releasing the actuator.
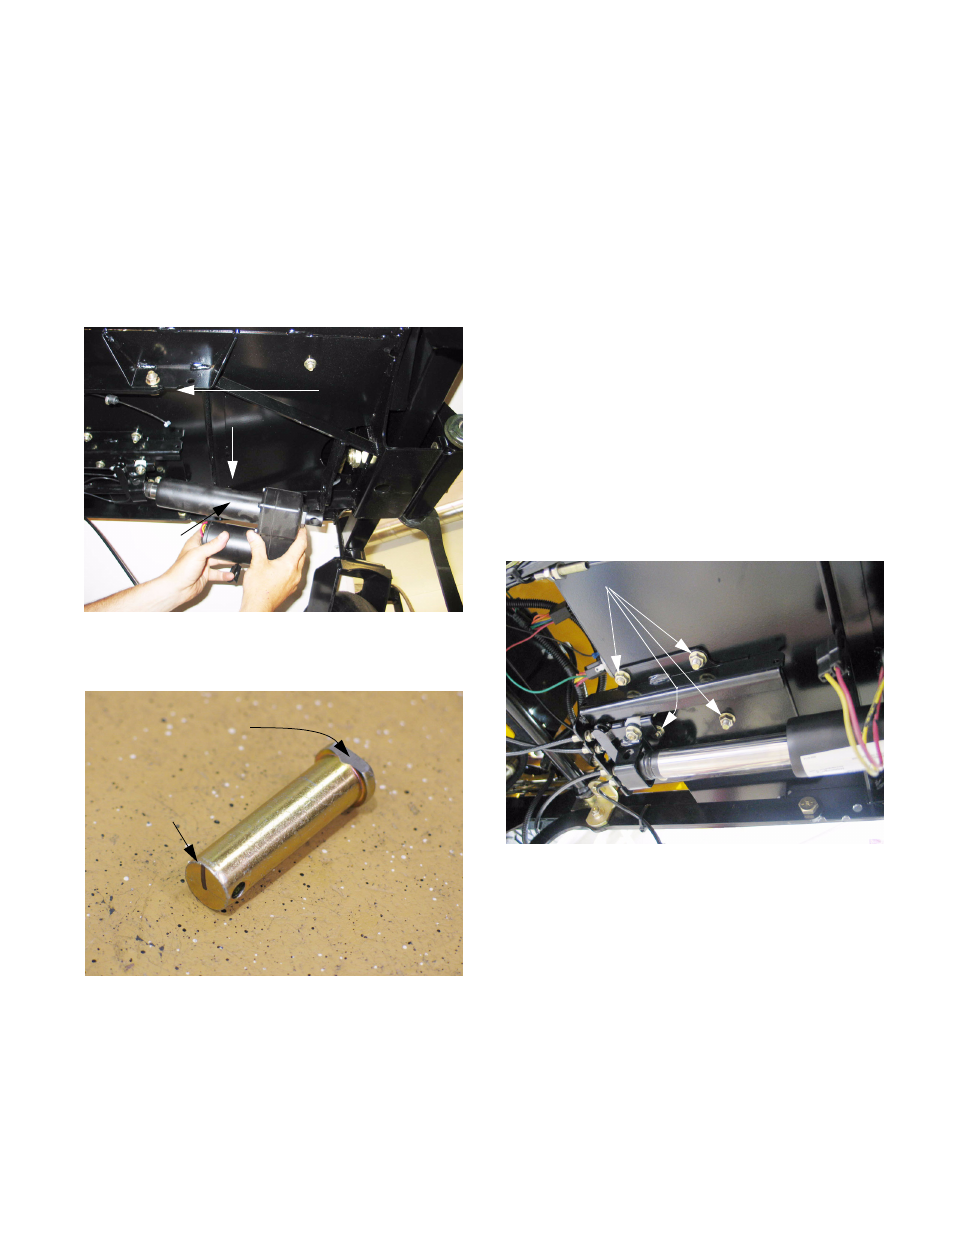
12.9. Carefully slide the actuator toward the back of
the mower to release it from the front bracket,
and lower it to remove it. See Figure 12.9.
12.10.Installation notes: See Figure 12.10.
•
Reverse the disassembly process to install the
actuator.
•
It is acceptable to grind a small flat on one side
of the head of the front clevis pin, perpendicular
to the bore for the hairpin clip, for ease of instal-
lation.
Figure 12.9
Slide back
then down
Actuator
Figure 12.10
Flat ground on pin
Index mark
Installation notes, continued:
•
Lubricate the pivot points (clevis pins) with anti-
seize compound.
•
Confirm correct operation and adjustment of the
hinge lift mechanism and associated safety fea-
tures before returning the mower to service.
12.11. If the actuator has failed in the fully extended
position, or if it is necessary to remove the cable
bracket, the following sequence of instructions
will be more useful.
12.12.To remove the wing lift actuator, remove the cut-
ting deck as described in the CUTTING DECK
REMOVAL section of this manual.
12.13.Disconnect the electric plug joining the actuator
to the rest of the harness.
12.14.Remove the rear hairpin clip and clevis pin that
hold the actuator to the cable bracket assembly.
12.15.Remove the four nuts that secure the cable
bracket assembly to the frame of the mower
using a 1/2” wrench. See Figure 12.15.
Figure 12.15
Nuts (securing cable bracket to frame)