Elecraft KPA100 Manual User Manual
Page 24
24
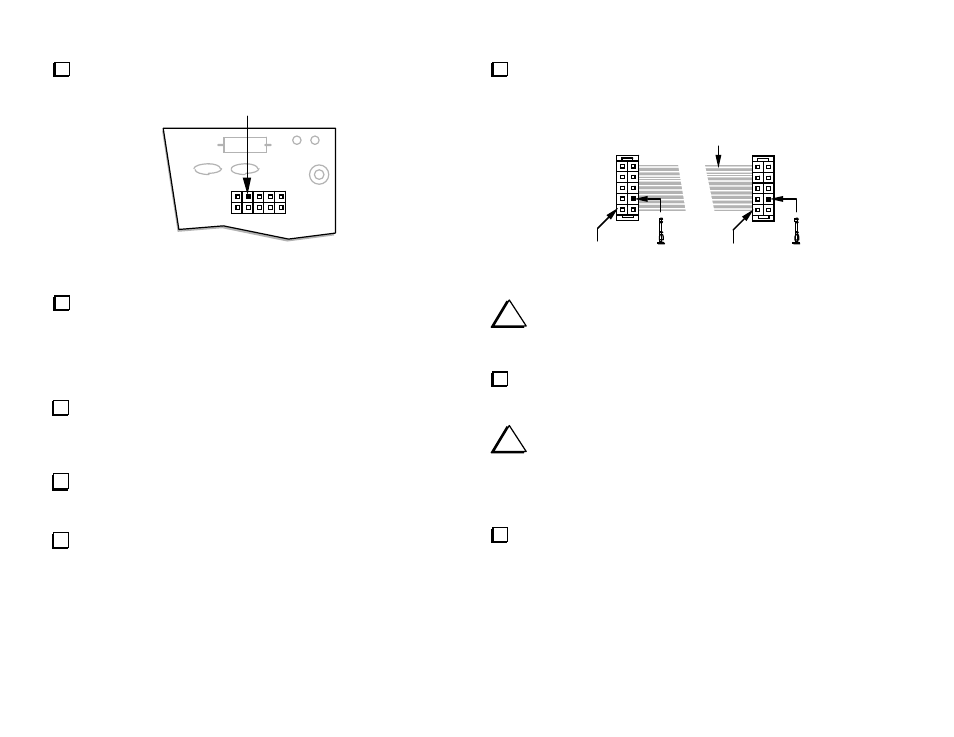
Cut pin 4 of P1 on the KPA100 board (see Figure 12).
R31
C25
GND
AF
P1
1
Cut Pin 4
Figure 12
The main microcontroller (U6, K2 Control board) must have
revision 2.02A or later firmware in order to control the KPA100. If
your firmware revision (recorded on the previous page) is older than this,
you'll need to install a new microcontroller. This 40-pin IC should have
been supplied with your KPA100 kit. Refer to the K2 Revision 2
Firmware manual for installation instructions.
If you plan to use computer control of your K2 via the KPA100's RS-
232 interface, and have not previously installed the KIO2 option, you may
need to modify the Control board (see page 59). Making the modification
now will save you the trouble of removing the Control board again later.
Plug the K2 Control board into the RF board. Make sure that all three
connectors along the bottom edge of the board are plugged into their
mating connectors.
Re-install the KAF2 board if applicable. Secure the Control board to
the Front Panel board with the hardware removed earlier.
Locate the pre-assembled ribbon cable. Lay the cable flat as shown
in Figure 13, with the black wire at the top and the connector holes
facing up.
Black Wire
Pin 1 Mark
Pin 1 Mark
Figure 13
i
Before installing the keying inserts in the next step, carefully
check to ensure they are in the correct positions! Once inserted, they
are almost impossible to remove.
Install keying inserts in position 4 of both connectors. The inserts
include break-off tabs that aid installation. The inserts should lock in
place and be flush with the mating surface of the connector.
i
The cables that connect the KPA100 to the K2 are all kept short
to avoid pickup of stray RF. Because of this, the KPA100 assembly must
be placed on top of a 3 to 4 inch (7 to 10 cm) platform to the right of the
K2 during test and alignment. You can use books, a cardboard box, etc.
Do not use metallic objects.
Place the KPA100 on a suitable platform as described above. The
front edge of the KPA100 board should be facing toward you (speaker
cutout to the right).