Advanced configuration ~ macros – ClearOne XAP400 User Manual
Page 74
Advanced Configuration
~ Macros
68
Technical Services Group ~ 1-800-283-5936 (USA) ~ 1-801-974-3760
To create a macro using Macro Editor
1. Click the Macro Editor button in the G-Ware toolbar to open the Macro
Editor.
2. Select the Macro (from 1 to 255) you are creating from the Macro list.
Numbers that are already assigned to macros will be marked with an
asterisk.
3. Select the Protected check box to lock your macro. Locked macros are
indicated by a padlock icon. Macros that are locked do not require the
password to be run. However, the password is required to make changes to
the macro. The macro password is the same as the preset password and is set
in the Unit Properties window; see page 26.
4. Click Change Name to create a more descriptive name for the macro which
is displayed in addition to the macro number (limit 20 characters).
5. Type any notes pertaining to the macro in the Macro Description box.
6. Select the Device Type and ID from their respective lists.
7. Select the Command from the Command list. When you select a command,
a description of it appears in the Command Description box.
8. Select the argument parameters from the argument option lists. The options
that are available depend on the command selected. When you select an
argument, a description of it appears in the Argument Description box.
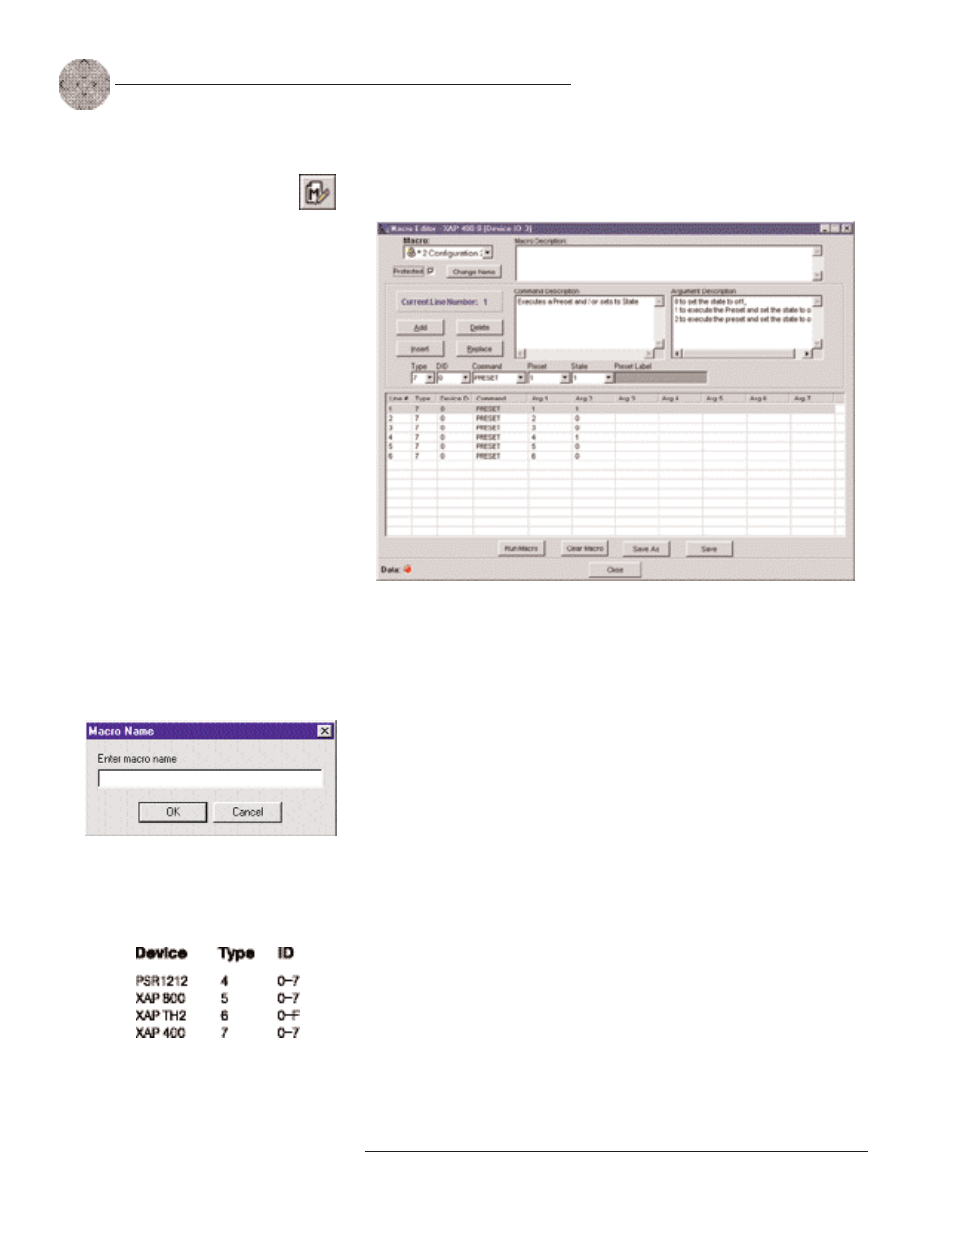
Figure 4.15. Macro Editor window
Figure 4.16 Macro Name window
Figure 4.14.
Macro Editor button