Contents special modes menu (2nd screen), Copier – Sharp MX-M264N User Manual
Page 137
2-39
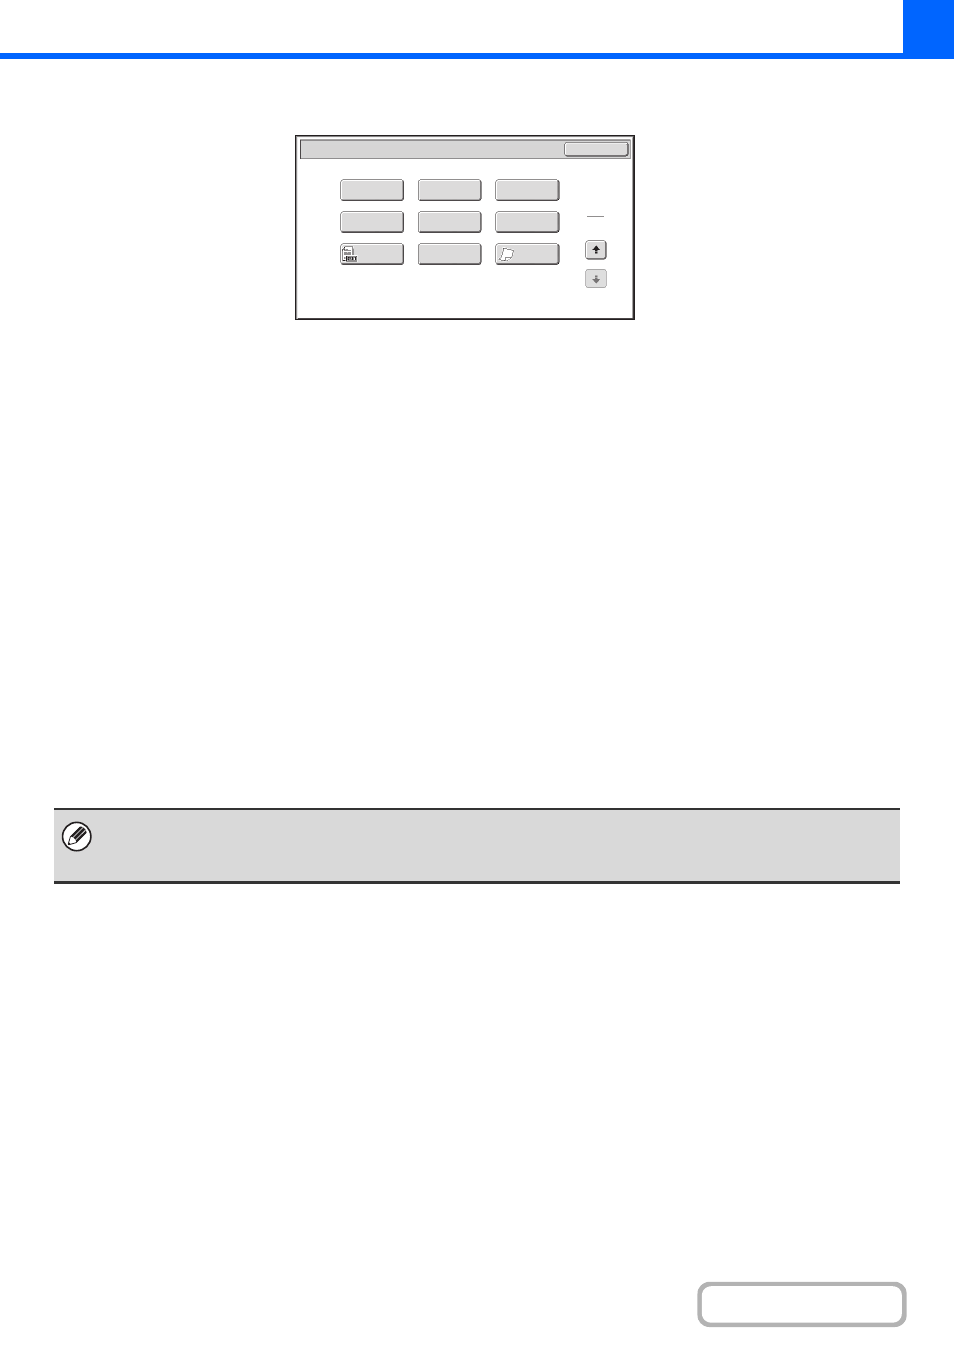
Special modes menu (2nd screen)
(1)
[Stamp] key
PRINTING THE DATE AND A STAMP ON COPIES
(Stamp)
(page 2-80)
(2)
[Image Edit] key
(3)
[Sharpness] key
ADJUSTING THE SHARPNESS OF AN IMAGE
(Sharpness)
(page 2-109)
(4)
[File] key
This saves a job in a folder of the document filing
function.
The hard disk drive is required.
(5)
[Quick File] key
This saves a job in the Quick File folder of the document
filing function.
The hard disk drive is required.
(6)
[Proof Copy] key
CHECKING COPIES BEFORE PRINTING (Proof
Copy)
The hard disk drive is required.
(7)
[Original Count] key
CHECKING THE NUMBER OF SCANNED
ORIGINAL SHEETS BEFORE COPYING (Original
Count)
(8)
[Mixed Size Original] key
COPYING ORIGINALS OF DIFFERENT SIZES
(Mixed Size Original)
(page 2-114)
When the document cover is installed, this key is not
displayed.
(9)
[Slow Scan Mode] key
COPYING THIN ORIGINALS (Slow Scan Mode)
(page 2-117)
When the document cover is installed, this key is not
displayed.
Special Modes
2
2
OK
Image Edit
Quick File
Proof Copy
Sharpness
Slow Scan
Mode
Original
Count
Mixed Size
Original
Stamp
File
(1)
(2)
(3)
(4)
(5)
(6)
(7)
(8)
(9)
• Special modes can generally be combined with other special modes, however, there are some combinations that are not
possible. In this case, a message indicating that the combination is not possible will be displayed.
• The displayed menu will vary depending on the country and regions.