Ac b, Ab c – Panasonic HX-A100D User Manual
Page 98
98
HD Writer WE
Using convenient features
Advanced Features
Text
1
Click .
2
Create a bounding box by dragging with the mouse
pointer in the preview window, and then click inside the
outline and enter the text.
3
Make text settings using the [Basic] tab.
[Font]: Sets the font type.
[Font size]: Sets the character size.
[Bold]: Makes the text bold.
[Italic]: Makes the text italics.
: Sets the alignment after line breaks.
[Color]: Sets the color.
[Opacity]: Sets the transparency.
4
Using the [Border] tab, set the color and width of the
external border using [External border], and the internal
border line using [Internal border].
5
To add shadows to the characters, enable [Add shadows]
using the [Shadows] tab, set the color of the shadows
using [Shadow color], and adjust the blurriness using
[Shadow blur], the direction using [Shadow direction] and
the distance from the character using [Shadow distance].
6
To add a background to the text (a rectangle behind the
text), enable [Add background] using the [Background]
tab, and use [Color] and [Width] to adjust the color and
width of the background border, and [Texture fill] to select
the background color.
●
You can round the four corners of the background by selecting
[Rounded corners].
7
Adjust the position of the text, etc.
●
You can rotate the text by dragging the pink circles in the four
corners of the bounding box.
Ellipses and rectangles
1
Click or .
2
Draw a figure in the preview window by dragging with the
mouse pointer.
[Color]: Sets the border color.
[Texture fill]: Sets the color for filled areas.
[Width]: Sets the width of the border.
[Rounded corners]: Rounds the four corners. (Rectangles only)
[Opacity]: Sets the transparency. (Shared by all objects)
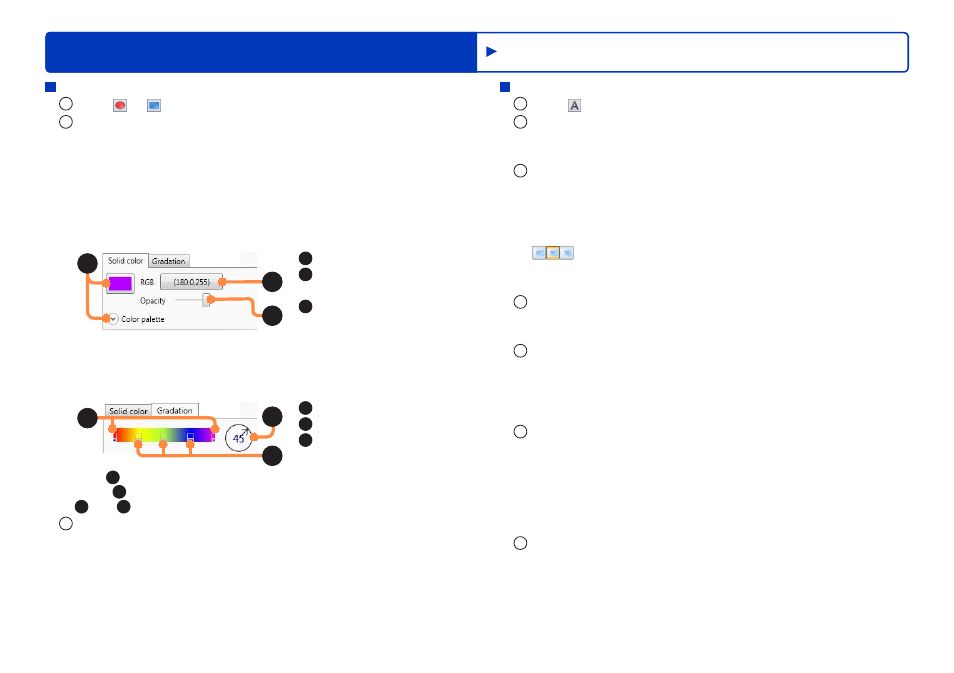
A
C
B
A
: Color palette display
B
: RGB value
specification
C
: Transparency setting
●
Click the color you want to use on the color palette. By clicking
[Recently used colors], you can select a color from your usage
history. You can also specify an RGB value.
A
B
C
A
: Edge color settings
B
: Gradation direction
C
: Intermediate color
setting
●
Click (
A
) to select the edge colors. You can create color crossover
points (
C
) by clicking the gradation bar. You can drag the points
(
A
and
C
), and delete them by right-clicking them.
3
Adjust the size and position of the figure.
●
Drag the light blue square inside the bounding box to make the
object larger/smaller, and drag the pink circles in the four corners to
rotate the object.
If you hold down the [Shift] key while dragging to adjust the size,
the object that you are drawing becomes a circle or a square. If the
drawing is already finished, its aspect ratio is maintained.
Retouching motion pictures