Panasonic HX-A100D User Manual
Page 97
97
HD Writer WE
Using convenient features
Advanced Features
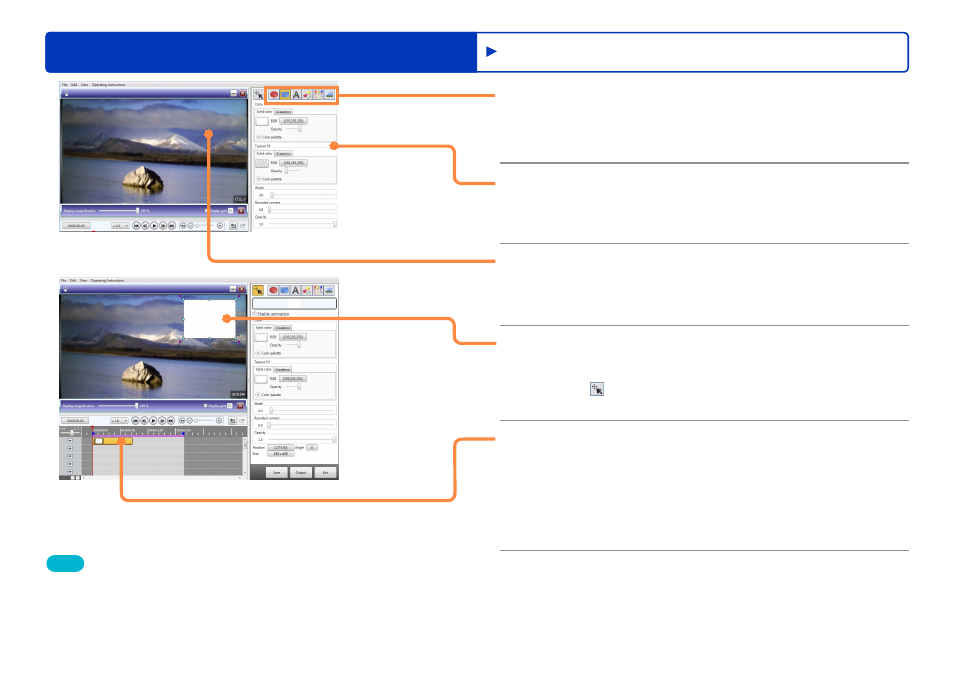
5
Click a Create object button.
If you have already decided when to start displaying the
object, you can drag the playback position bar to that position.
6
Make settings for the objects.
The settings can also be made after creating the object.
●
About the setting items for each object
.
7
Create an object on the screen.
The display period of the created object is indicated by the
position of the playback position bar over the track area.
8
Adjust the size, position, etc.
●
When you click the object in the preview window or in the track
with the button selected, you can edit the settings.
●
About animation settings
.
9
Set the display time of the object.
Drag the object in the track to move the display period.
To lengthen/shorten the display time, drag the left end to
adjust the start time position, or the right end to adjust the end
time position. You can also adjust the positions by selecting
[Time settings] in the right-click menu.
Tips
●
To save your work in progress as a “project”, click [Save].
Note that even if you save a retouched short movie story as a project,
retouching will not be reflected in the original short movie story.
However, if you later edit the original short movie story, the edited
contents will be reflected in the project as well.
Retouching motion pictures