Other tools, Mounting the scanner, Steps using the mini-bracket – Watlow CAS200 User Manual
Page 23: Mounting the scanner 11, Figure 2.3— mounting with the mini-bracket 11
CAS200 User’s Guide
Chapter 2: Installation
Watlow Anafaze
11
Other Tools:
You will also need these tools:
•
Phillips head screwdriver
•
Flathead screwdriver for wiring
•
Multimeter
Mounting the Scanner
Mount the scanner before you mount the
TB50
or do any
wiring. The scanner's placement affects placement and
wiring considerations for the other components of your
system.
You receive one of two types of mounting brackets with
your scanner, the mini-bracket or the collar bracket. Refer
to the corresponding sections below for instructions.
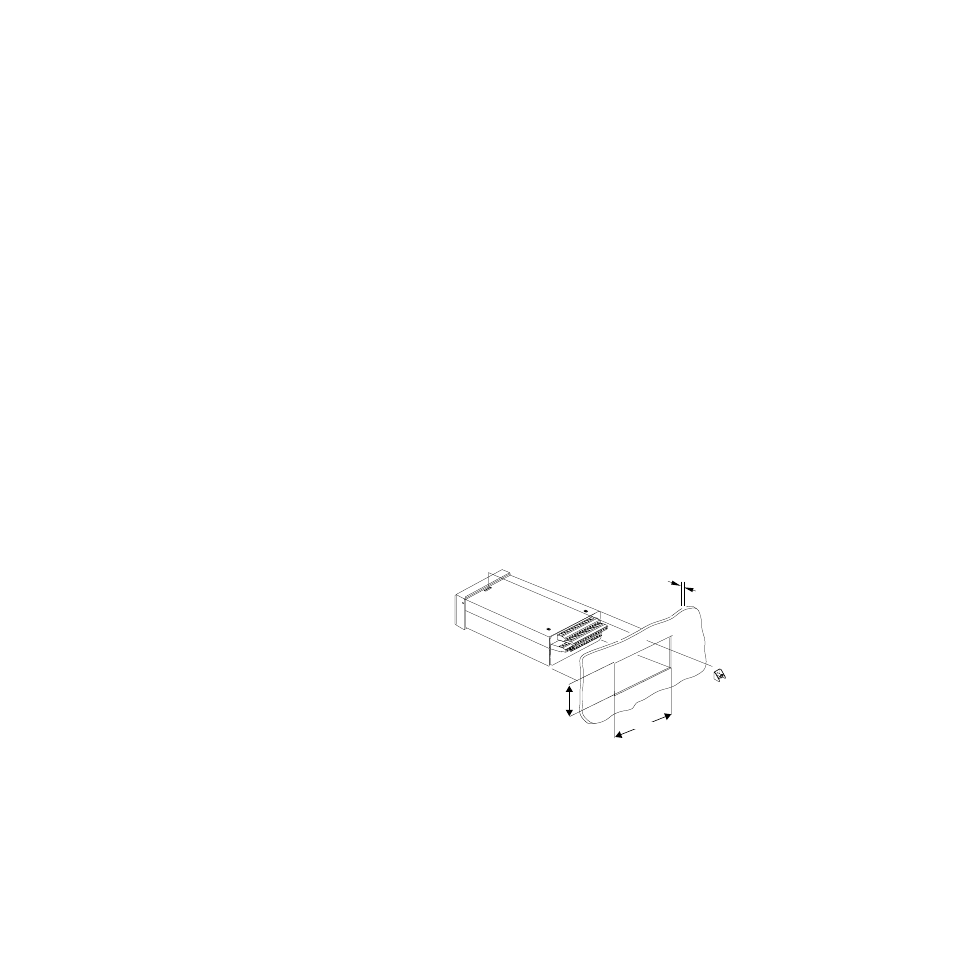
Steps Using the Mini-Bracket
1. Cut a hole in the panel to the dimensions shown in the
illustration below. To do this, use a punch, nibbler, or
jigsaw, and file the edges of the hole.
2.
Insert the scanner into the hole through the front of
the panel.
3.
Screw the top and bottom clips in place: insert the
clip’s lip into the cutout in the scanner’s metal housing
just behind the front panel. Tighten the screws.
4.
If you expect much panel vibration, use a rear support
for the scanner and its interconnecting cables.
Figure 2.3
Mounting with the Mini-Bracket
1.80 in. ±0.02 in.
(45.7mm ±0.5mm)
Maximum Panel
Thickness
3.63 in. ±0.02 in.
(92.2mm ±0.5mm)
0.2 in. (5mm)