Procedure: unit two – light-emitting diodes – PASCO EM-8656 AC_DC ELECTRONICS LABORATORY User Manual
Page 66
62
AC/DC Electronics Laboratory
012-05892A
®
PROCEDURE: Unit Two – Light-Emitting Diodes
PART I: Computer Setup
•
You do not need to change the computer setup.
PART II: Sensor Calibration and Equipment Setup
➀
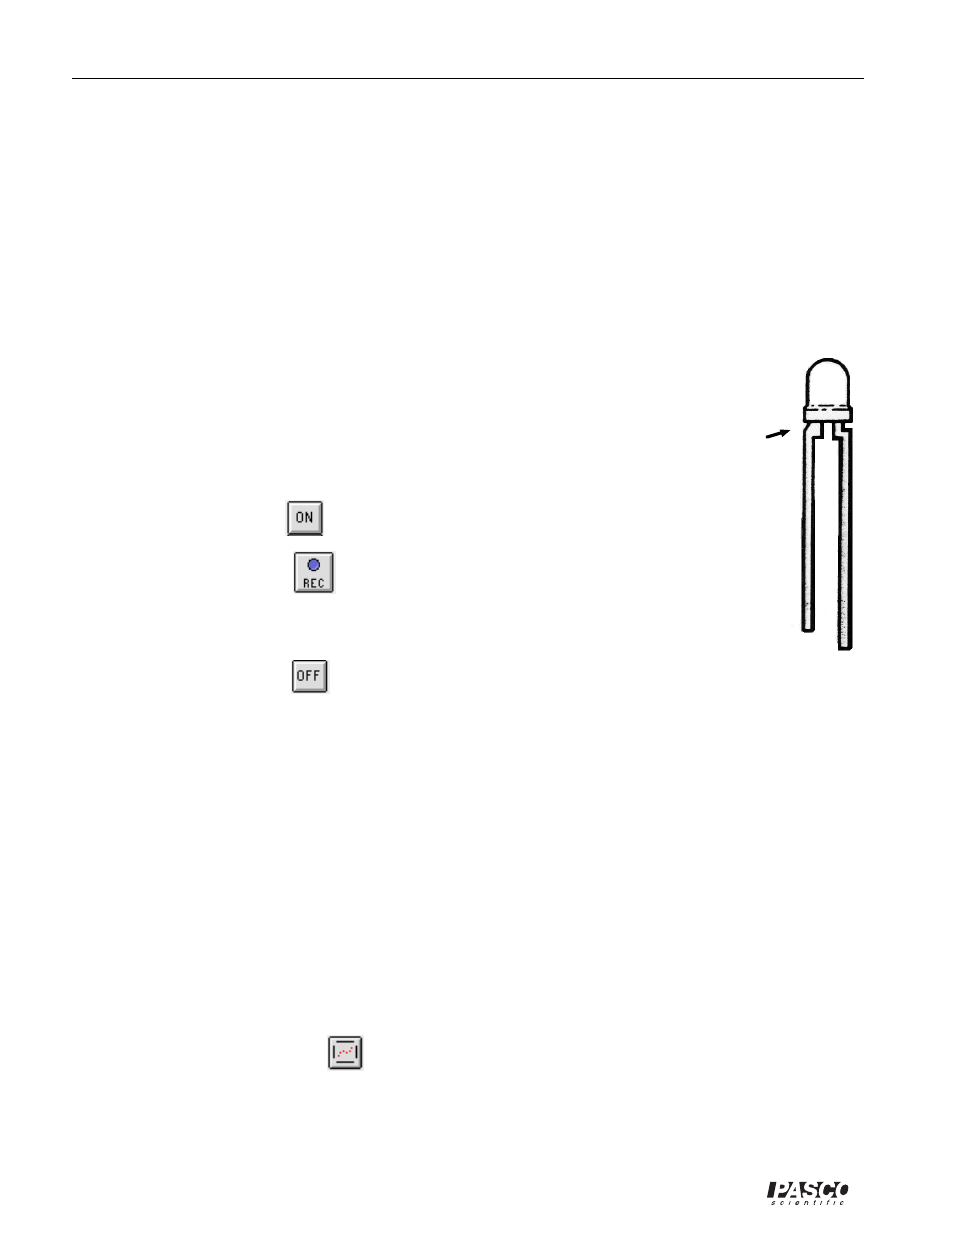
Prepare the red, yellow, and green LED’s by very carefully bending the wire leads so they can fit
in the component springs in place of the diode you used in Unit One.
➁
Replace the diode from Unit One with the first LED (red). Arrange the first LED so the short lead
(cathode) is to the left.
•
The wire lead that is connected to the cathode of the LED is slightly shorter, and has a beveled
shoulder near where the wire enters the LED.
PART IIIA: Data Recording – Light-Emitting Diodes
➀
Turn on the power switch on the back of the power amplifier.
➁
Click the “ON” button (
) in the Signal Generator window.
➂
Click the “REC” button (
) to begin data recording.
•
Data recording will end automatically after 250 samples are measured. Run #2
will appear in the Data list in the Experiment Setup window.
➃
Click the “OFF” button (
) in the Signal Generator window.
➄
Replace the first LED (red) with the next LED (yellow).
➅
Click the “ON” button in the Signal Generator window. Repeat the data recording procedure.
Click the “OFF” button in the Signal Generator window.
➆
Replace the second LED (yellow) with the last LED (green). Click the “ON” button in the Signal
Generator. Repeat the data recording. Click the “OFF” button in the Signal Generator.
•
There should be four runs in the Data list in the Experiment Setup window.
ANALYZING THE DATA: Light-Emitting Diodes
➀
Select “Save As…” from the File menu to save your data.
•
The Graph display shows the three most recent runs of data (one run for each LED).
➁
Select “Run #2” from the bottom of the Experiment menu.
•
The Graph display will show only Run #2.
➂
Click the “Autoscale” button (
) to resize the Graph to fit the data.
Light-emitting diode (LED)
Cathode - shorter,
beveled “shoulder” at the
top of the lead