Setup network, Screen 5: setup network port continued – Liquid Controls DMS Setup User Manual
Page 25
25
Setup Network
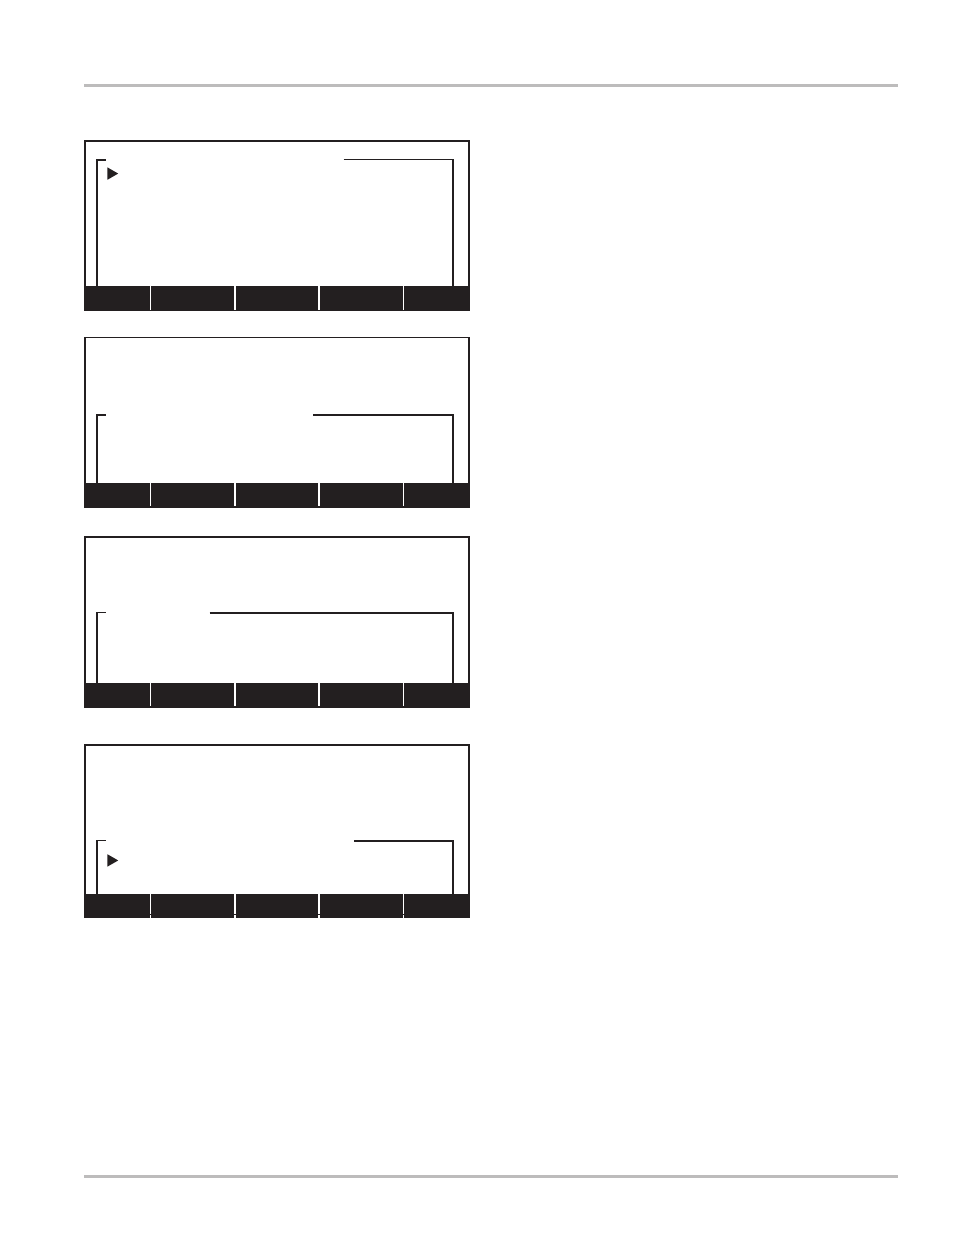
Move pointer to
Tx Enable Bit and press ENTER to open
Transmit Enable Bit list box window. The Transmit
Enable Bit is used in an RS-485 network when data is to
be transmitted to a LectroCount register. The following
options are available:
!DTR
!RTS
!RTS!DTR
DTR
None
RTS
RTSDTR
For a standard DMS i1000 Module, select
RTS and press
ENTER to accept the value.
Move pointer to
Maximum Retries and press ENTER to
open a field edit window.
Maximum Retries represents number of times system
attempts to communicate with a LectroCount register
should first attempt fail. The maximum number of retries
can have a value between
0 and 255. Enter desired
number of retries and press
ENTER to accept the value.
Move pointer to
Timeout and press ENTER to open a
field edit window.
Timeout value is the length of time (in
milliseconds) a single communication is attempted before
returning a communication failure. The timeout value may
be between
100 and 9999 ms. Enter desired value and
press
ENTER to accept. The recommended value is 100.
Move pointer to
Baud Synchronization and press
ENTER to open a list box window and chose Yes or No. If
Yes is selected, the system will try all available baud rates
should the baud rate set earlier result in a communication
error. Select
Yes and press ENTER to accept.
NOTE: Care should be taken when setting the Maximum
Retries and Timeout values. If an LCR is not present in
the network, it will take:
5 x (R + 1) x T = milliseconds
before it is determined an LCR is not present. 5 is the
number of baud rates if
Baud Synchronization is set to
Yes, R is the number of Maximum Retries and T is the
Timeout value in milliseconds. If the number of retries
is 3 and the timeout value is 500, then the time before an
error is returned is:
5 x (3 + 1) x 500 = 10,000 or 10 seconds.
Press
Exit (F5) to exit SETUP NETWORK PORT and
return to
SETUP NETWORK. Then press Dev (F1) to
advance to
Screen 5: SETUP NETWORK DEVICES on
page 24.
Screen 5: Setup Network Port
Continued
COM1 using IRQ 3
57600
SETUP NETWORK PORT
Port:
Bits/Second (Baud):
Timeout:
|250_|
Home <-- Ins --> End
COM1 using IRQ 3
19200
SETUP NETWORK PORT
Port:
Bits/Second (Baud):
Maximum Retries:
|1_ |
Home <-- Ins --> End
Transmit Enable Bit
!RTS
!RTS!DTR!
DTR
None
RTS
RTSDTR
Home PgUp Find
COM1 using IRQ 3
19200
RTS
SETUP NETWORK PORT
Port:
Bits/Second (Baud):
Tx Enable Bit:
Baud Synchronization
No
Yes