Liquid Controls LCR 600 - Quick Reference User Manual
Lectrocount lcr 600, Selector switch and printer controls fuel delivery
Q U I C K R E F E R E N C E
SELECTOR SWITCH AND PRINTER CONTROLS
FUEL DELIVERY
LectroCount LCR 600
-
E
lEctronic
r
Egistration
-
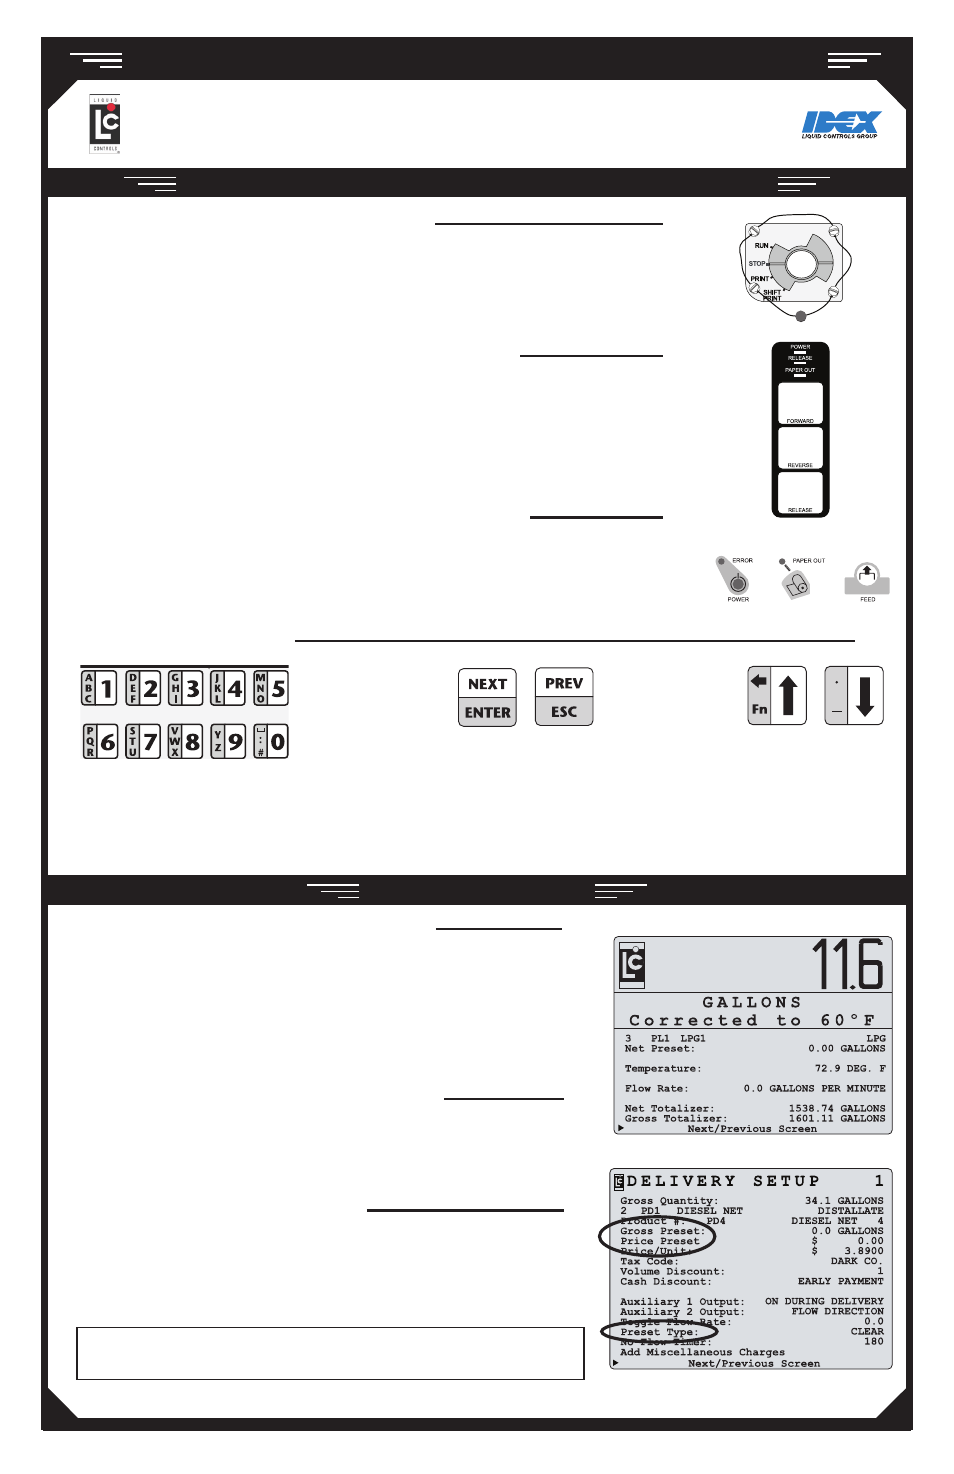
SLIP PRINTER BUTTONS AND INDICATOR LIGHTS
POWER light - light indicates power is on
RELEASE light- light indicates ticket can be removed
PAPER OUT light- light indicates no paper in printer
FORWARD button - moves paper forward
REVERSE button- moves paper backward
RELEASE button- release ticket for removal
ROLL PRINTER BUTTONS AND INDICATOR LIGHTS
ERROR light- light indicates printer unable to print (see printer manual)
POWER light - light indicates power is on
PAPER OUT light- light indicates no paper in printer
FEED button - moves paper forward
POSITIONS ON THE SELECTOR SWITCH
RUN - opens the control valve to begin a delivery
STOP - closes the control valve to pause a delivery
PRINT - ends a delivery and prints a delivery ticket
SHIFT PRINT - ends a shift, prints a shift ticket, and resets shift data in the LCR 600
Text Buttons
Navigation Buttons
Use the arrow buttons
to scroll the pointer
up and down the the left
side of the display
The NEXT/ENTER button opens the field to the right
of the pointer and accepts values in field edit and list
boxes. The PREV/ESC button exits any list box or field
edit window without changing its value. With the pointer
on the
Next/Previous Screen line, press the
PREV/ESC
button to return to the previous screen or
press NEXT/ENTER to advance to the next screen.
The ten small buttons on the left
side of the keypad are used to enter
numbers, characters, and text when
changing the value of a field.
ALPHAUMERIC KEYPAD
MAKING A DELIVERY (SLIP PRINTER)
1. Press RELEASE on the printer. Insert a blank delivery ticket.
2. Press FORWARD on the printer to engage the ticket.
3. Turn the selector switch to RUN.
4. Take the nozzle to the fueling point and fill the tank.
5. Turn the selector switch to PRINT to print a delivery ticket.
6. After printing, press RELEASE on the printer. Remove the ticket.
7. Insert a blank ticket, Press FORWARD.
MAKING A DELIVERY (ROLL PRINTER)
1. Check for paper in the roll printer.
2. Turn the selector switch to RUN.
4. Take the nozzle to the fueling point and fill the tank.
5. Turn the selector switch to PRINT to record the delivery.
MAKING A PRESET DELIVERY
1. Navigate to a preset field. See box below.
2. Enter the preset volume (or price).
3. Turn the selector switch to RUN.
4. Take the nozzle to the fueling point and fill the tank.
5. Turn the selector switch to PRINT to print delivery ticket.
Depending which delivery screen is active, preset fields (Gross, Net, and
Price) are on the delivery screen or the the Delivery Setup 1 screen.
©2010 Liquid Controls Group Pub. #502051 (08/2010)