A series – GE Industrial Solutions A Series Lighting Control Panelboards Programmer User Guide User Manual
Page 27
A Series
®
Lighting Controller LCD Programmer
Chapter 8 – Lighting Group Menu
23
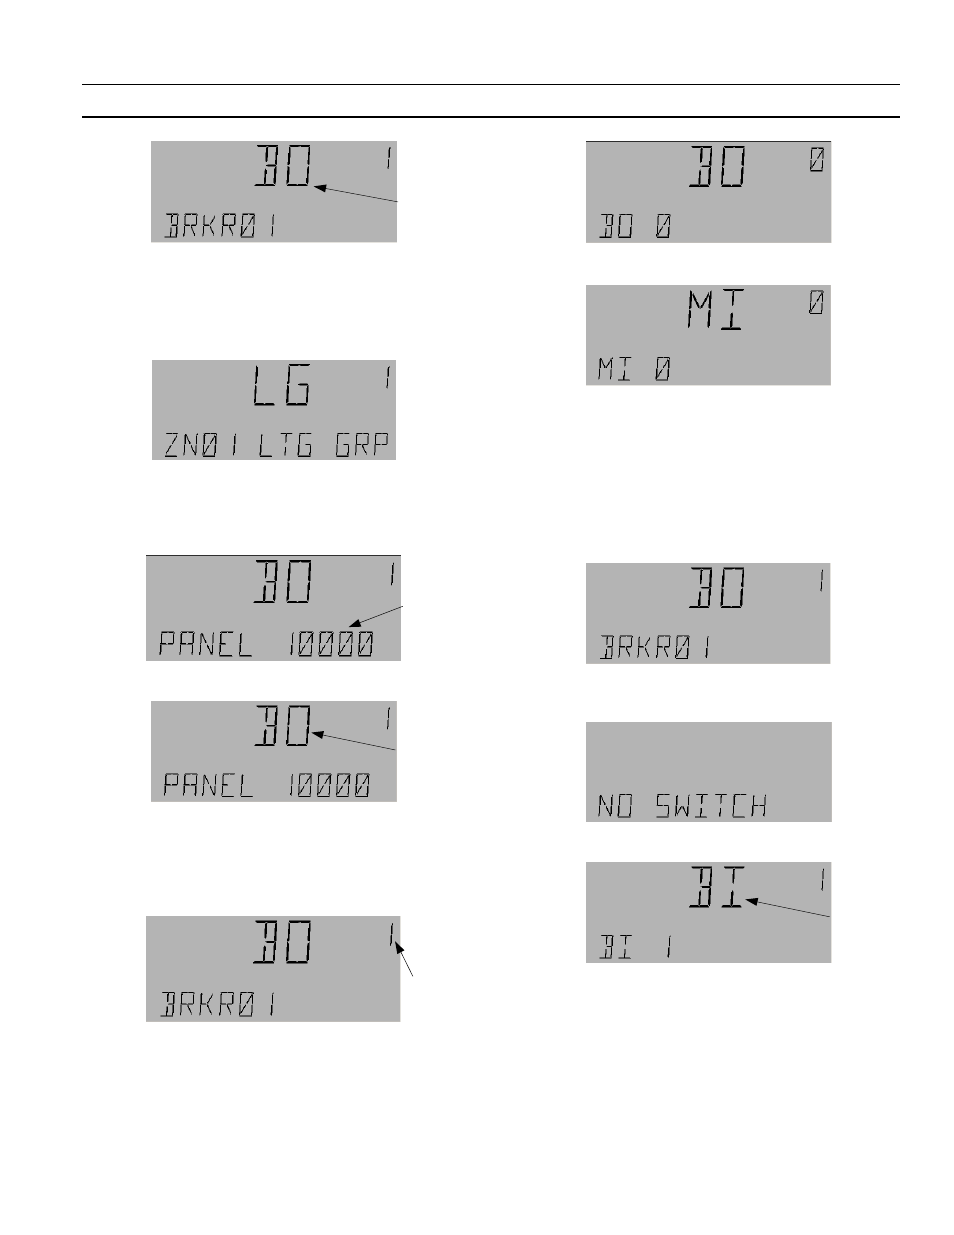
4.
Do one of the following:
• Press
OK
to accept a BO object type and jump
to step 8.
• Use the arrow keys to adjust the output type
and press
OK
to accept it and jump to step 8.
• Press the
Fn
key to edit the panel number and
continue with step 5.
5.
When the Panel number flashes, use the number
keys to adjust the panel number.
6.
Press
OK
to accept the change:
7.
Use the arrow keys to change the object type from
BO to LG Group or vice versa and press
OK
when
the desired object appears on the screen.
8.
Once the object type is accepted, the instance
number flashes:
9.
Do one of the following:
• Use the arrow number keys to change the
instance number. Press
OK
to accept the
instance number and add the object.
• Use the arrow keys to set the number to 0 to
delete the output.
or
Note that to delete any Output or Switch, set the
output instance to 0 and then press
OK
.
Adding a Switch
Use the following procedure to add a switch to a new
output:
1.
Use the arrow keys to navigate to the newly added
output:
2.
Press the down arrow to reach the NO SWITCH
display:
3.
Press
OK
to add a switch:
4.
Press the arrow keys to select either the BV or MI
(the BI and MV options should be ignored, as they
do not exist in the system).
5.
Do one of the following:
• Press
OK
to accept a BV or MI object type.
• Press the
Fn
key to edit the panel number.
When the panel number flashes, use the
number keys to adjust it.
Flashing
Flashing
Flashing
Flashing
Flashing