A series – GE Industrial Solutions A Series Lighting Control Panelboards Programmer User Guide User Manual
Page 23
A Series
®
Lighting Controller LCD Programmer
Chapter 7 – I/O Menu
19
This option (STEP) configures the switch as a
toggle switch. Press
OK
to accept the choice.
10.
The following screen may appear:
Do one of the following:
• If switch is to be configured as a toggle switch,
press
OK
.
• If the switch is to be configured as a
maintained switch, press numeric key 1. The
following display appears:
Press
OK
to accept the change.
11.
The following is displayed:
1 2 .
Press
E S C
as needed to return to the desired
previous menu.
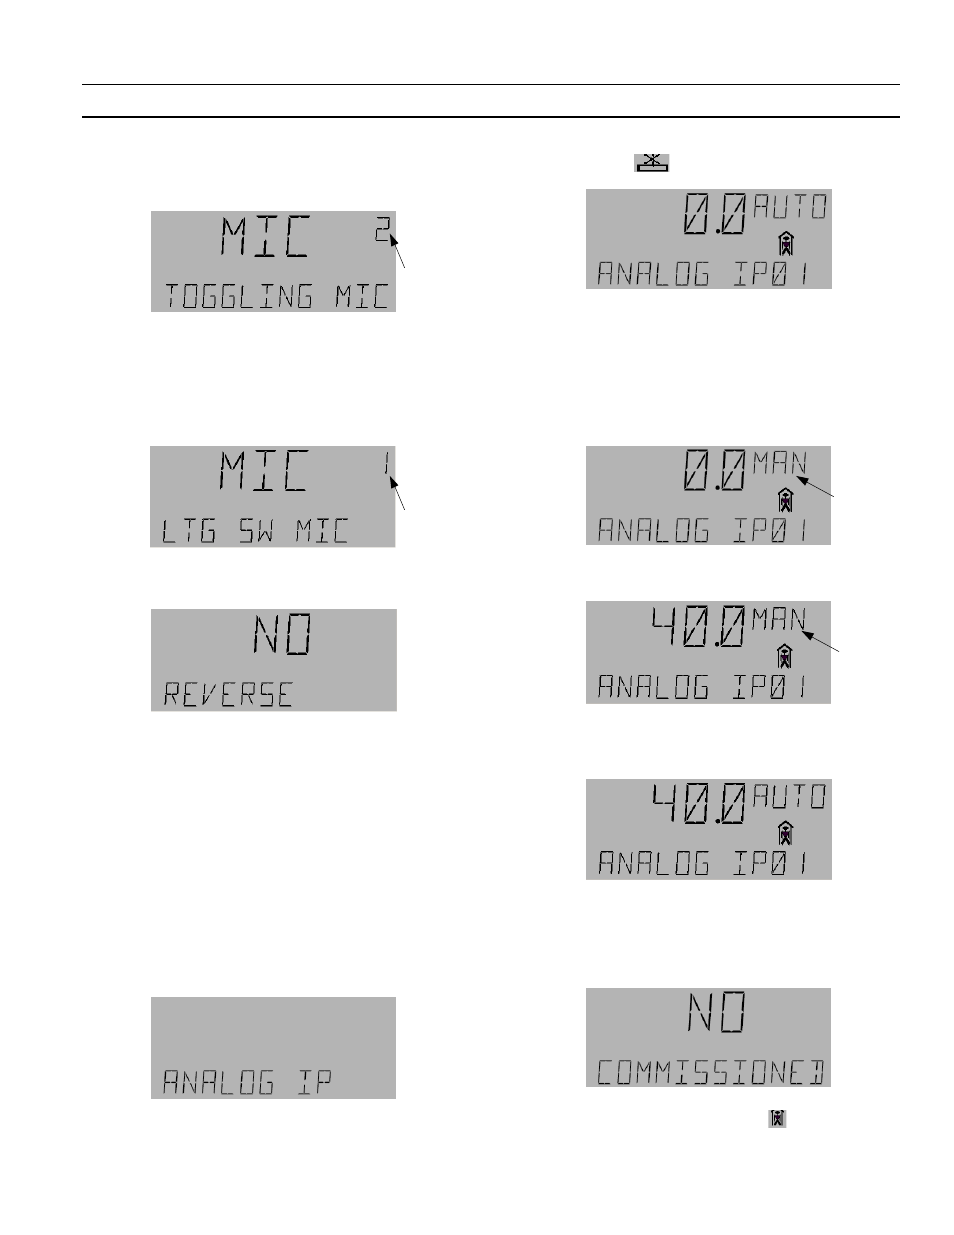
Editing Analog Inputs
The analog input menu is used to get the values of
sensors on the analog input ports (AI1–AI3) of the
controller. ANALOG IP01 corresponds to AI1, IP02 to
AI2, and IP03 to AI3. It is also used to get the light level
signal generated by the dimming module (LTG LVL
601–615 and 701–715). (Please refer to the dimming
module user’s guide, DEH41085, for further
information.)
Use the following procedure to edit analog inputs:
1.
Navigate to the ANALOG IP (AI) and press
OK
:
2.
Use the arrow keys to scroll to the desired AI and
then press
OK
to edit. Note that if the board is not
connected to the system, then its analog input
displays the
symbol.
Do one of the following:
• Press the
A/M
key to adjust the AI value
manually; continue with step 3.
• Press the
Fn
key to access the special functions;
jump to step 6.
3.
If the
A / M
key is pressed, the following display
appears:
4.
Use the number keys to set the desired value and
press
OK
to accept the change.
5.
Press
O K
followed by the
A/M
key to put the AI
back into Auto Mode. Press
OK
to accept change to
AUTO mode. Go to step 8.
6.
If the Fn key is pressed, the Commissioned menu
appears, with NO or YES flashing. When an object
is not commissioned then no events or alarms are
logged. When an object is commissioned, events
and alarms are logged as selected.
7.
Press the arrow keys to adjust Commissioned to
YES or NO. If NO is selected,
appears on the
display. Press
OK
to accept the changes.
Flashing
Flashing
Flashing
Flashing