Create a rhythm set (create rhythm), Creating a multisample (create multisample), For the rest of the procedure, refer to p. 114 – Roland Fantom-Xa User Manual
Page 114: 114 editing a sample
114
Editing a Sample
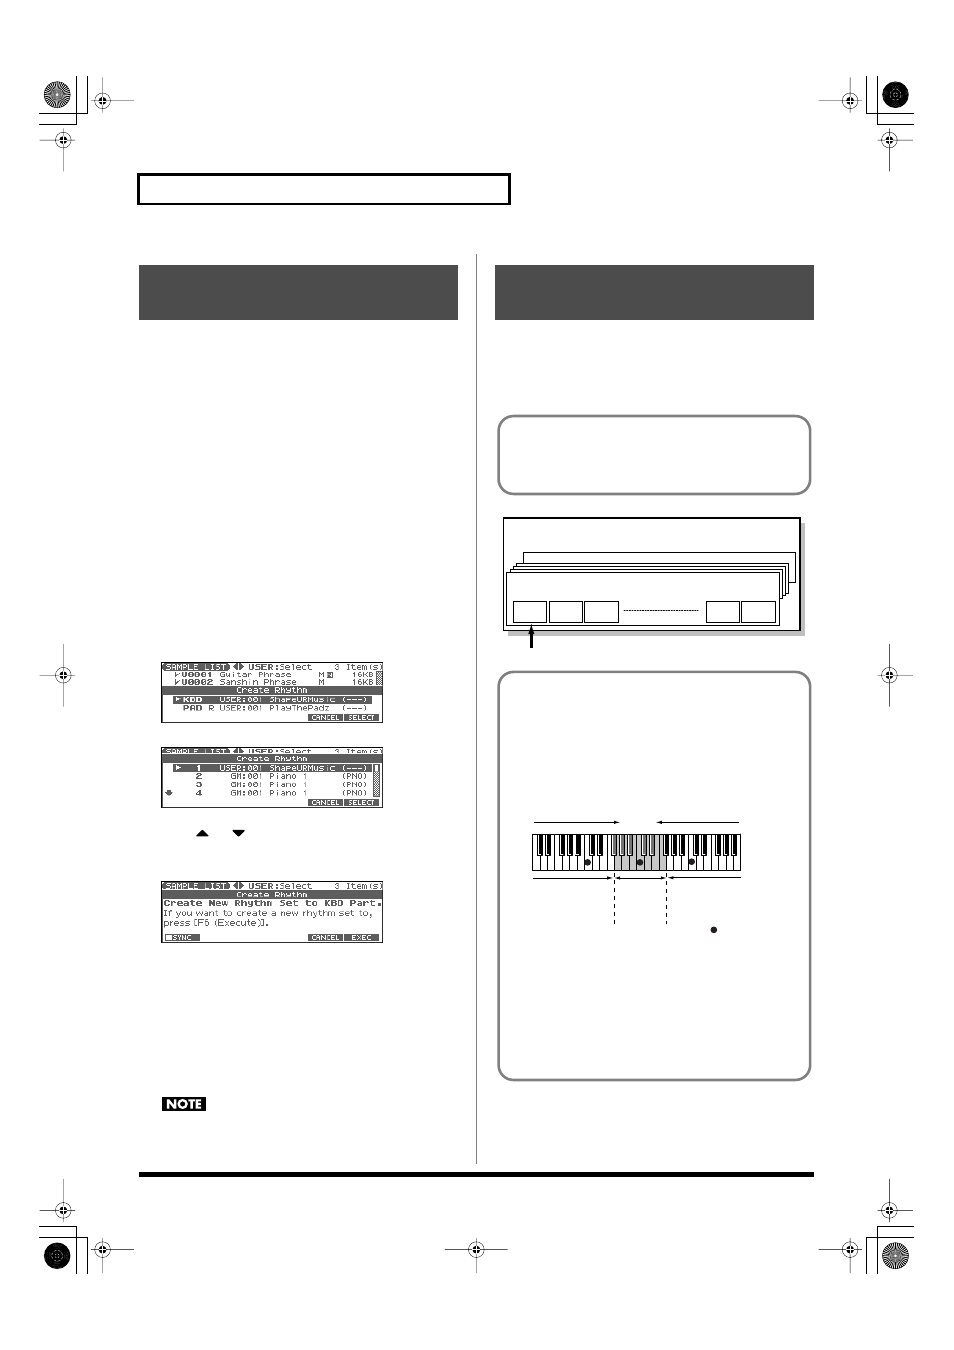
Here’s how you can use the sample(s) to create a rhythm set. This
operation is called
Create Rhythm.
When you execute Create Rhythm, the sample(s) will become a
rhythm set and will be assigned to a part.
For example, you could record a sample, use the Chop function to
divide it, and then use this Create Rhythm operation to assign the
divided samples to a part as a rhythm set. Alternatively, you can
assign a mark to two or more samples in the sample list, and execute
Create Rhythm to assign the samples to a part as a rhythm set.
The samples will be assigned consecutively from the C2 key.
1.
With the SAMPLE LIST screen shown, select the samples.
If you want to select two or more samples, press [F2 (MARK)] to
add a check mark (
✔
) to the samples that you want to select.
To remove the check mark from a selected sample, select and
press [F2 (MARK)] again.
You can press [F6 (PREVIEW)] to audition the selected sample.
2.
Press [F4 (ASSIGN)], and then press [F3 (RHYTHM)].
The Create Rhythm window will appear.
Patch Mode
Performance Mode
3.
Press
or
to select the part that you want to assign,
and then press [F6 (SELECT)].
The Create Rhythm window will appear.
fig.CreateRhythm2
*
If you press [F1 (SYNC)] to add a check mark (
✔
), the Wave Tempo
Sync parameter (p. 59) will be turned ON for the rhythm tone that is
assigned.
4.
Press [F6 (EXEC)].
The sample will be assigned (as a rhythm set) to the specified
part.
*
To cancel, press [F5 (CANCEL)].
5.
Press [EXIT] to return to the previous screen.
If you select another rhythm set, the rhythm set you assigned
will be replaced by that rhythm set. If you want to keep the
rhythm set, press [WRITE] and save it (p. 57).
Two or more samples assigned to different keys are collectively
called a “multisample.” One multisample can assign up to 128
samples divided (“split”) across the notes of the keyboard. A
memory card can store 128 multisamples.
fig.MultiSample1.e
Create a Rhythm Set
(Create Rhythm)
Creating a Multisample
(Create Multisample)
In order to hear a multisample, you’ll need to assign it to a Part
as a Patch. Choose the desired samples to create the
multisample, and then assign it as a patch to a keyboard part for
use.
No.001
Multisample
sample
No.001
No.128
Multisample
sample
No.002
sample
No.003
sample
No.127
sample
No.128
Multisample
Number in the sample list
A multisample is
divided into 128
If, for example, only one note (e.g., the sound of the C4 key) is
sampled from a wide-ranging instrument such as a piano, and
assigned to the entire range of keys, it will sound unnatural
when played significantly below or above its original pitch. If
the instrument is sampled at several different pitches and
assigned to different ranges of the keyboard, this unnatural
effect can be minimized.
fig.15-015.e
When you create a multisample, the split points are
automatically determined according to the original key of each
sample. Before you begin this process, you should set the
original key of each sample to the range where you want it to be
assigned. (Assigning a multisample to the desired keys (p.
115))
A sample will not sound at a pitch higher than one octave above
the original key.
(128 key)
128 split
Multisample
sample No.001
original key
C3
sample
No.002
original key
C4
sampleNo.003
ogriginal key
C5
: original key
split point
split point
Fantom-Xa_e.book 114 ページ 2004年10月22日 金曜日 午後2時3分