Sample edit, Setting the start/end points of the sample, Making settings for sample (sample parameters) – Roland Fantom-Xa User Manual
Page 106: Using the knobs to edit the points, 106 editing a sample
106
Editing a Sample
1.
From the SAMPLE LIST screen, Press [SAMPLE EDIT <->
LIST].
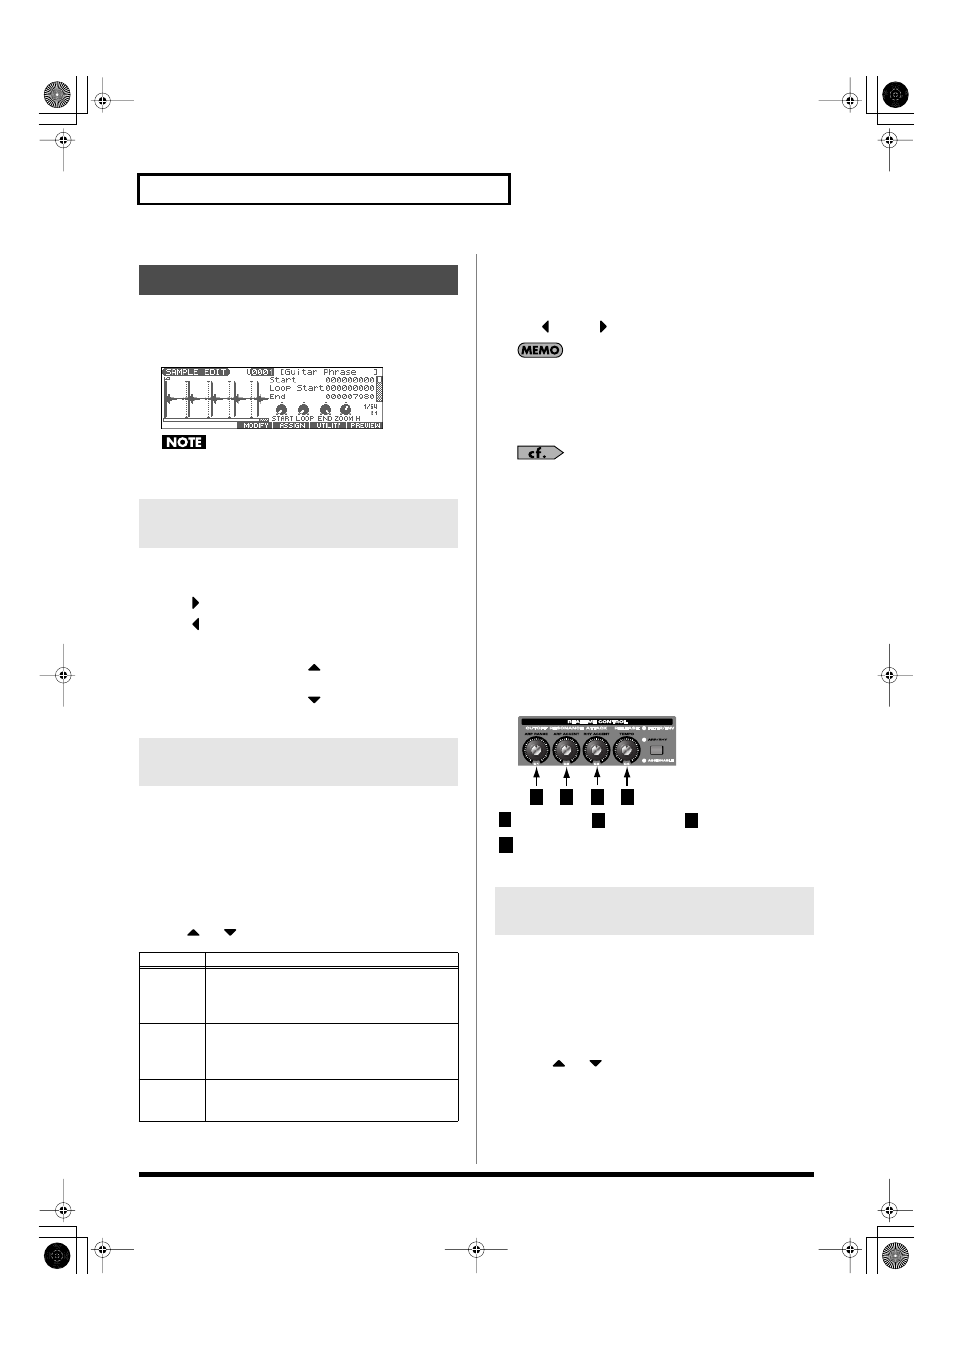
The SAMPLE EDIT screen appears.
fig.SampleEdit
Samples that you edit will be lost when you turn off the power.
If you want to keep them, you must Save them (p. 116).
Here’s how to change the magnification of the sample display.
•
Horizontal axis (time axis):
1/1–1/16384
Press
to increase the display magnification.
Press
to decrease the display magnification.
•
Vertical axis (waveform amplitude axis):
x1–x128
Hold down [SHIFT] and press
to increase the display
magnification.
Hold down [SHIFT] and press
to decrease the display
magnification.
You can specify the portion of the sample that will actually sound.
You can also specify the region that is to be looped.
1.
With the SAMPLE LIST screen shown, select the sample
that you want to edit (p. 104).
2.
Press [SAMPLE EDIT].
The SAMPLE EDIT screen appears.
3.
Use
or
to select the point that you want to set.
*
By pressing [F6 (PREVIEW)] you can audition the region between
Start and End.
4.
Use the VALUE dial or [INC] [DEC] to move the point.
You’ll probably find it convenient to zoom-in when making fine
adjustments, and zoom-out when making major adjustments.
You can move the point in units of one beat by pressing
[F1 (
)] or [F2 (
)].
If you hold down [F6 (PREVIEW)] and move Start/Loop Start/
En, the sample will play repeatedly across that point. This is a
convenient way to check your setting.
(Zooming-in or zooming-out on the waveform will change the
region that loops.)
*
Sample modify operations (Chop, Normalize, etc.) apply to the entire
sample. Even if you specify Start or End, they will be ignored. If you
want to apply the operation only to the region between the Start and
End, use Truncate to delete unwanted portions of the sample, and then
perform the sample modifying operation.
Using the knobs to edit the points
You can use the REALTIME CONTROL knobs to edit each point.
Using the knobs is convenient when you need to make large changes
to the value.
From the left, the knobs have the following functions.
fig.15-003a
: Start Point
: Loop Start
: End Point
: Zoom-in/zoom-out the horizontal axis of the display
Here you can make various settings for the sample.
1.
With the SAMPLE LIST screen shown, select the sample
that you want to edit.
2.
Press [SAMPLE EDIT <-> LIST] to access the SAMPLE EDIT
screen.
3.
Press
or
to select a parameter.
4.
Use the VALUE dial or [INC] [DEC] to edit the value.
5.
Press [EXIT] when you are finished.
Sample Edit
Magnifying/Shrinking the
Waveform Display (Zoom In/Out)
Setting the Start/End Points of the
Sample
Point
Explanation
Start
Point at which playback will start
Set this so that any unwanted portion at the be-
ginning of the sample will be skipped, and the
sound will begin at the desired moment.
Loop Start
Point at which loop playback (second and subse-
quent times) will start
Set this if you want to loop the sound from a
point other than the start point.
End
Point at which playback will end
Set this so that any unwanted portion at the end
of the sample will not be heard.
Making Settings for Sample
(Sample Parameters)
1
2
3
4
1
2
3
4
Fantom-Xa_e.book 106 ページ 2004年10月22日 金曜日 午後2時3分