Changing the operating mode – Paradyne 9788 User Manual
Page 48
4. Configuration Options
4-8
December
2002
9700-A2-GB20-20
Entering System Information and Setting the System Clock
Select System Information to set up or display the general SNMP name for the
unit, the location, a contact for the unit, and set the system clock.
Main Menu
→Control→System Information
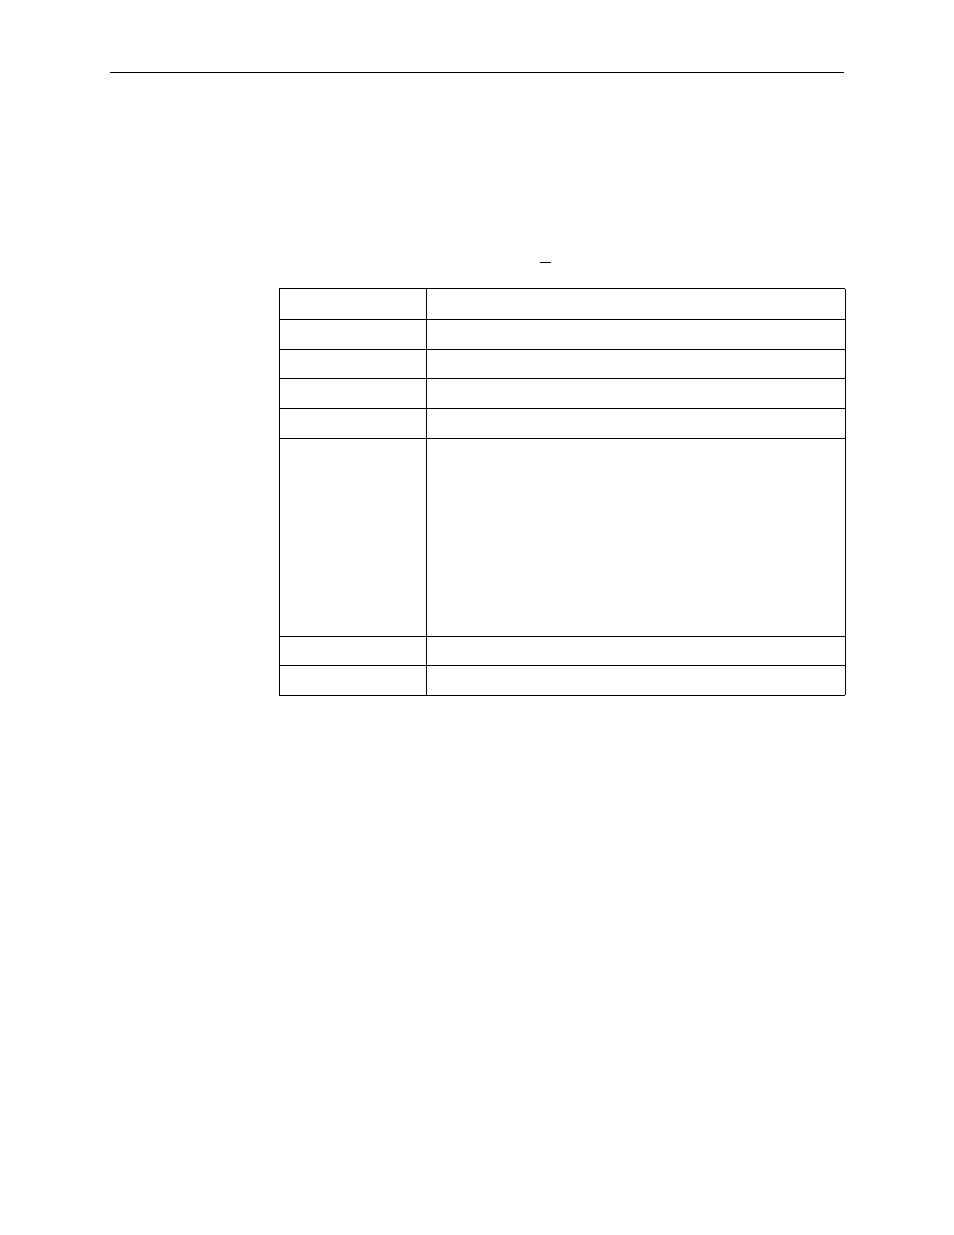
The following information is available. Save any entries or changes.
NOTE:
To clear existing information, place the cursor in the Clear field (Tab to the
Clear field ) and press Enter.
Changing the Operating Mode
The FrameSaver unit can be connected to another FrameSaver unit without a
frame relay switch between them. This is called back-to-back mode and can be
used for demonstrations or for a point-to-point configuration over a leased line.
To change the operating mode, select Change Operating Mode from the Control
menu:
Main Menu
→Control→Change Operating Mode
On the ensuing screen, select Back-to-Back Operation or Standard Operation.
Standard Operation is the default mode.
If the selection is . . . Enter the . . .
Device Name
Unique name to identify the device (up to 20 characters).
System Name
SNMP system name (up to 255 characters).
System Location
System’s physical location (up to 255 characters).
System Contact
System person name and how to contact (up to 255 characters).
ATM Location ID
Identification of the ATM location for the system. The ID must be
entered as 16 one-byte values, each conveyed as two
hexadecimal characters, delimited by colons. When Clear is
selected, all octets are filled with 6A (for example,
6A:6A:6A:6A...), which is the factory default and an invalid value.
The values are restricted.
The first byte must be 01, 02, 03, FF, or 6A.
If the first octet is FF, the octets 2–16 must also be FF.
If the first octet is 6A, the octets 2–16 must also be 6A.
Date
Current date in the month/day/year format (mm/dd/yyyy).
Time
Current time in
the hours:minutes:seconds format (hh:mm:ss).