Remove the printhead cartridge – Datacard Group SP Series User Manual
Page 52
4-8
Maintaining the printer
User’s Guide for Express™ and Select™ Class Printers
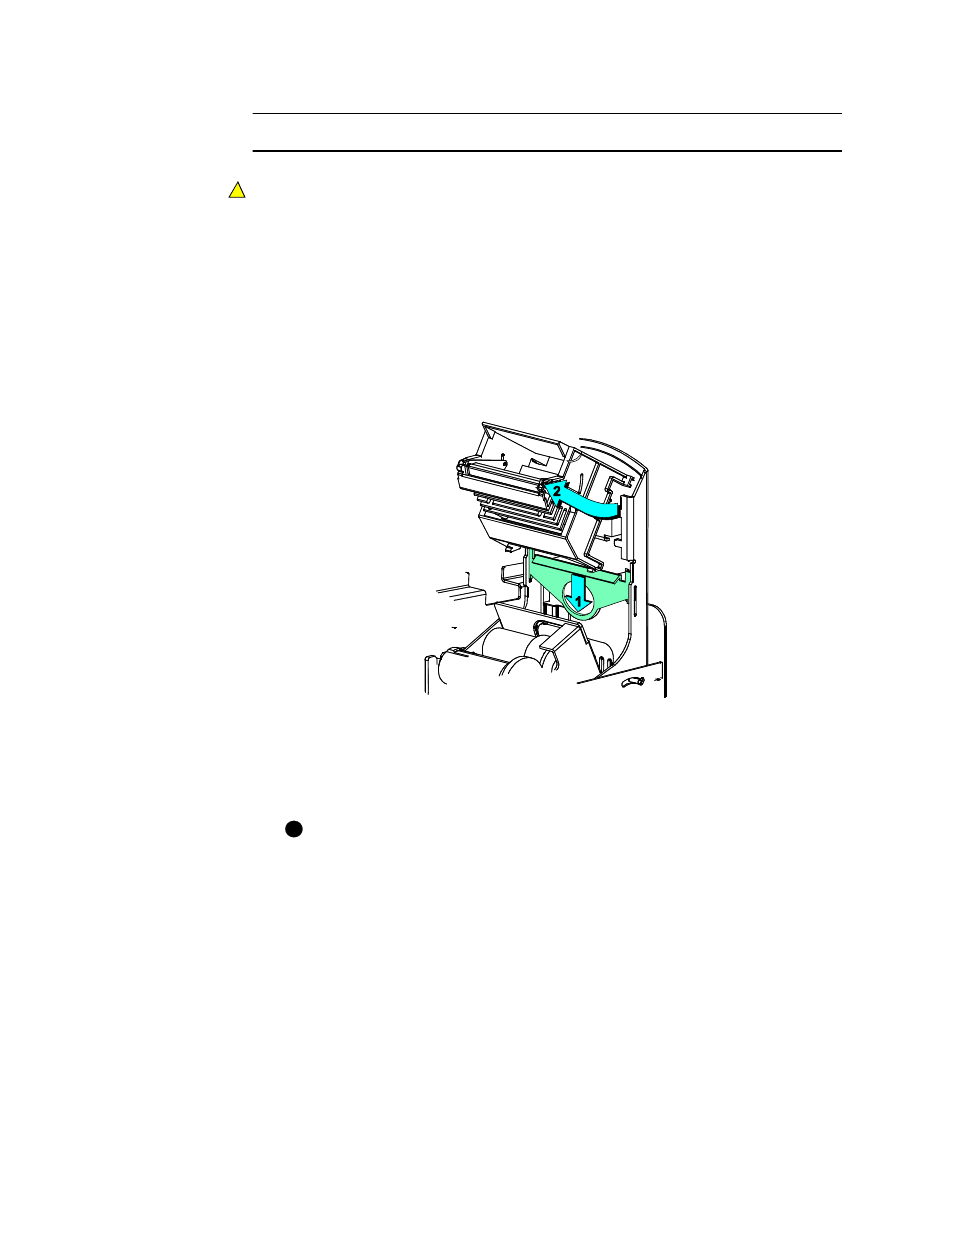
Remove the printhead cartridge
Do not touch the printing edge of the printhead cartridge. If you do, clean it, as
described in
“Cleaning the printhead” on page 4-7
.
1
Power off the printer.
2
Open the top cover.
3
Push down on the swing arm. The push latch will release the swing arm. Lift the
swing arm up until it is fully open.
4
Put on the ESD strap and ground it. Follow the instructions with the strap.
5
Press down on the green printhead cartridge latch to release the printhead (step 1
in
Figure 4-9
).
Figure 4-9: Printhead cartridge latch lever
6
Lift the printhead cartridge up and off the swing arm (step 2 in
Figure 4-9
).
7
Push the locking tabs to the side. Remove the printhead cable from the printhead
cartridge (see
The printhead installed in your printer might have a slightly different location
for the printhead cable receptacle.
!
i