1 adjust lever setting – Epson 440 User Manual
Page 19
EPSON Stylus Color 440/640/740
Revision A
Chapter 1
Product Description
19
[Envelope]
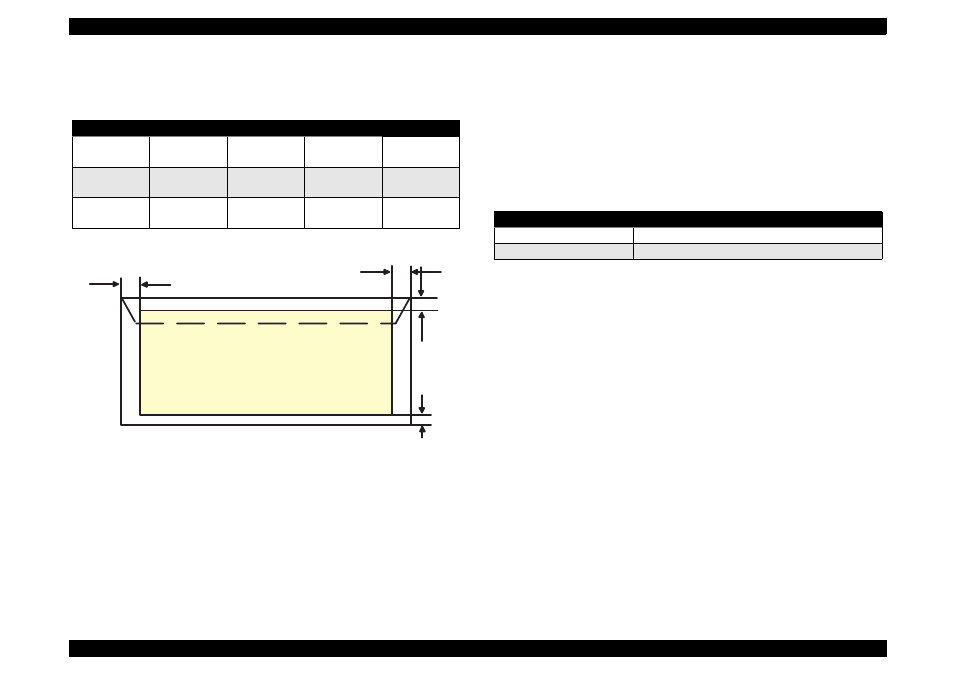
Table 1-6 and Figure 1-5 show the printable area for envelopes.
Table 1-6. Envelopes Margin
Figure 1-5. Printable Area for Envelopes
1.2.3.1 Adjust Lever Setting
The adjustment lever located on the right side (dark blue) under the
printer cover needs to be set to the proper position according to the
paper you print. (Refer to the Table 1-7.) Also, if there is any dirt caused
by friction on the way or wrinkled paper, this can be prevented by
changing the lever position to rear position (marked with “+”) in spite of
paper types.
Table 1-7. Adjust Lever Setting
NOTE: Return the adjust lever to the zero position, which is normal
position, after you finish printing on all media. Leaving the lever
in the plus position may cause the printed image to have gaps
on other media.
Paper Size
LM
RM
TM
BM/min.
#10
28 mm (1.10”)
3 mm (0.12”)
3 mm (0.12”)
14 mm (0.54”)
3 mm (0.12”)
DL
7 mm (0.28”)
3 mm (0.12”)
3 mm (0.12”)
14 mm (0.54”)
3 mm (0.12”)
C6
3 mm (0.12”)
3 mm (0.12”)
3 mm (0.12”)
14 mm (0.54”)
3 mm (0.12”)
RM
TM
LM
Printable
Area
BM
Lever Position
Clearance between head and platen
Plus Position
1.04 mm
Zero Position
1.74 mm (+0.7 mm)