Epson 440 User Manual
Page 133
EPSON Stylus Color 440/640/740
Revision A
Chapter 5
Adjustment
133
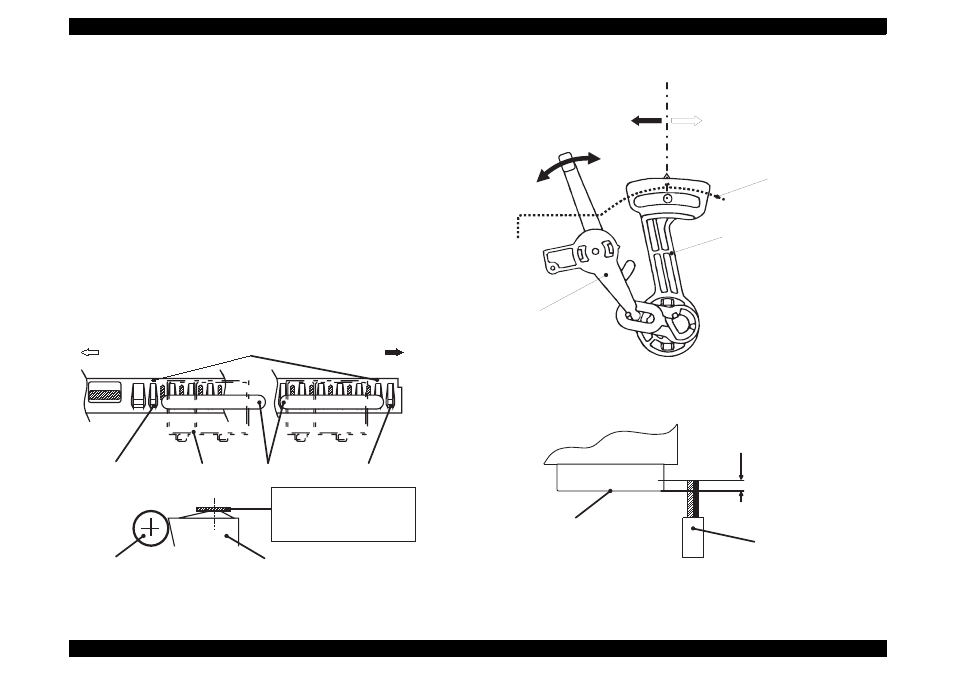
[Fixing Parallelism Adjustment Bushing]
13. Fix the right and left parallelism adjustment bushings with screws.
(No.1 screw for each.)
When completing this adjustment, check the overlap amount of the
printhead and head cleaner.
1. Rotate the gear 67.2 and move the head cleaner to the printer rear
side.
2. Move the carriage next to the head cleaner and make sure that
overlap between the tip of the printhead and cleaner head is more
than 0.5 mm.
3. Then, rotate the gear 67.2 and return the head cleaner to the front
position.
Figure 5-1. Setting of the Gauge at Parallelism Adjustment
Figure 5-2. Parallelism Adjustment
Figure 5-3. Overlap of Head Surface and Cleaner Blade
Left
"PAPER GUIDE, FRONT;B"
Right
(HP side)
Rib: Avoid 2ribs from left
Carriage
Assembly
[Thickness Gauge] Rib: Avoid 1 rib at right end
"ROLLER, ASSEMBLY, PF"
"PAPER GUIDE, FRONT;B"
*Put the gauge on a flat face
*Align the center of gauge and
the ribs
P o s i t i o n M a r k
F o r w a r d
( G a p : W
i d e r )
B a c k w a r d
( G a p : N a r r o w e r )
S i d e F r a m e
" B U S H , P A R A L L E L A D J U S T , R I G H T "
" L E V E R , P G "
( 0 )
( + )
Printhead
(Nose face)
"CLEANER, HEAD"
Overlap = 0.5mm or more
CR