Epson All-In-One Stylus Photo RX600 User Manual
Page 122
122
Maintenance
3. Press the u and d buttons to select
Head cleaning
.
4. Press the
OK
button, then press
OK
to start cleaning the print head.
Cleaning takes about 30 seconds, during which the message
Head Cleaning
appears on the LCD screen.
Caution:
Never turn off the Stylus Photo RX600 while the message Head Cleaning appears
on the LCD screen, unless the Stylus Photo RX600 hasn’t moved or made noise
for more than 5 minutes.
5. When head cleaning is finished, you return to the Setup Menu. Use the
u
and d buttons to select
Nozzle Check
.
6. Make sure letter-size paper is loaded. Press the
OK
button, then press
OK
to
print a nozzle check.
Note:
You can also print a nozzle check using the printer software. Click the ? or Help
button on your printer settings window for instructions on printing a nozzle check.
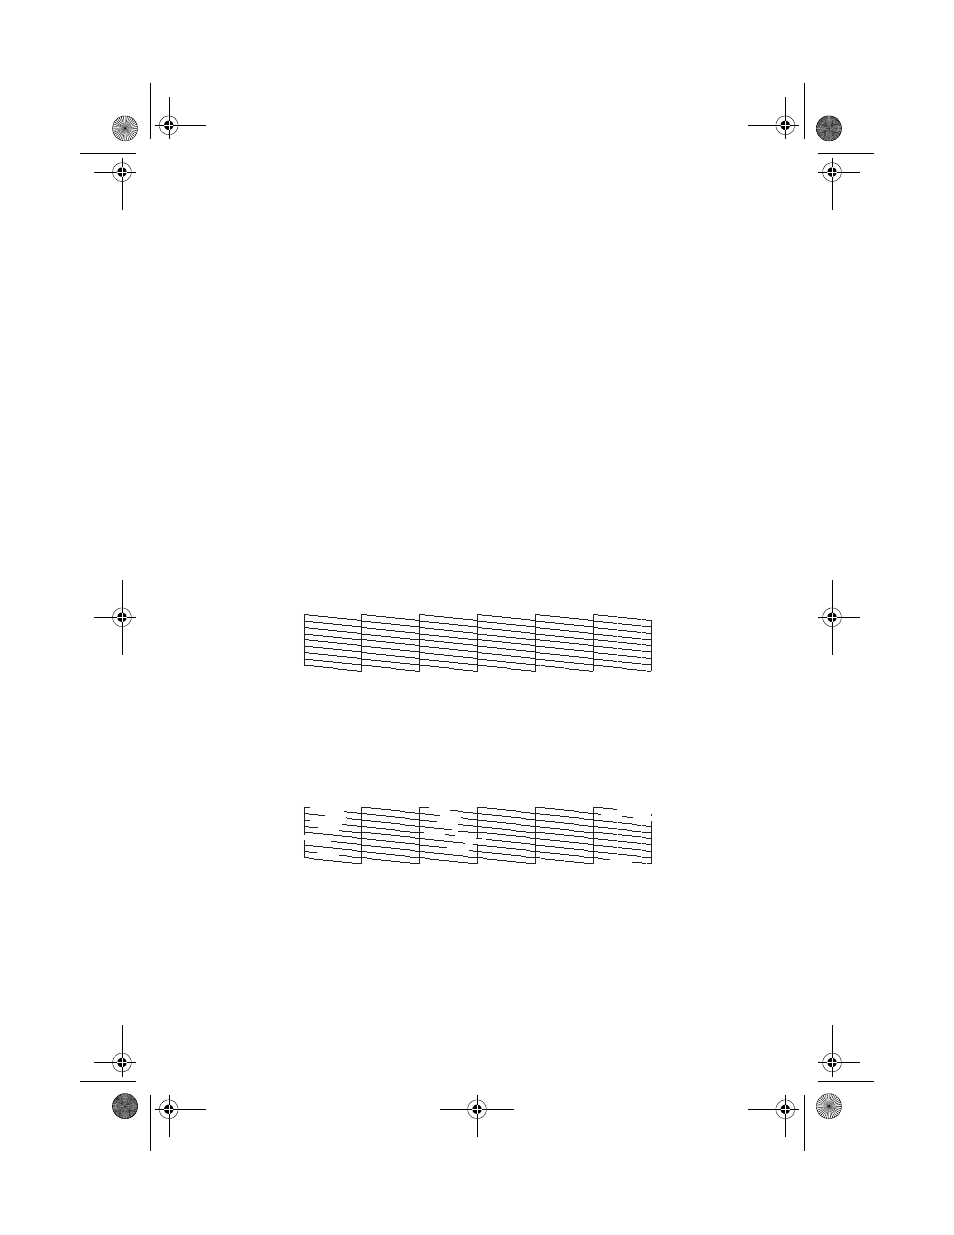
7. Examine the nozzle check pattern you printed. Each staggered line should be
solid, with no gaps, as shown.
■
If your printout looks okay, you’re done. Click
Cancel
to return to the
main menu.
■
If you see any gaps (as shown below) in the dot pattern, press
OK
. Then
follow the instructions on the LCD screen to clean the print head again.
SP RX600 Users Guide.book Page 122 Thursday, January 29, 2004 1:08 PM