Grass Valley EDIUS v.5.1 User Manual
Page 470
470
EDIUS — User Reference Guide
Section 5 — Timeline Operations
3.
Click a video from the camera of each track in the multi cam display in
the Recorder at the point at which you wish to switch the selected
camera.
The camera switch point is set at the Timeline cursor position at the time
the track camera was clicked. When playback stops, a cut point is added to
the clip at each camera switch point. See
for an example.
Note
The number keys on the numeric keypad may also be used to switch cameras
during playback. Press the numeric key corresponding to the camera to
which you wish to switch.
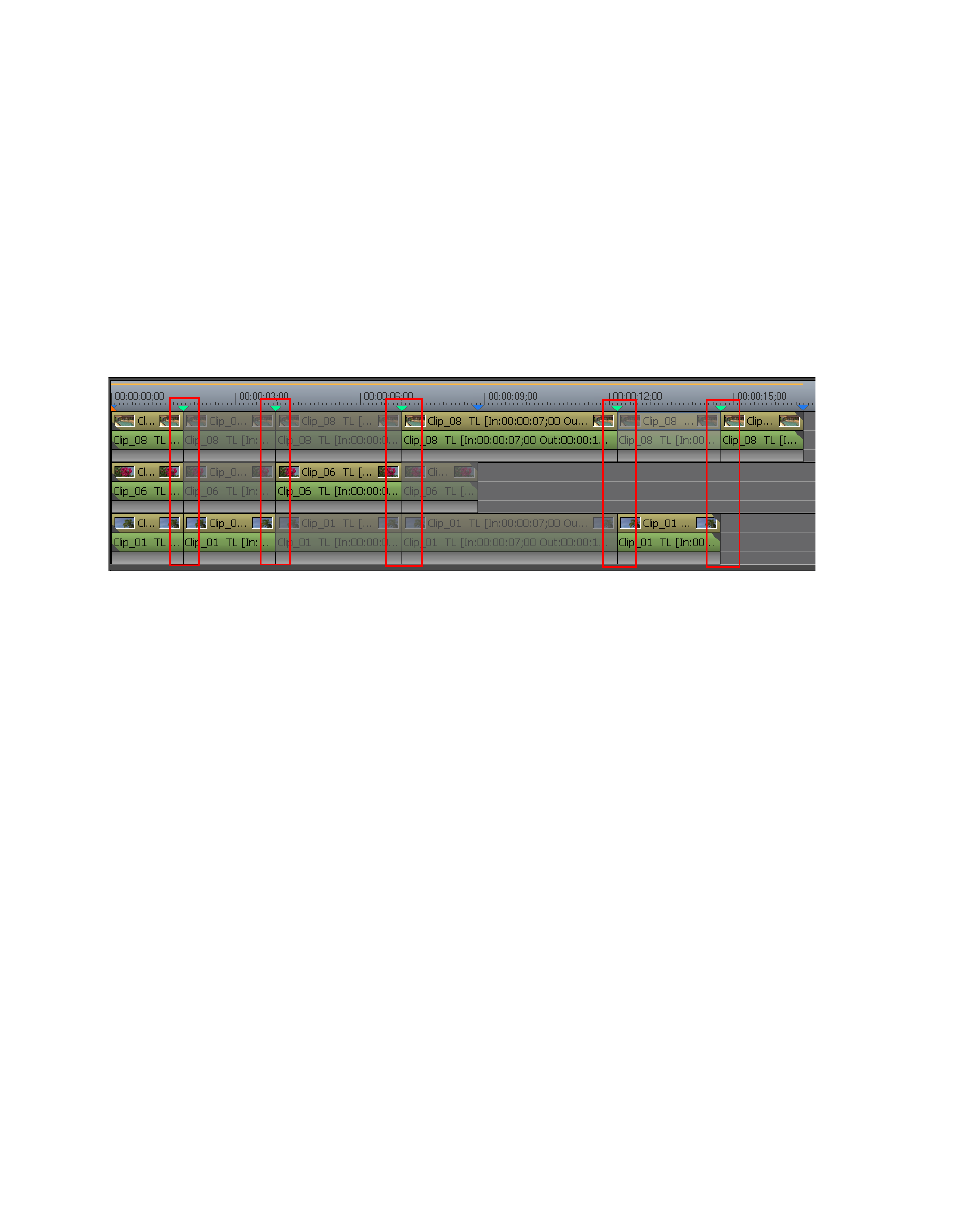
Figure 533. Switch Points Added During Playback
In the example above, playback of this sequence from beginning to end
would result in the following track cameras displayed in the Master
monitor as defined by the switch points (3 is the top track and 1 is the
bottom track): 3,1,2,3,1,3
Related Operations:
•
By default, any existing camera switch points between the first added
switch point and the end of playback are overwritten and deleted. Only
the switch points added during playback remain
•
To prevent overwriting existing switch points, do one of the following
before beginning playback and setting new switch points:
•
Select Mode>Overwrite Cut Point from the Preview window menu
bar.
Note
This is a toggle function. If the check mark appears by the option, Overwrite
Cut Point is on. If the check mark does not appear by the option, Overwriting
of existing cut points is off
•
Click the list button [V] on the
Multi cam
button and select “Over-
write Cut Point” from the menu.