Grass Valley EDIUS v.5.1 User Manual
Page 451
EDIUS — User Reference Guide
451
Rendering Operations
clip or project are automatically deleted according to the settings in the
Application Settings>Render dialog. See Render Settings
for
more information.
Temporary files are created by the following processes:
•
Exporting a clip from the Timeline
•
Rendering a part of the Timeline
•
Rendering a clip
If the folder contents become too large, it may be necessary to delete some
of these files manually to free up sufficient disk space for additional ren-
dering operations.
Note
In the descriptions below, “All Files” will delete all temporary files in the “ren-
dered” directory; even those with valid links to existing clips. The “Files that
are not Used” option only deletes temporary files that no longer have valid
links.
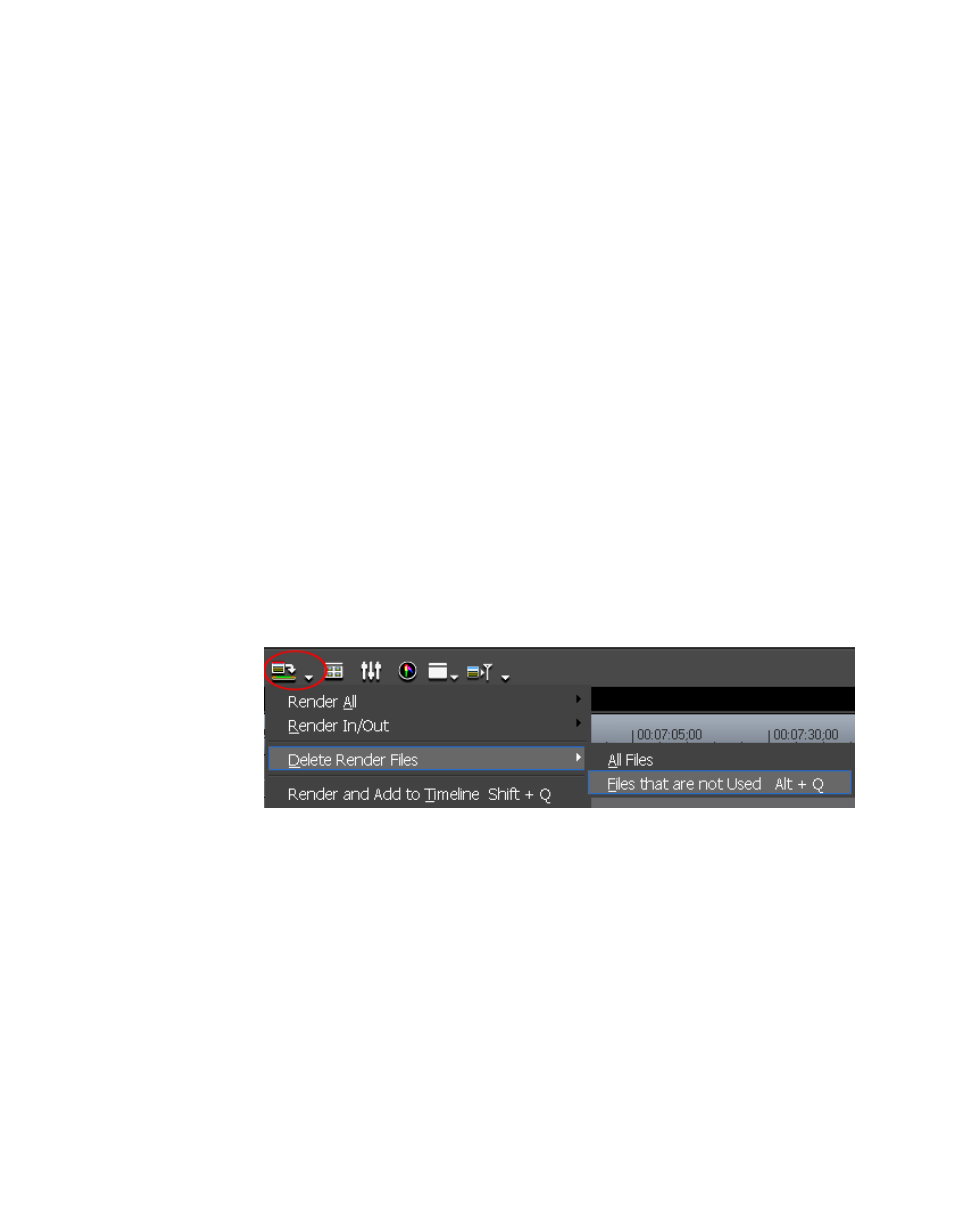
To delete temporary files manually, follow these steps:
1.
Click the list button [V] on the
Render In/Out - Render overload area
button.
2.
Select “Delete Render Files>All Files” or “Delete Render Files>Files
that are not Used” from the menu. See
Figure 505. Render In/Out Menu - Delete Render Files
Alternative Methods:
•
Select Render>Delete Render Files>All Files or Render>Delete Render
Files>Files that are not Used from the Preview window menu bar.
•
Press the [
ALT
]+[
Q
] keys on the keyboard to delete unused files.
Note
Some temporary files in the “rendered” folder may be edited (renamed,
deleted, copied, etc.). However, temporary files used in projects - such as
files created with the Render In/Out options - cannot be edited, Temporary
files created for clips placed on the Timeline with the ‘Render and Add to
Timeline” function can be edited to make the file an “Offline Clip.”