7 setup, 1 setup preparation, 2 switching on – ARAG Bravo 400S Seletron User Manual
Page 17: Setup preparation, Switching on
17
7
SETUP
7.1
Setup preparation
Before computer setup, check:
• that all components are correctly installed (control unit and sensors)
• the correct connection to the power source
• the correct connection of components (control unit and sensors).
Failure to correctly connect system components or to use specified components might damage the device or its components.
WARNING: DO NOT CONNECT THE CONNECTORS TO THE SELETRON NOZZLE HOLDERS.
THE SELETRON ELECTRIC CONNECTORS MUST BE CONNECTED AT A LATER TIME, DURING THE PAIRING PROCEDURE
(chap. 11 Seletron connection).
7.2
Switching on
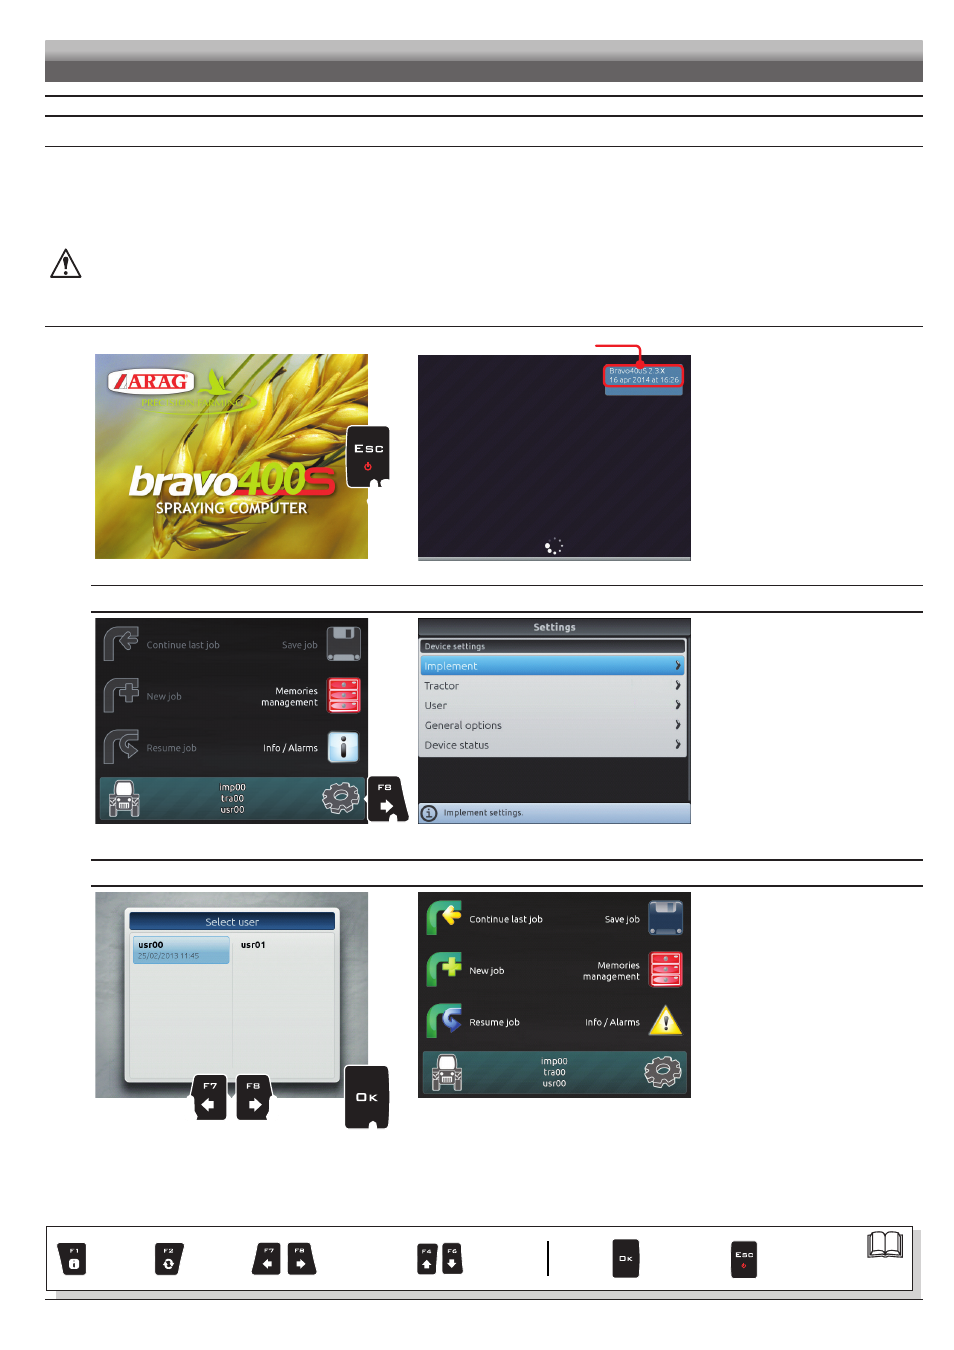
Fig. 28
SOFTWARE VERSION
Fig. 29
Keep key pressed until Bravo 400S
displays the screen shown in Fig. 28.
The software version is shown
immediately afterwards (Fig. 29).
FIRST DEVICE SWITCHING ON
Fig. 30
Fig. 31
Upon first switching on, after the
software version, Bravo 400S
displays the "Home" screen
(Fig. 30): press
F8
and enter the
device basic settings (chap. 9).
ORDINARY SWITCHING ON
Fig. 32
Fig. 33
After the software version, Bravo
400S displays the Select User
prompt (Fig. 32).
Press
F7
or
F8
to move across
the available items, then press
OK
to confirm your selection.
At this point, Bravo 400S displays
the "Home" screen (Fig. 33).
SETUP
Par.
Exit the function or
data change
Confirm access
or data change
Scroll
(LEFT / RIGHT)
Delete
selected
character
Increase /
decrease
value
Scroll
(UP / DOWN)
Enter
selected
character