FingerTec Ingress User Manual
Page 20
20
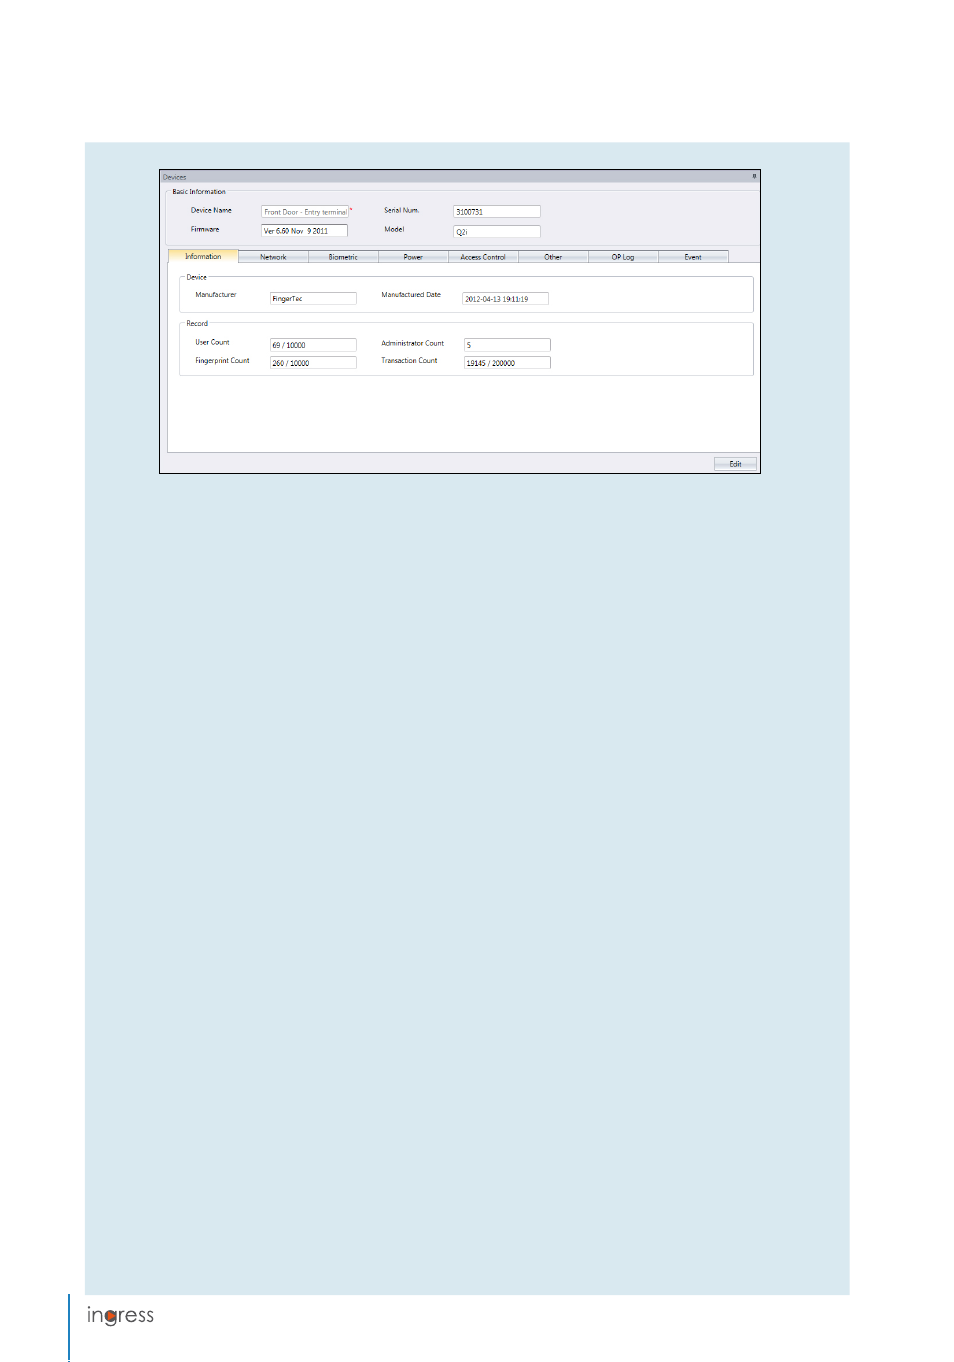
Information:
This is the page to display all information of the device. No amendments are allowed. You
can know the storage status of the device at the Record section.
Network:
You can change types of communication mode in this page, for example change from TCP/IP to
RS485. You can update the TCP/IP settings (e.g.: change to new IP address) or RS485 settings (e.g.: change
baud rate to 9600bps). All new settings will take effect after you upload the new settings to the device.
Biometric:
This page is only effective when connecting to devices that support fingerprint or face recog-
nition. Amend these settings accordingly after you click the Edit button:
Only 1:1 verification: Set to No by default so users can gain access immediately after verifying their finger or
face. Change this to Yes if you want users to insert their ID before fingerprint/face verification.
Fingerprint algorithm: VX 10.0 is the latest fingerprint matching algorithm supported by the device. Only
change to VX 9.0 if your environment is using the older algorithm. This option is not applicable to Ingres-
sus because it only supports VX 10.0.
Face/Fingerprint 1:1 Threshold: The level of matching security if you want users to insert user ID before finger-
print/face verification. For fingerprint, the range is from 0 to 50, where 50 is the highest. For face, it ranges
from 0 to 99 where 99 is the highest. The default values are 15 for fingerprint and 70 for face.
Face/Fingerprint 1:N Threshold: The level of matching security if you allow users to verify by fingerprint/face
without inserting user ID. The default values are 45 for fingerprint and 75 for face.
Power:
You can configure the duration (in minutes) for device to wait before going into idle mode.
Idle time (in minutes): Time duration to wait before going into idle mode.
Idle action: Select either Sleep or Power Off.
Power on time: Check the box and insert time to turn on the device.
Power off time: Check the box and insert time to shut down the device.
Access control:
You can configure the device for basic access control settings.
Save Transaction log: Set to Yes by default. The device saves IN-OUT records of users. In case you only want
the device to control access without referring to its records, select No. The device will not keep any IN-
OUT records.
Save False Log: Set to
Yes
by default. The device saves records even though users fail to verify. You can as-
sess the level of fail verifications happening at this device and adjust the biometric settings to improve
the verification process. Select
No
and the device will not store this record.
Master Record State: You must define the device as Master or Slave If two standalone devices are installed to
control one door. Normally the standalone device controlling entry is set as Master, and at the exit is the
Slave. Ignore if you are installing slave device with a standalone device. This is important if you are using
Antipassback function. The Master device stores all entry-exit records to justify Antipassback status.
Antipassback: Feature that forces users to verify every time he/she comes in or leaves a zone. In case he/she
is tailgating another user without verification to access a zone, the device will block his/her verification to
gain access again. You can select any of the following settings to suit your environment.