Benelli SuperNova Tactical Pump Shotgun User Manual
Page 87
86
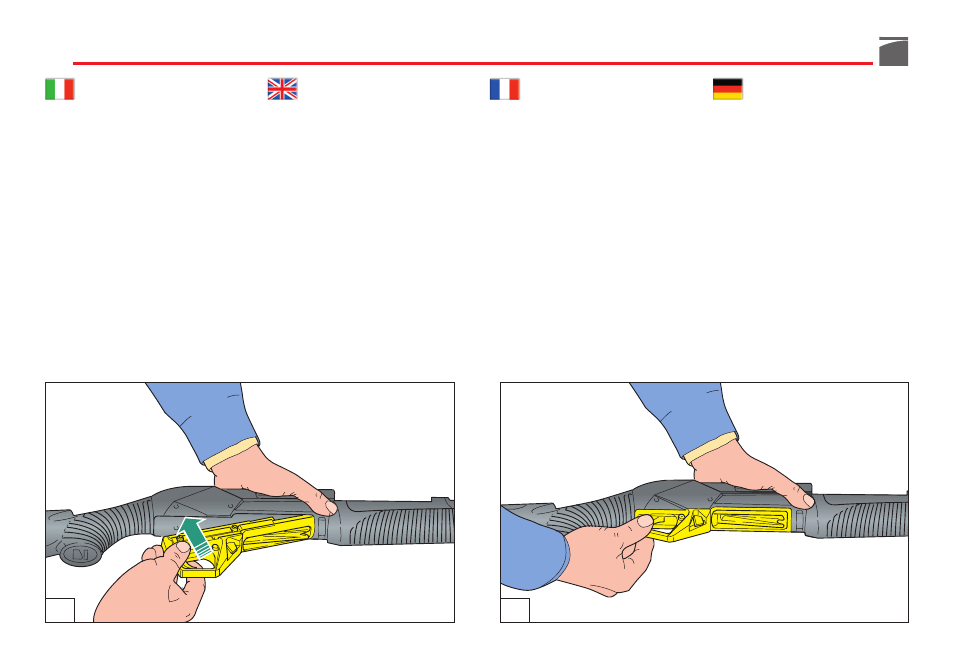
6) Avanzare l’astina e inserire il grup-
po guardia - a cane armato - nella
carcassa, facendo perno sull’inca-
stro anteriore; portarlo poi in bat-
tuta sul retro della carcassa stessa
(figg. 36-37).
7) Infilare le spine di arresto guardia.
ATTENZIONE:
la spina più lunga
deve essere montata sul foro anteriore
(fig. 38).
8) Completare il montaggio dell'arma
seguendo la procedura di mon-
taggio.
6) Slide the fore-end ahead and insert
the trigger guard - with cocked
hammer on the receiver, by twist-
ing in the front locking hole, and
then placing it in the rear part on
the receiver (figs. 36-37).
7) Push the trigger guard pins.
NOTE:
the longer pin is used in the
forward hole (fig. 38).
8) Complete the assembly of the fire-
arm following the mounting pro-
cedure.
6) Faire avancer le devant et intro-
duire le groupe sous-garde - chien
armé - dans la carcasse, en faisant
pression sur la gorge avant et en
allant ensuite en butée sur le dos
de la carcasse (figs. 36-37).
7) Introduire les goupilles d'arrêt de
la sous-garde.
ATTENTION:
la goupille la plus lon-
gue doit être montée sur le trou avant
(fig. 38).
8) Compléter le montage de l'arme
en suivant la procédure.
6) Den Vorderschaft vorschieben und
die Abzugsgruppe - mit gespann-
tem Hahn - ins Gehäuse stecken;
wobei man sich auf den vorderen
Teil stützt. Ihn dann auf dem
Rücken des Gehäuses selbst in
Anschlag bringen (Abb. 36-37).
7) Die Befestigungsstifte der Abzugs-
gruppe einsetzen.
ACHTUNG:
der längere Stift muss in
die vordere Bohrung eingesetzt wer-
den (Abb. 38).
8) Die Waffe-Montage beenden,
indem man die Montage-Prozedur
befolgt.
36
37