Figure 41: disabling pcs from ace gui – Achronix Speedster22i SerDes User Manual
Page 95
Note: When compared with the sample design (simple_serdes_design), no change is required in
ace_placement.pdc or in ace_constraint.sdc files for this derivative
(simple_serdes_design_pcs_bypassed). The instantiation of the SerDes wrapper will remain
same.
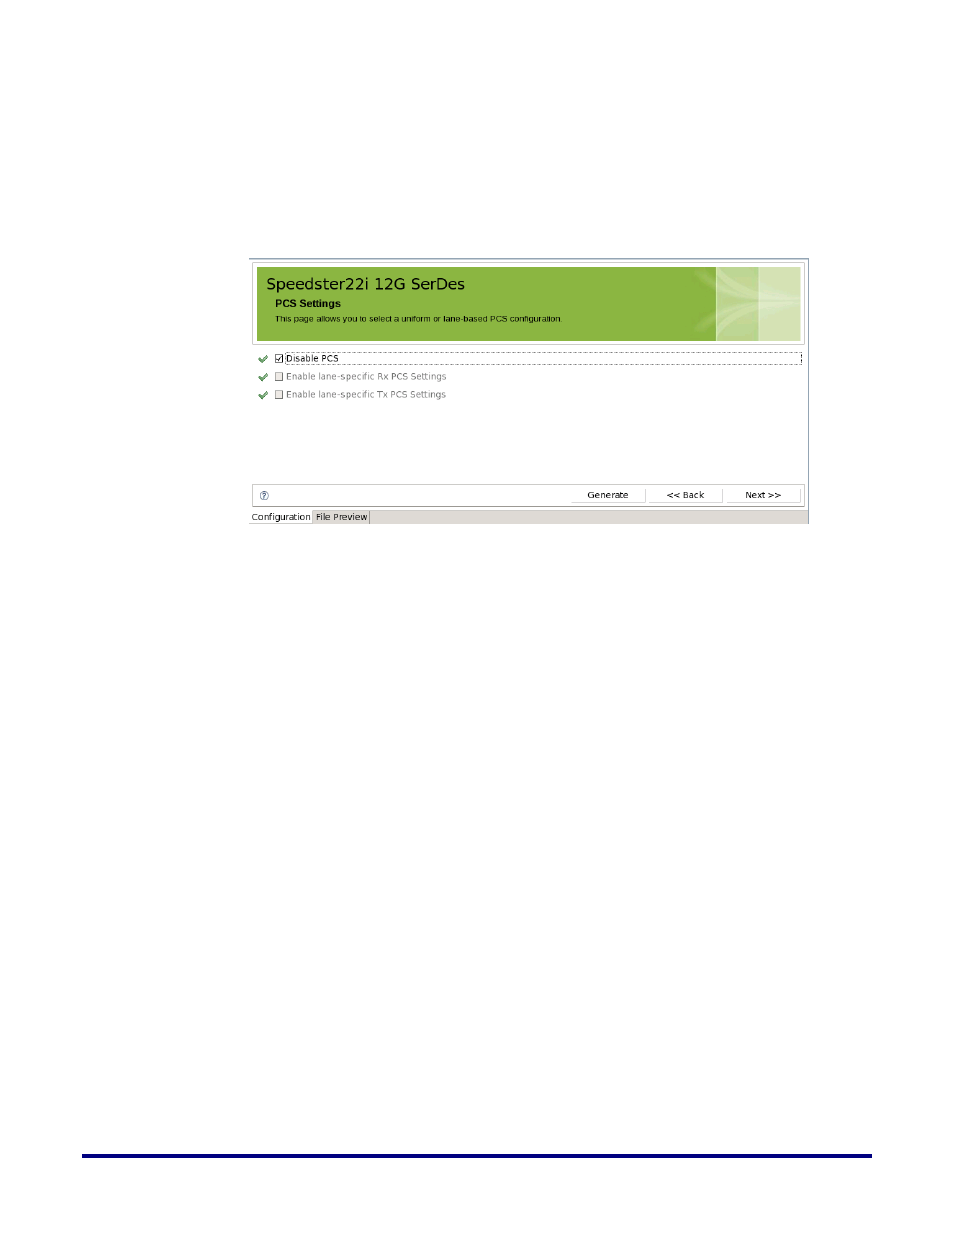
Figure 41: Disabling PCS from ACE GUI
Bypassing PCS by Manually Overriding Corresponding Register
This section presents use an alternative approach for bypassing PCS through the Advanced
section in ACE GUI. This is presented for demonstration purpose only.
The PCS blocks can be bypassed by modifying the value stored in the PCS register 17A. More
specifically, the bit-4 of the PCS register 17A needs to be set at 1’b1 to bypass the PCS block.
The values of the PCS/PMA registers can be overridden by using the Advanced section of the
ACE GUI. The user can reach Advanced section by selecting the link in the Outline window
(“Figure 24: Outline Window”).
Clicking Next button will bring the page titled Register Settings – Lane 0 as shown in “Figure
42 Modifying Register Settings from ACE GUI”. This page has several fields:
1. Start Address, End Address and Function. These fields are used to search for a
specific PCS register. The hexadecimal address is used for both PCS and PMA
registers.
2. A table displaying the list of AHB addresses (1st column: AHB Address) and the
corresponding values set by ACE (3rd column: Value). The 2nd column (Override
Value) will display the values that are entered as overriding value, such as bit-4 of
Reg17A.
3. Two text boxes for AHB Address and Override Value. To enter the value that will
override the default value of a register. Both of these entries need to be in
hexadecimal format.
4. A table that shows the details on each bit for the register that corresponds to the
address typed in AHB Address text-field.
UG028, July 1, 2014
95