Sony SX-N737 User Manual
Page 61
Attention! The text in this document has been recognized automatically. To view the original document, you can use the "Original mode".
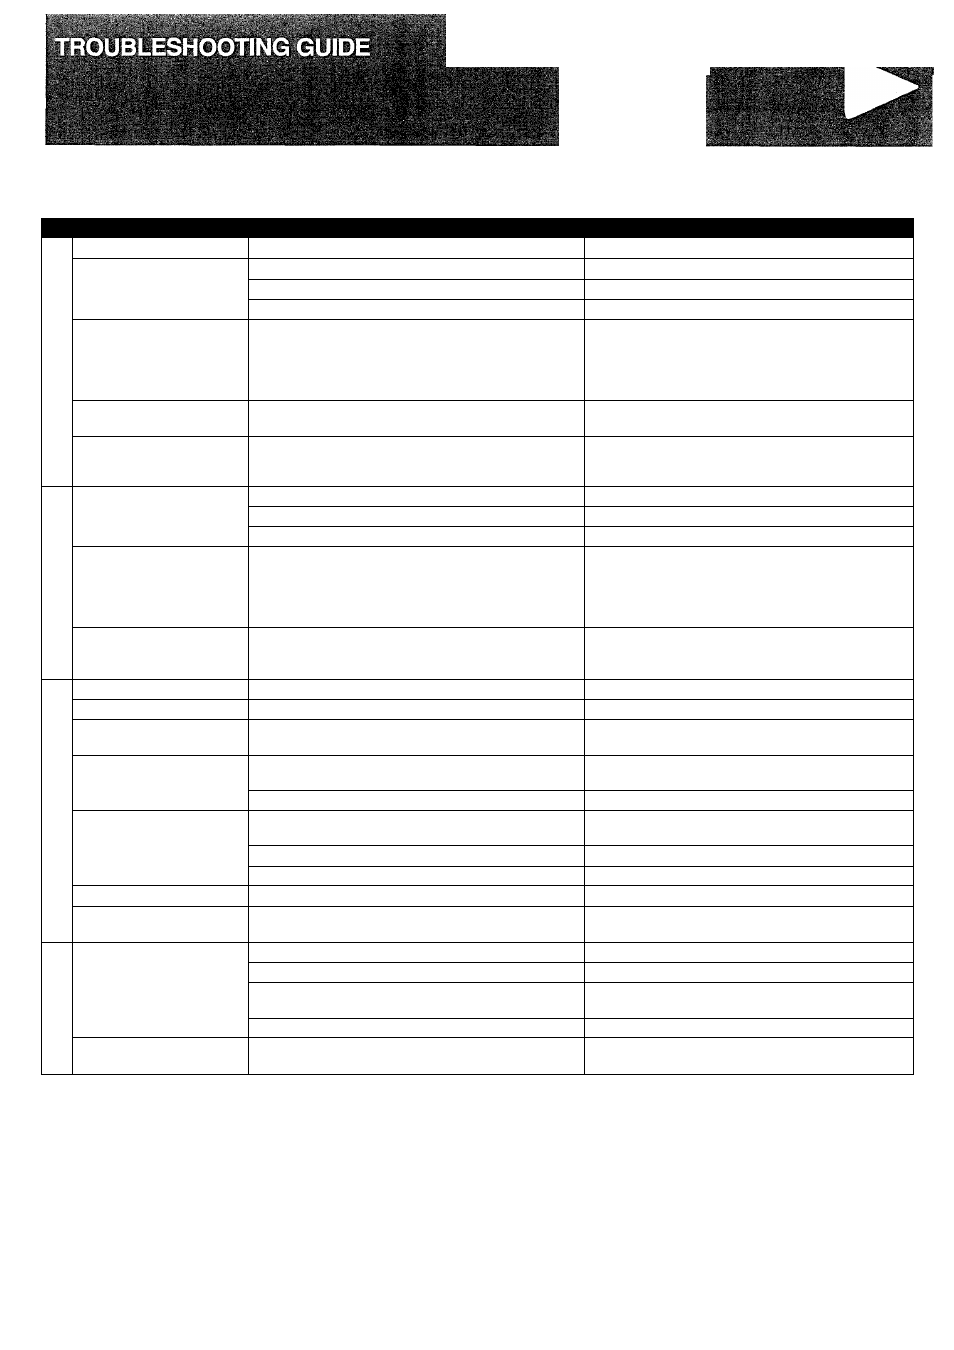
If the system does not seem to.operate as it should, after re-reading these operating instructions carefully, check the chart below:
r
I Symptom
. ' ' ■ . ' Causes ' ' ^
I Solutions
(D
0)
c
o
o
Power does not turn on.
• The flat cables are not connected properly.
• Correct the connections.
There is no sound.
• The power cord is not connected properly.
• Correct the connection.
• An incorrect function button is pressed.
• Press the function button to select the correct input.
• There is a bad connection between units.
• Correct the connection.
The indicators in the
display go out or the power
is turned off soon after it is
turned on.
• There is a short circuit in the speaker jack.
• The breaker tripped because of a connection to a low-
impedance speaker.
•
Disconnect the AC power cord, correct the condition,
including speaker connections, and then connect the
power again. Turn on the power by pressing PO\A/ER.
•
If the clock display is flashing, set the clock again
(page 11).
Sound comes from only
one speaker.
• A speaker is disconnected.
• Correct the speaker connection.
The display is strange.
• The microprocessor has been electronically affected.
• With MEMORY pressed down, turn the power
back on. (All stored settings will be erased from
the system.)
0)
c
3
H
There is constant, wave
like static.
• The antenna is not connected properly.
• Check the antenna connection.
• The station is not correctly tuned.
• Correct the tuning.
• The signal is too weak.
• install an outside antenna.
There is noise.
• The system is picking outside noise.
• Change the location or direction of the antenna.
• Turn the system to a different orientation.
• Move the system away from other electrical
appliances, such as a TV. fluorescent lights, or
move the appliances.
The sound is distorted.
• There is multipath distortion.
• Change the orientation of the antenna.
• Replace the antenna with one that has the correct
orientation.
o
0)
■D
QJ
"5
(A
(A
CO
Ü
The tape does not run.
• Deck 2 is paused.
• Press II PAUSE to release the pause.
The sound is off-balance.
• The head is dirty.
• Clean the head.
High sounds are too loud.
• The Dolby NR mode is set differently from when the
recording was done.
• Reset the Dolby NR.
There are no high
frequencies.
• A tape recorded without Dolby NR is being played back
in the Dolby NR mode.
• Turn off the Dolby NR.
• The head is dirty.
• Clean the head.
There is no recording.
• The erasure prevention tab on the tape has been
removed.
• Cover the erasure prevention hole with cellophane
tape.
• There is an incorrect connection.
• Correct the connection.
• The head is dirty.
• Clean the head properly.
The tape is not erased.
• The erase head is dirty
• Clean the erase head.
Vocals are not in stereo or are
weak.
• The vocal fader Is on.
• Press KARAOKE AUTO VOCAL FADER to turn it off.
u
(A
‘■D
t)
(0
a
E
o
Ü
There is no playback.
• The disc is not set correctly.
• Set the disc with the label facing up.
• The disc is dirty.
• Clean the disc.
• Moisture has condensed.
• Leave the system with the power on for some time.
Playback becomes possible.
• Playback is paused.
• Press ► PLAY/PAUSE to release the pause.
Vocals are not in stereo or are
weak.
• The vocal fader is on.
• Press KARAOKE AUTO VOCAL FADER to turn it off.
6 1