Installing the doorbell, Installing the doorbell -8 – ClearOne DigiLinX User Manual
Page 87
DigiLinX Installation and Design Guide
11-8
All specifications subject to change without notification. All rights reserved. Copyright © 2008 NetStream
Main +1 512.977-9393 / fax +1 512.977.9398 / Toll Free Technical Support +1 866-353-3496
3600 W. Parmer Lane, Suite 100; Austin, TX 7872
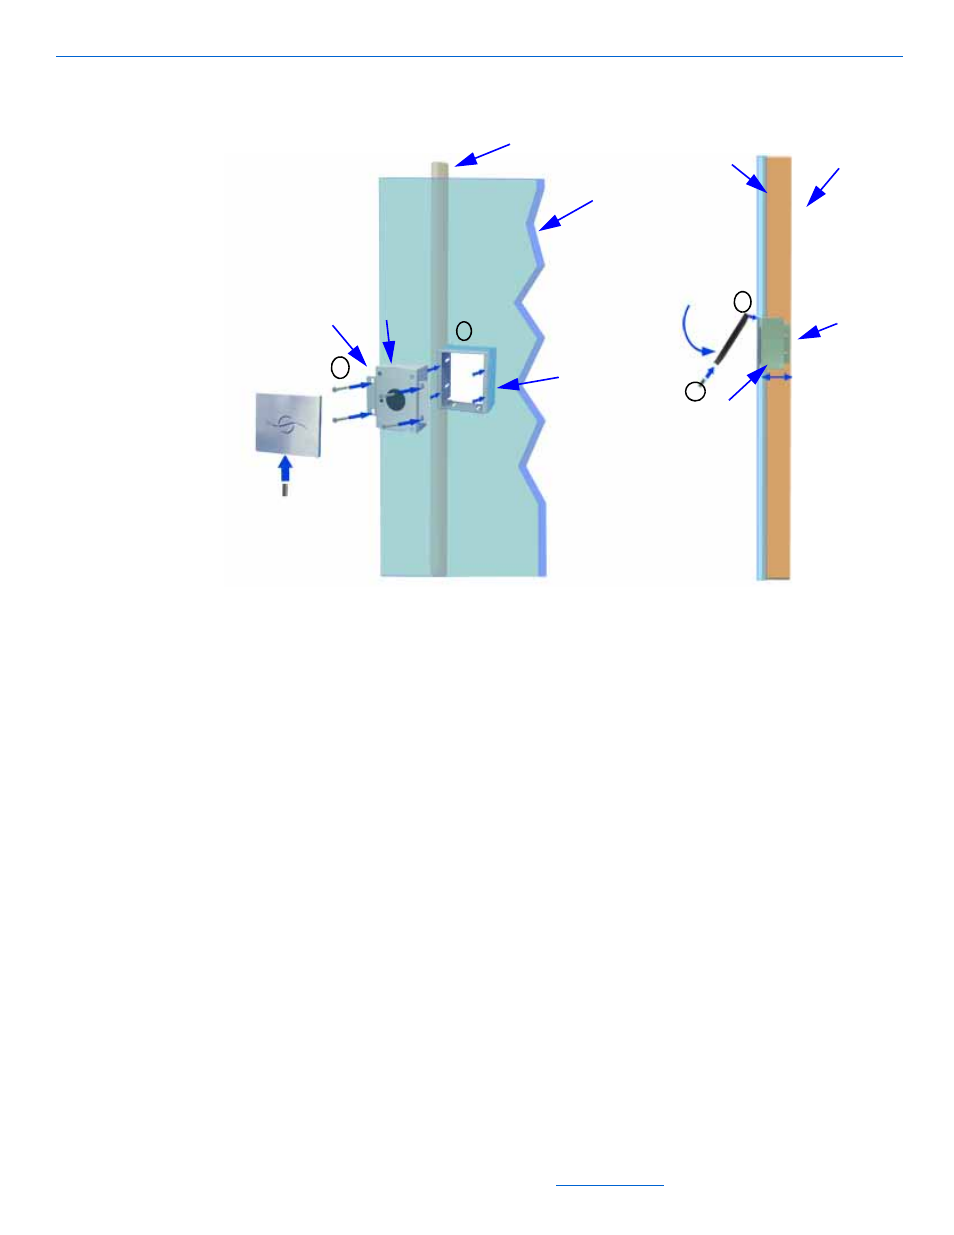
thickness of the outer wall material, taking into account a tight seal for the gasket on the
faceplate.
Figure 11-6
Installing DoorLinX faceplate
2.
Make all wiring connections, and then insert the DoorLinX electronics (DX100) into the
mounting box using the four mounting screws. Ensure that the faceplate mounting slot
faces up.
3.
Fit the hanger bracket on the faceplate to the faceplate mounting slot on the DoorLinX
and push the faceplate down and towards the DoorLinX.
4.
Push the faceplate against the DoorLinX so that it compresses the gasket. While
maintaining pressure, insert the set-screw at the bottom of the faceplate and screw in to
lock the faceplate in place.
Installing the Doorbell
The doorbell easily attaches to the mounting plate. To install the doorbell, complete the
following steps (refer to Figure 11-7):
1.
Hang the doorbell faceplate’s tab over the top of the mounting plate.
DoorLinX
Backbox
Adjust depth
as needed
DoorLinX
Faceplate
Faceplate
Mounting Bracket
(DXB100)
DoorLinX
Electronics
(DX100)
Faceplate Mounting
Slot
Cutaway of
Wall
Wall Stud
Wall
Wall
Stud
2
3
4
1