Store packaging material, Multi-axis stage storage, Mount the multi-axis stage – Rockwell Automation MPMA Integrated Multi-Axis Linear Stages User Manual
Page 35
Rockwell Automation Publication MPMA-UM001B-EN-P - November 2010
35
Mounting and Connecting the MP-Series Integrated Multi-axis Linear Stage
Chapter 4
Store Packaging Material
Keep the crate and packing materials in case the multi-axis stage needs to be
returned for warranty service or stored for an extended period of time.
1.
Tape screws and clamp hardware to the plywood board brace.
2.
Put the end caps and braces in their original positions and place all packing
material inside the crate.
Multi-axis Stage Storage
The multi-axis stage storage area should be clean, dry, vibration free, and have a
relatively constant temperature. Refer to
Environmental Specifications for Multi-
for more detailed information.
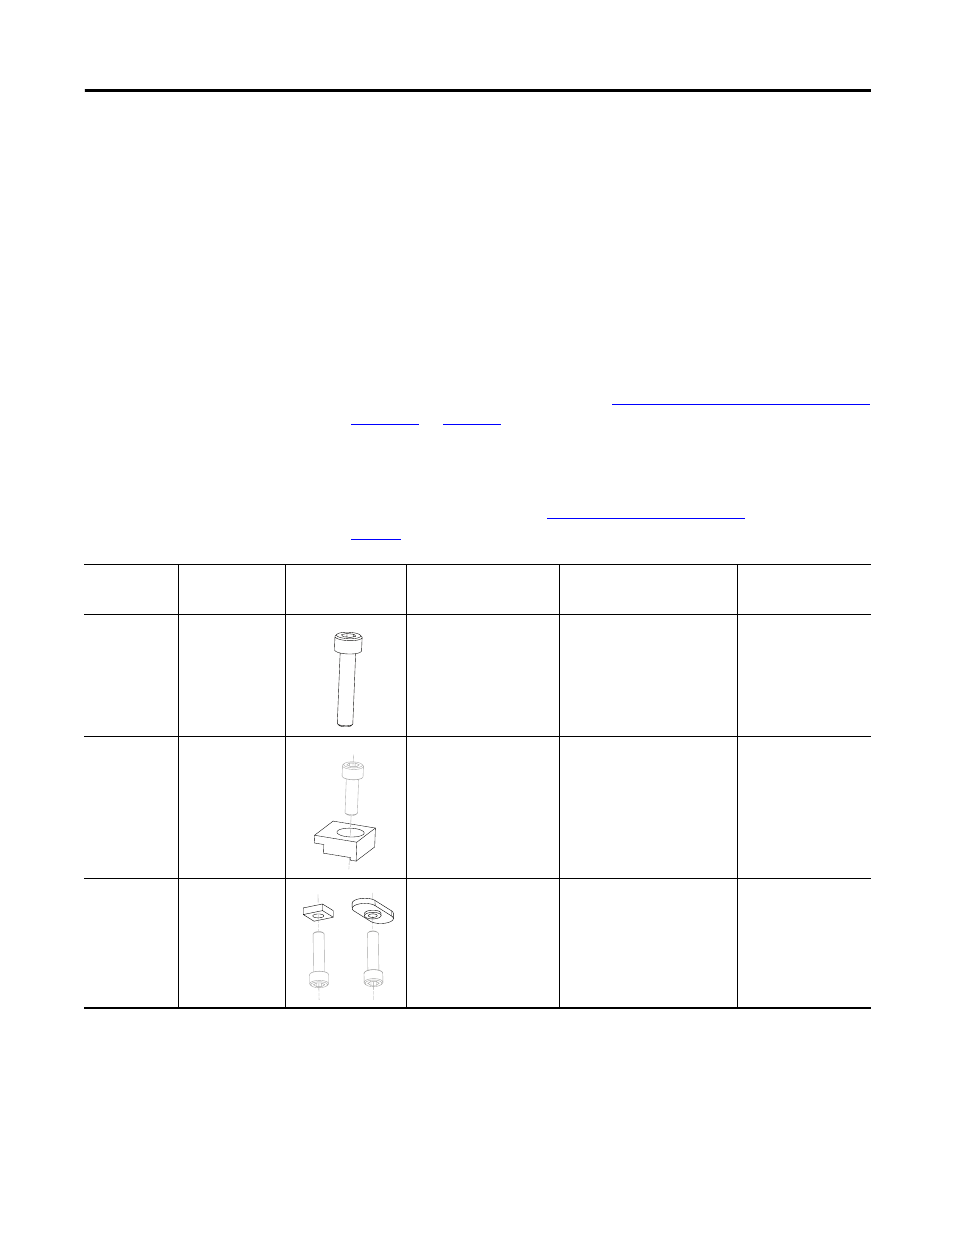
Mount the Multi-axis Stage
Follow these steps to install a multi-axis stage on its mounting surface using the
supplied tee nut bars. Refer to
beginning on
for detailed mounting dimensions and the number of fasteners required.
Fastener
Order
Illustration
User Supplies
(4)
Recommended For
Torque
N•m (lbf•in)
Through Bolt
(1)
–
M5 x 1.0 x 16 mm min
Uncovered stages
3.4 (30)
Toe clamps
MPAS-TOE
M6 x 1.0 x 16 mm min
Covered stages
5.5 (48)
Tee nuts
(2)
MPAPS-x-TNUT
(3)
M6 x1.0
Securing a stage from beneath
the mounting surface.
Tee Nut 5.5 (48)
Square Nut 2.3 (30)
(1) Through bolt mounting is not an option for catalog number MPAS-x6xxxx-xLMxxx (150 mm) stages.
(2) The tee nut mount for a catalog number MPAS-x8xxxx-xxxxx (200 mm) stage is a square nut in a tee slot.
(3) Where x is the frame size of a stage, 6 = MPAS-x6xxxx-xxxxx (150 mm), 8 = MPAS-x8xxxx-xxxxx (200 mm), 9 = CHPS-x9xxxx-xxxxx (250 mm).
(4) You supply the bolts.