4 totalizer start and totalizer reset, 5 setting of pulse output (scaling), 6 setting of burnout switch – Yokogawa digitalYEWFLO (DY) User Manual
Page 96: Totalizer start and totalizer reset -2, Setting of pulse output (scaling) -2, Setting of burnout switch -2
<10. OPERATION>
10-2
IM 01F06A00-01EN
10.1.4 Totalizer Start and Totalizer Reset
When using the Totalizer Function, the start setup
should be done.
(1) Start operation using BT200
Enter to B40(TOTAL START), and move the
video bar to “EXECUTE”. Push “ENTER” key
at 2 times.
(2) Start operation using indicator
Enter to “Setting mode”, move to B40 of
parameter number, and enter to “01” of data
number.
Refer to Section 5.4 “Setting Mode.”
Totalized value can be reset using the indicator or
BT200.
(1) Reset operation using BT200
Enter to B42 (TOTAL RESET), and move the
video bar to “EXECUTE”. Push “ENTER” key at
2 times.
(2) Reset operation using indicator
Enter to “Setting mode”, move to B42 of
parameter number, and enter to “01” of data
Number.
Refer to Section 5.4 “Setting Mode.”
10.1.5 Setting of Pulse Output (Scaling)
Pulse output are constructed by two units, that are
“Scaled pulse and Unscaled Pulse”.
(1) Scaled Pulse
When SCALED PULSE is selected in B20, set
fl owrate per one pulse output. Rate unit is linking to
the fl ow unit.
(2) Unscaled Pulse
When UNSCALED PULSE is selected in B20, it
outputs the pulse calculated by following formula.
The formula for output pulse number is as follows.
Output pulse number per one second = vortex
number per one second / PULSE RATE set
number.
Refer to Section 11.6 “Flow Calculation.”
● Pulse Rate setting
Pulse rate setting is settable by “B21:PULSE
RATE”.
10.1.6 Setting of Burnout Switch
digitalYEWFLO is equipped with a CPU error
burnout function used to set the output direction
upon CPU error, and a sensor burnout function
that sets the direction of the output in the event of
burnout of the temperature sensor. When factory-
shipment under normal conditions, the output of
both CPU error burnout and sensor burnout are
set to HIGH, but if option code /C1 is specifi ed,
the CPU error burnout is set to LOW(-2.5% below)
output, and sensor burnout is set to LOW(-2.5%
below) output, respectively. The setting of the
direction of output from burnout can be changed.
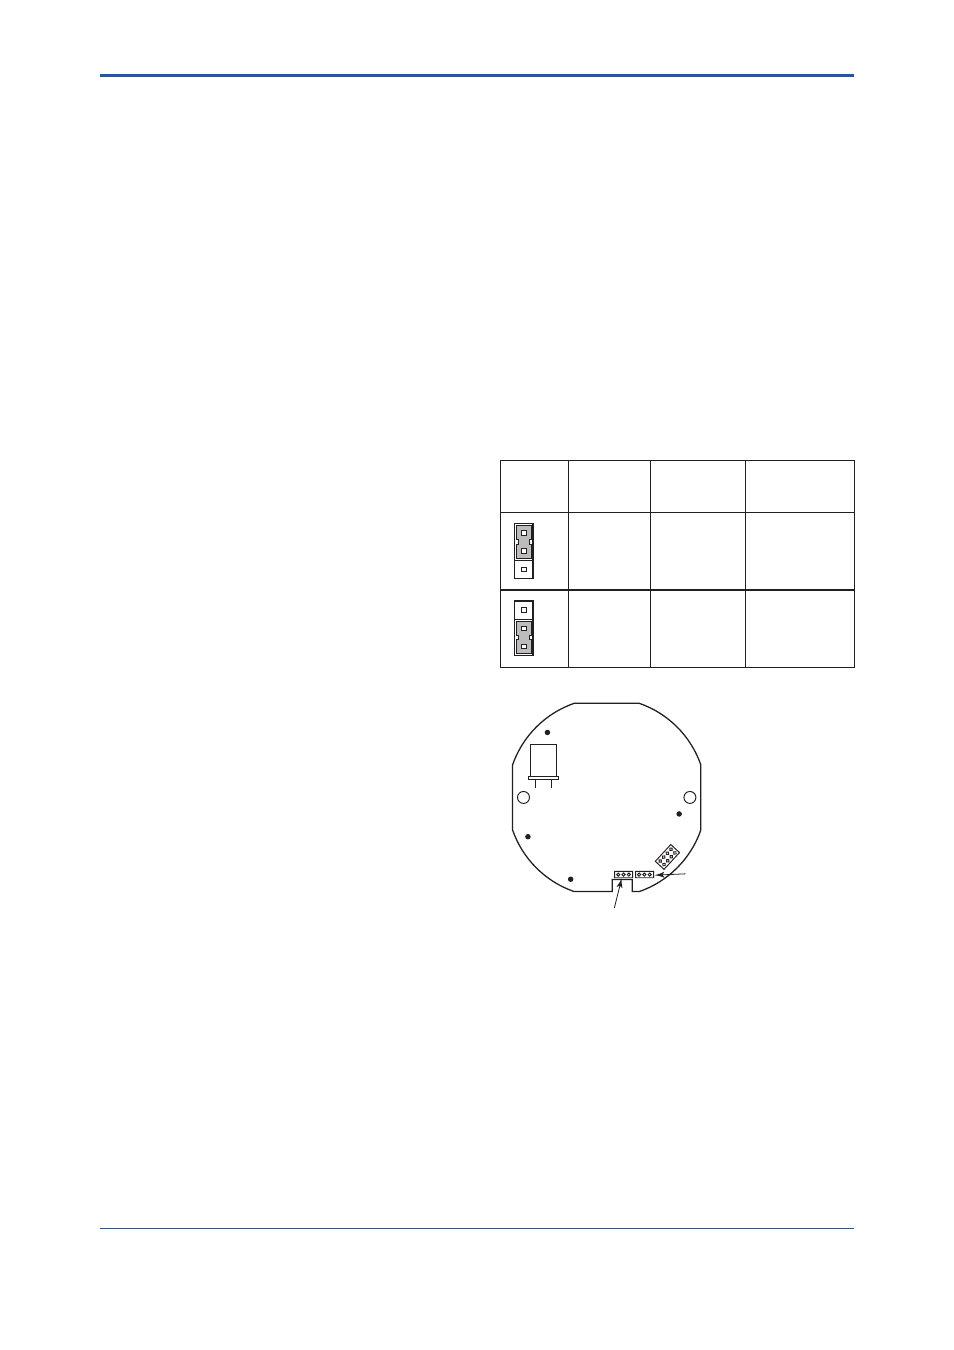
To change the direction of output arising from
burnout, switch the setting pin on the CPU
assembly (Refer to Table 10.1).
Table 10.1
Output Setting Pin for Burnout
Pin
position
CPU error
burnout
direction
CPU error
burnout
output
Remark
H
L
HIGH
110% or more
(21.6mA DC)
Set to HIGH
before shipment.
H
L
LOW
-2.5% or less
(3.6mA DC)
Set to LOW for
option code /C1.
TP2
COM
HHT
P
F1002.ai
Pin position of Burnout Switch
Pin position of
Write Protect Switch
Figure 10.2 Pin position of Burnout and Write
Protect Switch