One touch – Roland G-70 User Manual
Page 78
Additional Arranger/Style functions
78
r
G-70 Music Workstation
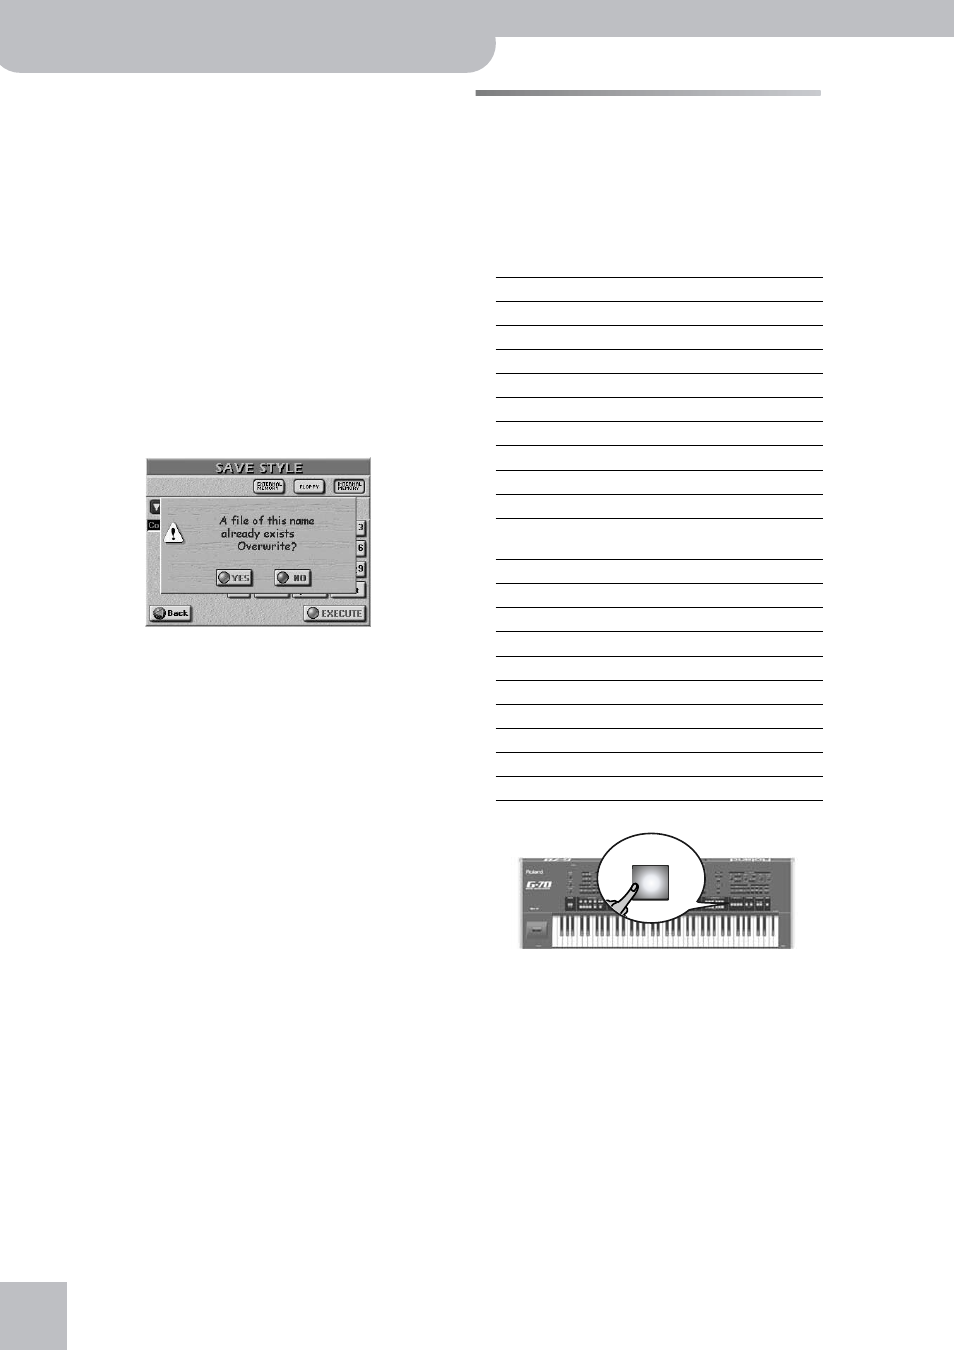
This page allows you to save the current Style to the
internal memory, a memory card or a floppy disk. It
will be saved along with the COVER settings you
selected.
(3) Press the [EXTERNAL¥MEMORY], [FLOPPY] or
[INTERNAL¥MEMORY] field to select the area where
you want to save the Music Style.
(4) Enter the name for the file.
See page 49. If you are sure you will always use the
selected Style with the COVER preset you selected,
proceed with the next step.
Note: The G-70 supports both upper- and lower-case letters
for file names. Choose whichever is more convenient (or
clearer).
(5) Press the [EXECUTE] field to save the data.
If the selected memory area already contains a Music
Style of that name, you are asked whether it is OK to
overwrite it.
• Press the [YES] field to overwrite the file. This replaces
the Music Style in question with the new version.
• Press the [NO] field to return to the SAVE STYLE page,
change the name, then press [EXECUTE] again.
The data are copied and a “Operation Successful”
message confirms the end of the operation.
Note: To reassign the original orchestration to the Style you
just saved, select it, press the [ORIGINAL] field on the STYLE
COVER page, then save it again using the procedure described
above.
Note: If you save an internal Music Style under a different
name, you can no longer select the new version using the
STYLE family buttons (see p. 27). Such “customized” Styles
need to be assigned to a CUSTOM memory (see p. 84) or can be
directly recalled using the Style Finder (see p. 86).
One Touch
You may find yourself using the One Touch function at
regular intervals, because it automates quite a few
tasks. The G-70’s One Touch memories are actually
“miniature User Programs” that go way beyond any-
thing you may know from other arranger instruments.
The ONE TOUCH function makes a number of automatic
settings for you:
(1) Press a ONE TOUCH button.
(2) Select a Music Style (page 27) and start Arranger
(3) Play a melody to the accompaniment.
You will notice that the sound of the UP1 (or any
other Keyboard) part matches the style and mood of
the selected Music Style.
(4) Select a different Music Style and again play a solo
line: the active Keyboard part now uses a different
sound.
(5) Press another ONE TOUCH button.
Tone Selection
UP1, UP2, UP3, LW1, LW2, MBS
Harmonic Bar status
UP1, LW1, MBS
Volume
UP1, UP2, UP3, LW1, LW2, MBS
Pan
UP1, UP2, UP3, LW1, LW2, MBS
Reverb Send
UP1, UP2, UP3, LW1, LW2, MBS
Chorus Send
UP1, UP2, UP3, LW1, LW2, MBS
Octave
UP1, UP2, UP3, LW1, LW2, MBS
Tone Edit settings
UP1, UP2, UP3, LW1, LW2, MBS
C1 value
UP1, UP2, UP3, LW1, LW2, MBS
MFX status
UP1
MFX part assign
UP1, UP2, UP3, LW1, LW2, MBS,
MELODY INT, D Beam
Harmonic Bar effect
UP1, LW1, MBS
Part status (on/off)
UP1, UP2, UP3, LW1, LW2, MBS
Main Split
(value)
Upper 3 Split
(value)
Upper 3 Split
(status: on or off)
Bass Inversion
(status: on or off)
Keyboard Mode
SPLIT or WHOLE
Sync Start & Stop
Status
Intro/Ending
(status: on or off)
Pattern level
VARIATION [1]~[4]
1