NEC Express5800/120Rh-2 N8100-1126F User Manual
Page 295
Upgrading Your Server 9-21
Installation
Install a DIMM in the following procedure.
IMPORTANT:
The server supports DIMMs of only the low-profile
type (30 mm (1.2 inches) in height). It does not support DIMMs
exceeding the specified height.
1.
See the section "Preparing for Installation and Removal" described earlier to prepare.
2.
Pull out the server from the rack.
3.
Open the logic cover.
4.
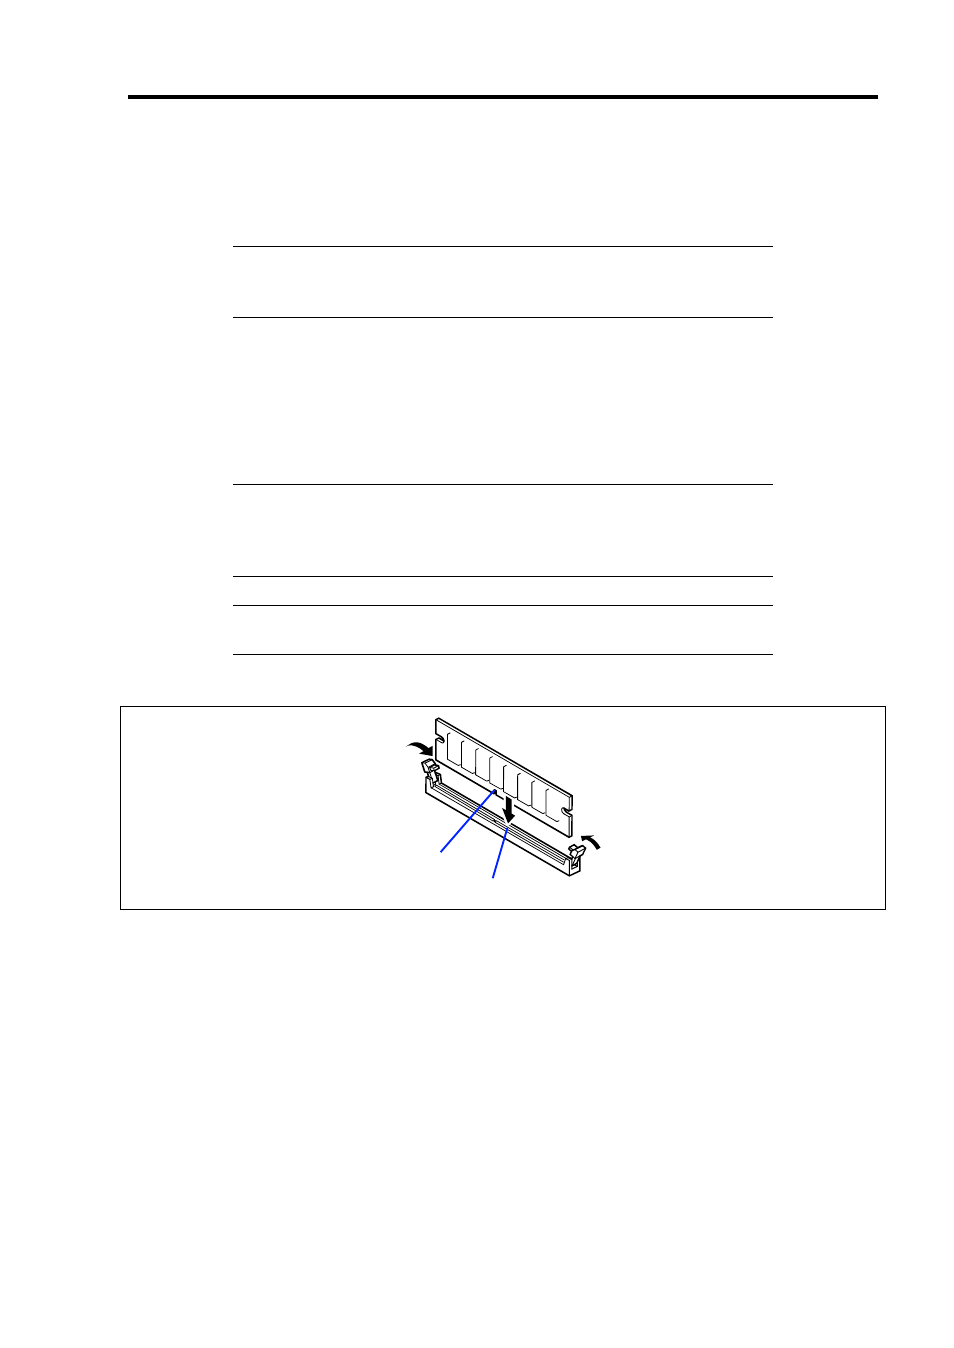
Push the DIMM straight into the socket.
NOTE:
Make sure of the orientation of the DIMM.
Position the DIMM so that a notch in the bottom edge of the DIMM
aligns with the keyed socket. Applying too much pressure can damage
the socket. Keyed DIMMs insert only one way.
IMPORTANT:
To avoid damage to the socket, do not apply
excessive force while pressing the DIMM.
The levers automatically close when the DIMM is inserted into the socket.
5.
Install the components you removed in steps 1 to 3.
6.
Power on the server and verify that POST displays no error messages.
If POST displays an error message, take a note on the message and see the POST error
messages listed in Chapter 8.
7.
Start the SETUP and select [Advanced] → [Memory Configuration] to verify that the
installed DIMM shows the status "Normal". (See Chapter 4 or details.)
8.
Select "Yes" for [Reset Configuration Data] on the [Advanced] menu.
This setting is required to change the hardware configuration data. See Chapter 4 for
details.
9.
If the Windows operating system is in use, set the paging file size to the recommended
value (total memory size × 1.5) or a greater value. See Chapter 5 for details.
Key slot
Key