Genesis ii ddc plastic lid clamping details – Innotech Genesis II Digital Controller (v5) User Manual
Page 18
Genesis II Installation Instructions
Page 18
© Mass Electronics Pty Ltd 2010
Edition 2.0 dated 06/12/2013
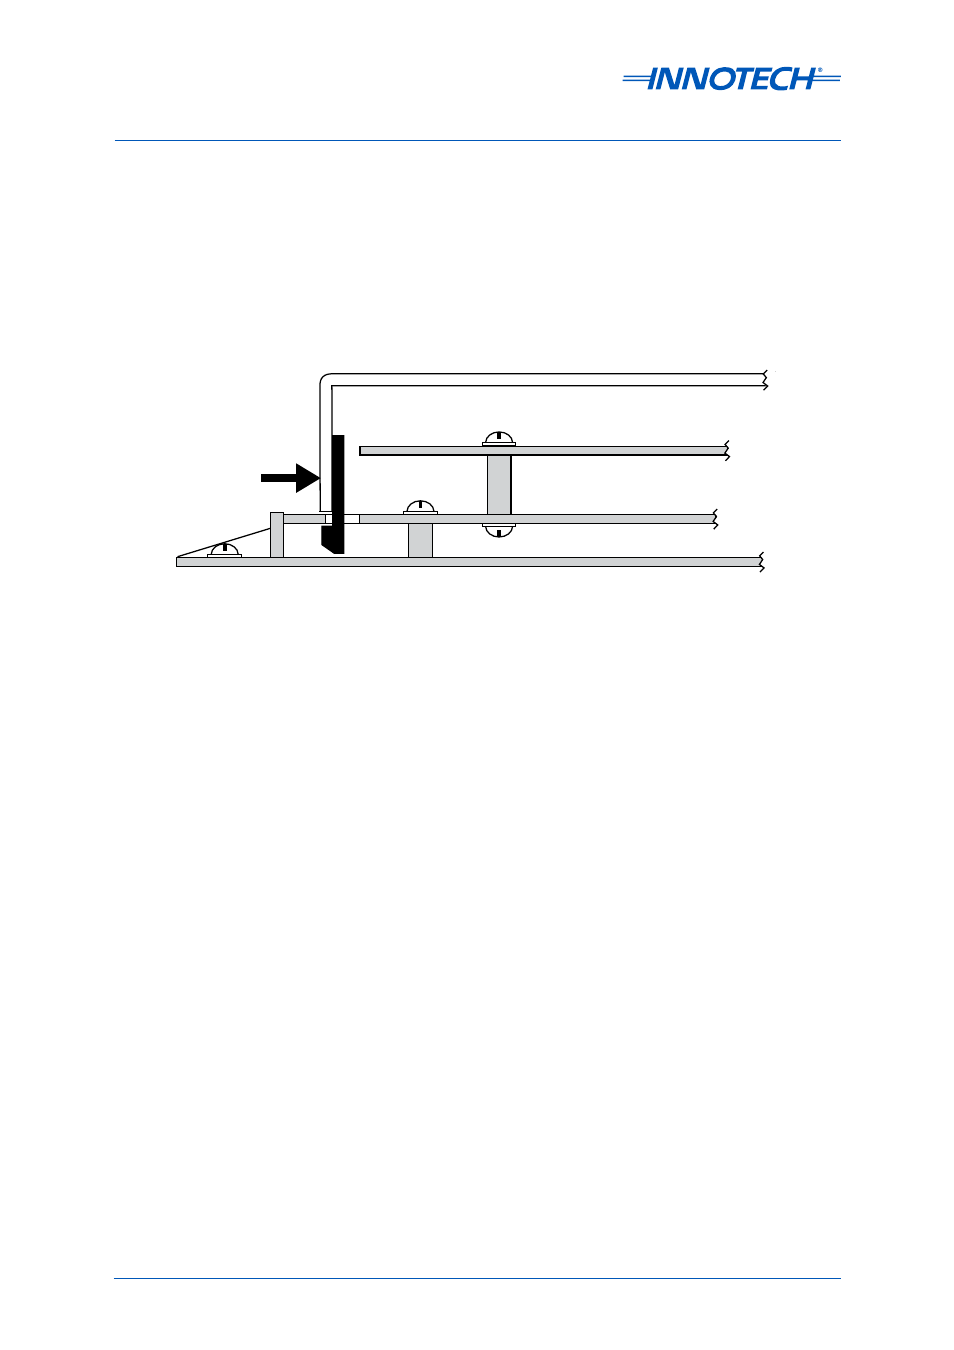
Plastic Lid Piece
Top Circuit Board
Motherboard
Plastic Base Piece
PRESS TO
RELEASE
The unit’s circuit boards are mounted inside the case, which consists of a base and a lid. The plastic
base has eight mounting holes; each hole is 4mm in diameter. Not all of the eight holes are required
for mounting, provided the unit is
securely installed.
There are four slots in the bottom circuit board (motherboard), two slots at each end. These slots
facilitate the clamping of the case’s plastic lid to the motherboard. To remove the plastic lid from the
motherboard, press firmly inwards at each end of the plastic lid, which disengages the clip-in fittings,
and lift away simultaneously. Refer to Figure 2-2.
Installation of the plastic lid is similar to the removal procedure; insert the clip-in fitting at one end of
the plastic lid into the slots provided on the motherboard. Then, clip the opposite end of the plastic
lid into the slots at that end of the motherboard. Pressing the two ends of the plastic lid together can
assist in the operation.
Figure 2-2: Genesis II DDC Plastic Lid Clamping Details