Print head alignment method – Epson SureLab D570 Professional Minilab Photo Printer User Manual
Page 87
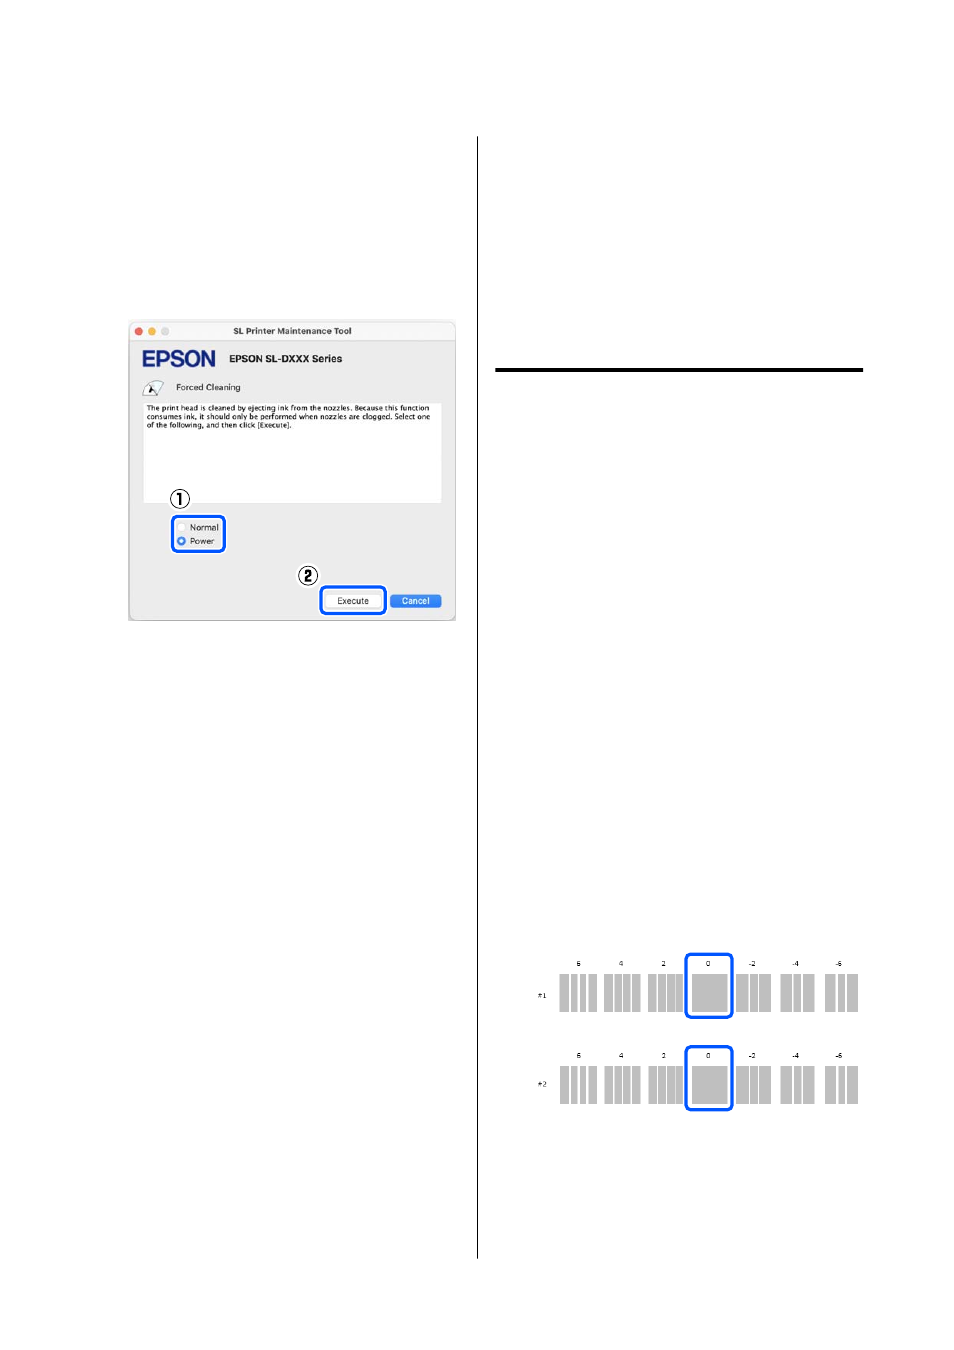
Power
cleans more powerfully than
Normal
.
Use this setting if the nozzles are still clogged
even after repeating
Normal
cleaning several
times.
Power
consumes more ink than
Normal
cleaning. If a message is displayed informing
you that here is not enough ink remaining,
refill the ink tank and then execute.
U
Cleaning is executed.
Cleaning may take some time depending on the
selected cleaning level.
A message is displayed on screen when cleaning
is complete.
C
Check the results of Forced Cleaning.
There are the following two ways to check the
cleaning results.
❏
Execute a nozzle check to check for clogged
nozzles.
U
“Nozzle Check Methods” on page 84
❏
Print a nozzle check pattern to check for
clogged nozzles.
U
“Print Nozzle Check Pattern Method” on
If the clogged nozzles are not cleared by
executing
Normal
cleaning, execute
Normal
cleaning again. If the clogged nozzles are not
cleared even by repeating this several times,
execute
Power
cleaning.
If the clogged nozzles are not cleared even after
executing cleaning at
Power
, then do not use
the printer for printing for at least 12 hours.
Waiting for this amount of time may allow the
clogged ink to dissolve.
If that does not improve the situation, execute
Power Ink Flushing from the printer’s control
panel.
U
“Power Ink Flushing” on page 63
Print Head Alignment Method
If the print results appear grainy or out of focus,
perform Print Head Alignment. The Print Head
Alignment function corrects print head
misalignments when printing.
After executing Print Head Alignment, go on to
execute Paper Feed Adjustment.
A
Load 2 sheets of paper in the paper cassette.
U
“How to Load Paper” on page 25
B
Click
Print Head Alignment
on the main
screen.
The
Print Head Alignment
screen is displayed.
C
Click
.
2 sheets of adjustment patterns are printed. Two
groups of adjustment patterns, #1 and #2, are
printed on separate sheets of paper.
D
Check the printed adjustment pattern.
Confirm which of the print pattern numbers
has no gaps between the nozzles in each group.
SL-D500 Series User's Guide
Using the Maintenance Tool (Mac)
87