Epson SureLab D570 Professional Minilab Photo Printer User Manual
Page 141
A
Remove the rear cover.
B
Open the front cover, and pull out the interior
of the printer until it stops.
C
Open the inner cover, peel off the tape that was
securing the print head.
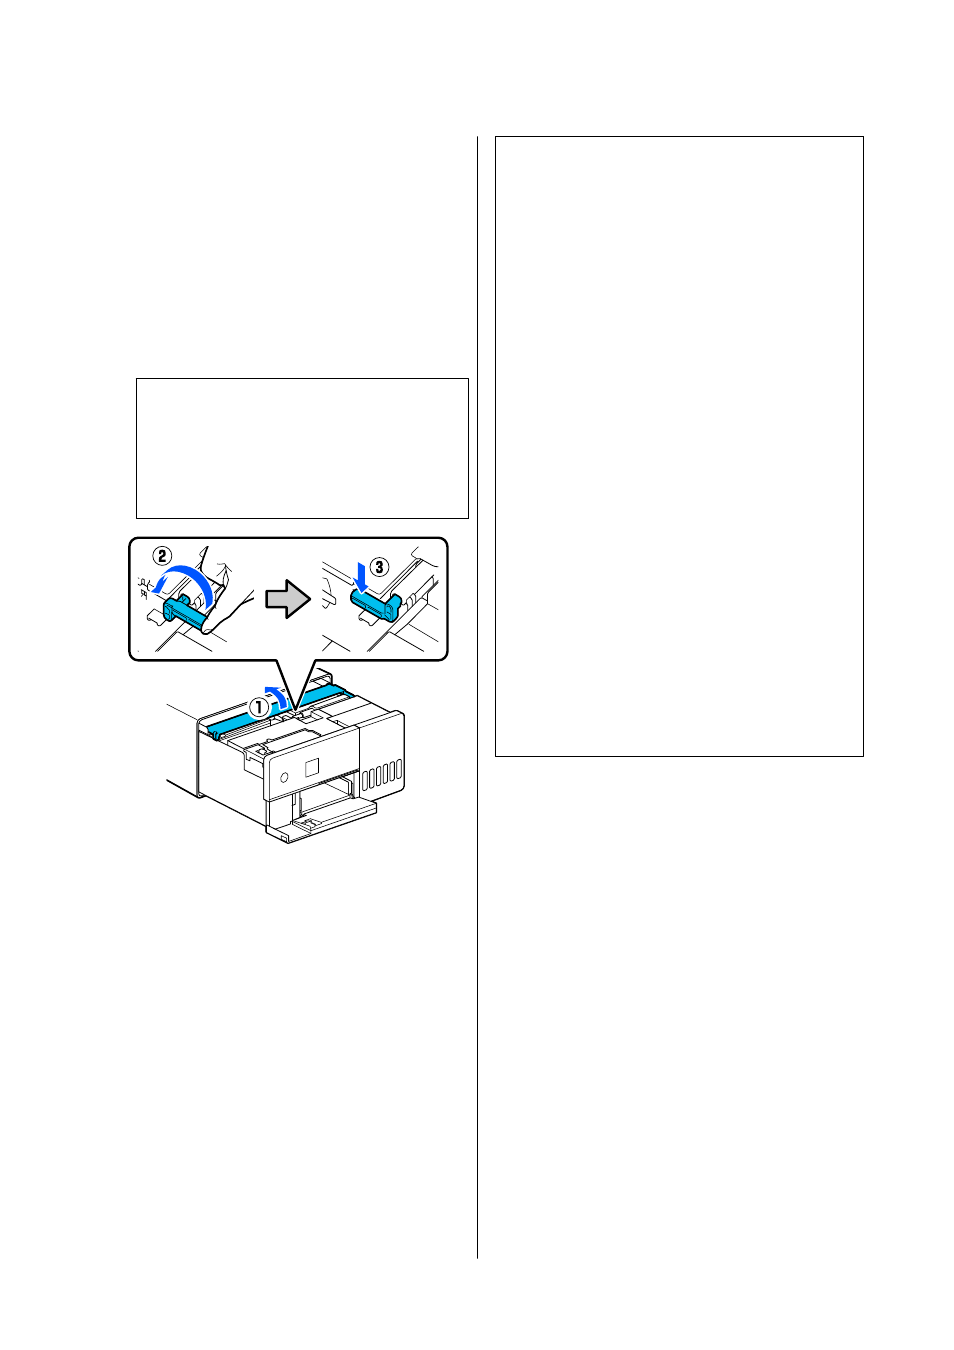
D
Set the transportation lock in the print position,
as shown in the illustration.
c
Important:
After transporting the printer, return the
transportation lock to the printing position.
You cannot print if it is in the transportation
position.
E
Close the inner cover, return the interior of the
printer to its original position, and then close
the front cover.
F
Install the rear cover.
G
Connect the power cable, and turn the printer
on.
H
Execute a Print Head Nozzle Check to confirm
that the nozzles are not clogged.
U
“Print Head Nozzle Check” on page 60
Note:
North America
See the Start Here sheet for the procedure to connect
LAN/USB cables to the printer.
If you do not have a Start Here sheet on hand, you can
go to
(U.S.) or
(Canada) and search for your
product to view it.
Latin America
See the Start Here sheet for the procedure to connect
LAN/USB cables to the printer.
If you do not have a Start Here sheet on hand, you can
go to
(Caribbean),
razil), or
ther regions) and
search for your product to view it.
Other Regions
See the Setup Guide for the procedure to connect
LAN/USB cables to the printer.
If you do not have a Setup Guide on hand, you can go
to
to select and view one for your
printer model.
You can watch the procedure on video also.
SL-D500 Series User's Guide
Appendix
141