Print head alignment method, Paper feed adjustment method – Epson SureLab D570 Professional Minilab Photo Printer User Manual
Page 76
U
“Power Ink Flushing” on page 63
Print Head Alignment Method
If the print results appear grainy or out of focus,
perform Print Head Alignment. The Print Head
Alignment function corrects print head
misalignments when printing.
A
Load 2 sheets of paper in the paper cassette.
U
“How to Load Paper” on page 25
B
Click
Printer settings
on the main screen.
See the following for more details on the main
screen.
U
“Explanation of the Main Screen” on
C
Select a printer, in the printer list area on the
top of the Printer settings screen, on which to
execute Print Head Alignment, and then select
Paper Settings
.
You cannot select multiple printers.
See the following for more details on the printer
settings screen.
U
“Explanation of the Printer settings” on
D
Click
in
Print Head Alignment
.
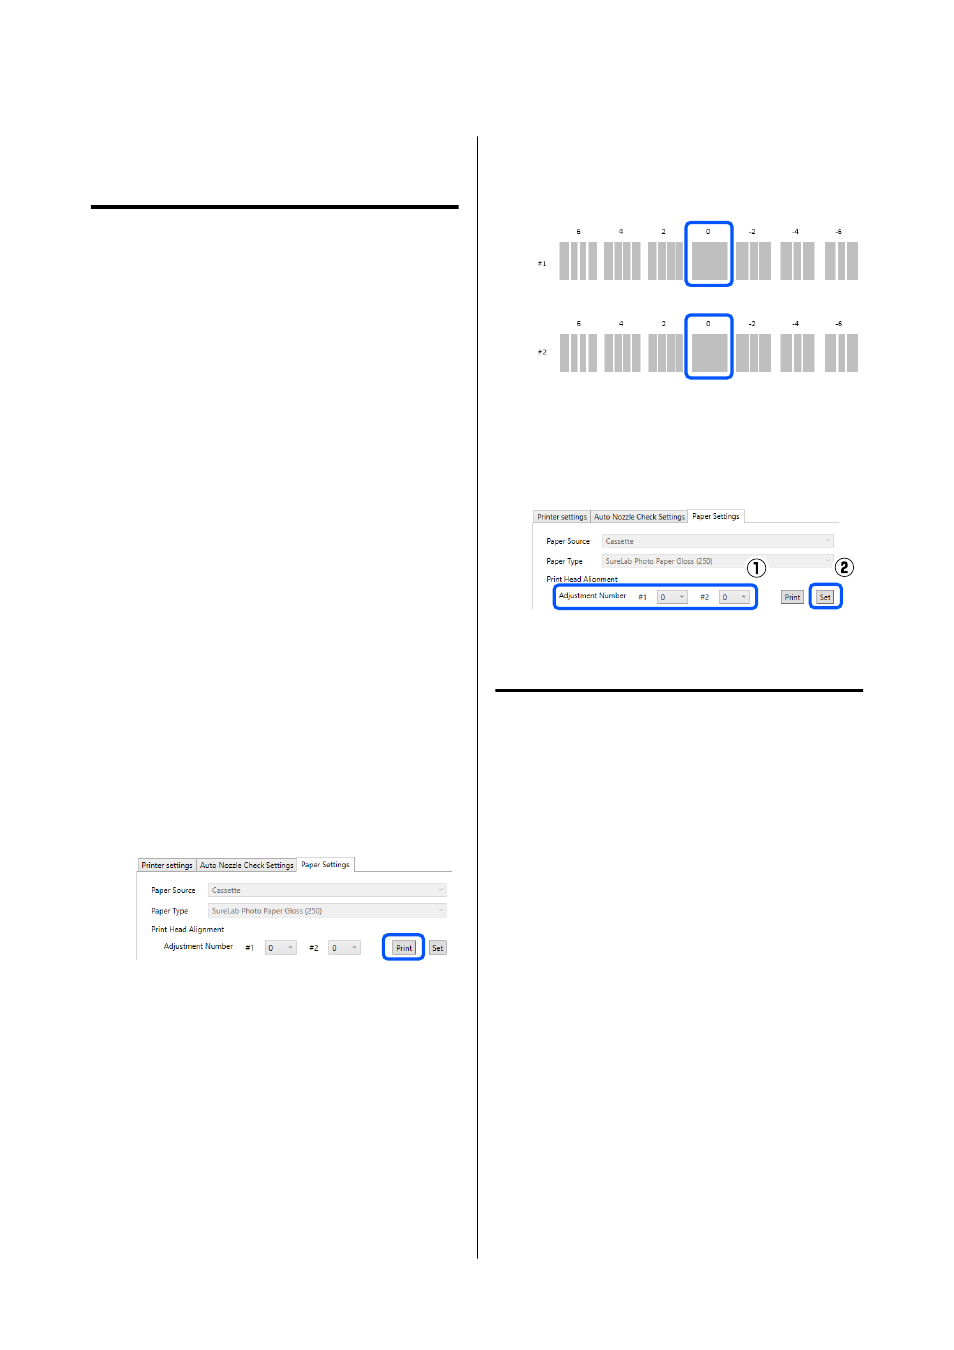
2 sheets of adjustment patterns are printed. Two
groups of adjustment patterns, #1 and #2, are
printed on separate sheets of paper.
E
Check the printed adjustment pattern.
Confirm which of the print pattern numbers
has no gaps between the nozzles in each group.
F
Select the number of the print pattern you
confirmed, and then click
Set
.
Select the number of the print pattern you
confirmed individually for both
#1
and
#2
.
The adjustment values are applied.
Paper Feed Adjustment Method
Execute this when streaks and unevenness that occur
in print results are not improved even though print
head cleaning was executed.
A
Load paper in the paper cassette.
U
“How to Load Paper” on page 25
B
Click
Printer settings
on the main screen.
See the following for more details on the main
screen.
U
“Explanation of the Main Screen” on
C
Select a printer, in the printer list area on the
top of the Printer settings screen, on which to
execute Paper Feed Adjustment, and then select
Paper Settings
.
You cannot select multiple printers.
See the following for more details on the printer
settings screen.
SL-D500 Series User's Guide
Using the Maintenance Tool (Windows)
76