Adjusting auto exposure -11, Adjusting auto exposure, System settings 3-11 – TA Triumph-Adler DC 2060 User Manual
Page 111: System menu / counter

System Settings
3-11
Adjusting Auto Exposure
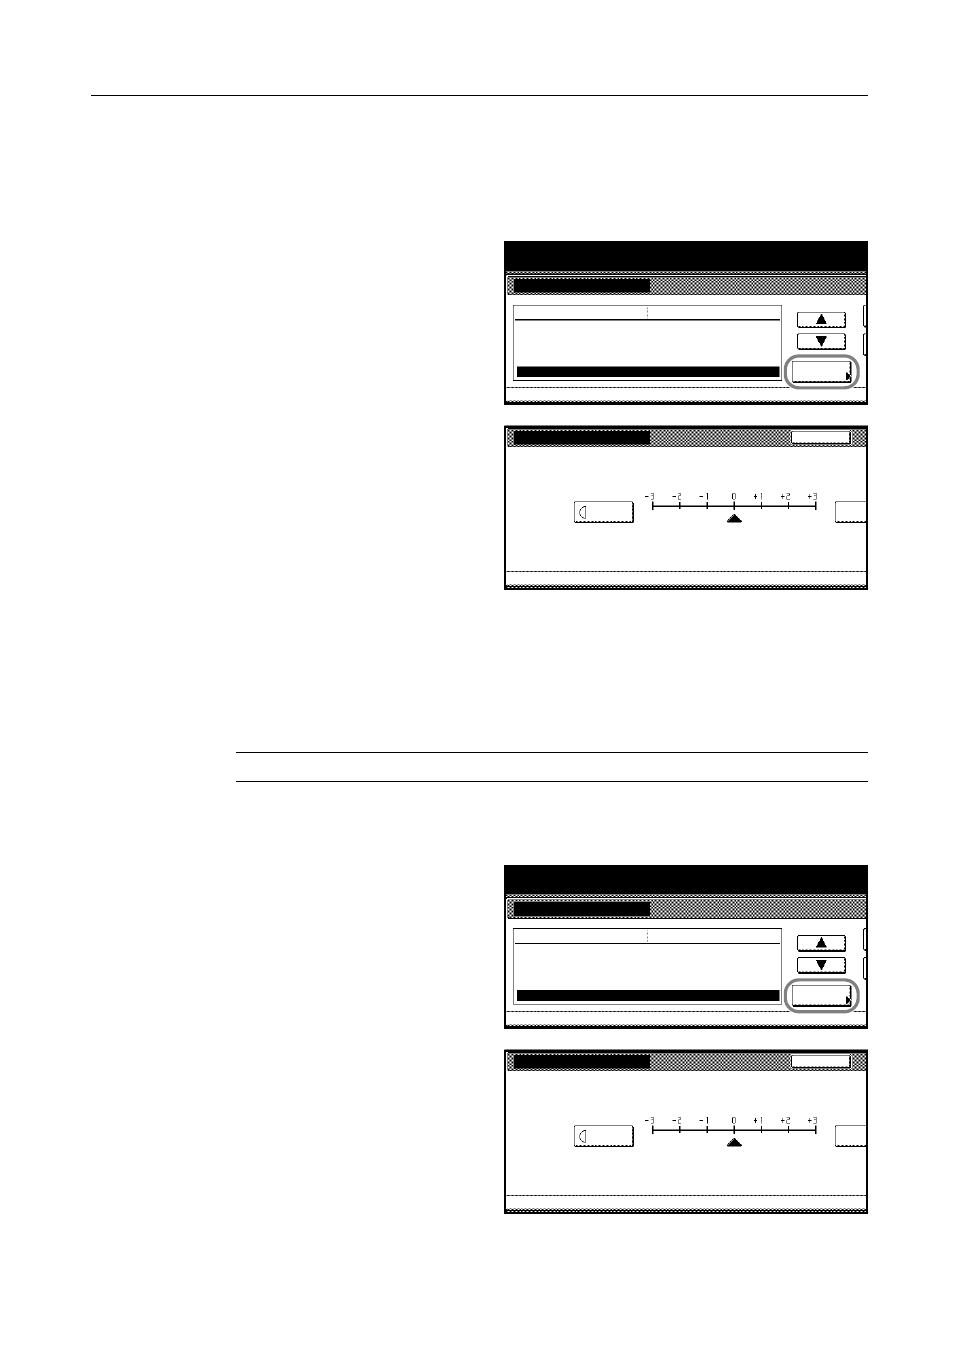
Adjusting the median exposure for Auto Exposure by biasing the reference exposure.
1
Access the Copy Default screen. (For instructions, refer to Accessing the Copy Default Screen on
page 3-3.)
2
Press [S] or [T] to select Adjust auto
exposure and press [Change #].
3
Press [Lighter] if you desire to make
copied images lighter or [Darker] if you
desire to make copied images darker,
when automatic exposure is selected.
4
Press [Close]. The touch panel will return to the Copy Default screen.
Adjusting Automatic Exposure for Scanning Text Documents
This menu allows to adjust the scanning exposure when the copier is installed with the option
scanner. Adjust the exposure so that the best readability is obtained when the scanned image is
printed and processed with a OCR software application.
NOTE: This setting is available only if the copier is equipped with the optional scanner kit.
1
Access the Copy Default screen. (For instructions, refer to Accessing the Copy Default Screen on
page 3-3.)
2
Press [S] or [T] to select Adjust auto
exposure (OCR) and press [Change #].
3
Press [Lighter] to make the scanned
image lighter or [Darker] to make the
scanned image darker.
System Menu / Counter
System Menu
Copy Default
Select paper type(APS)
Default drawer
Default menu
Setting mode
Drawer for cover paper
Auto % Priority Setting
Adjust auto exposure.
Plain
Change #
1st paper
Multipurpose tray
Off
Standard
Adjust auto exposure.
Back
Copy Default
System Menu
Adjust copy exposure default setting. (Auto)
Lighter
Darker
-
System Menu / Counter
System Menu
Copy Default
Default drawer
Drawer for cover paper
Default menu
Setting mode
Auto % Priority Setting
Adjust auto exposure.
Adjust auto exposure(OCR)
1st paper
Change #
Multipurpose tray
Off
Standard
Standard
Adjust auto exposure(OCR)
System Menu
Copy Default
Back
Lighter
Darker
-
