Saving a panel, Saving a panel -47 – Grass Valley Xpanel Vertigo Suite v.4.8 User Manual
Page 81
Xpanel User Manual
4-47
Building and editing panels
Saving a panel
In the Vertigo workflow, all assets and panels are centrally stored in the Xmedia Server
(either a central or local Xmedia Server). Therefore, once you have created a new panel, or
made changes to an existing panel, you must save it to the Xmedia Server.
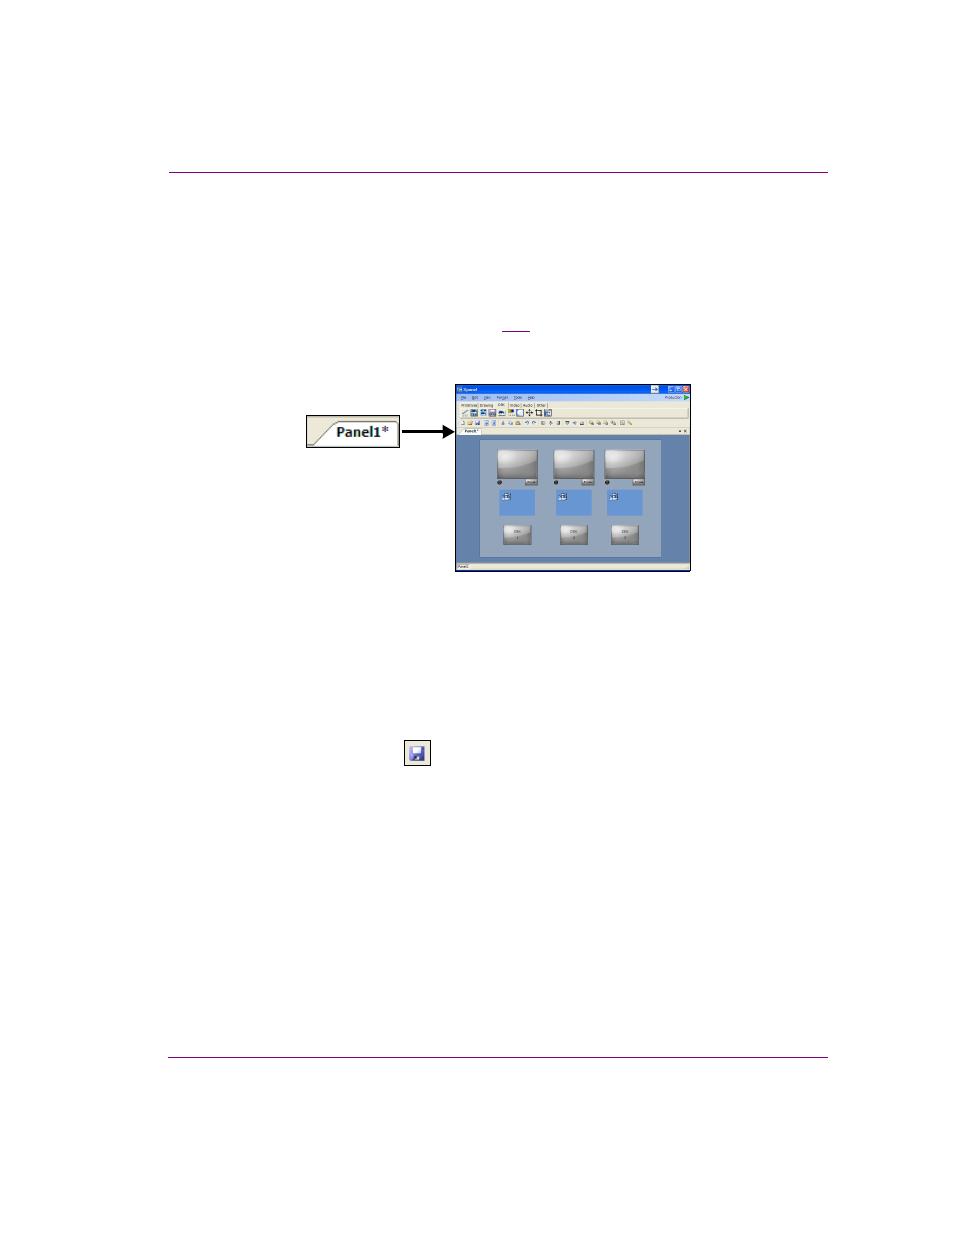
When changes have been made to a new or existing panel in Xpanel, an asterisks appears
next to the panel’s name on panel’s tab (figure
). The asterisks indicates that the changes
have not yet been saved to the Xmedia Server. Note that if you attempt to close a panel that
has unsaved changes, Xpanel will display a message prompting you to save the panel.
Figure 4-20. The asterisks indicates that the panel contains unsaved changes
To save a panel:
1.
If multiple panels are open, select the panel to be saved to make it the active panel in
Xpanel.
2.
Save the panel using one of the following methods:
• Select the F
ILE
>S
AVE
(C
TRL
+S) menu command.
Or,
• Click the Save button
in Xpanel’s toolbar.
Or,
• Right-click the panel’s tab and select the S
AVE
command.
If you are saving the asset for the first time, the Save window appears and allows you
to determine the storage location (i.e. folder), specify the name of the panel, the name
of the person who authored the panel and a short description of the panel. Click S
AVE
to commit the changes and save the panel to the Xmedia Server.
If saving changes to an existing assets, Xpanel simply saves the panel using the
current name without opening the S
AVE
window.
If you want to save the currently selected panel using another name and/or location,
select the F
ILE
>S
AVE
A
S
menu command. This essentially allows you to create a copy
of the panel using a different name.