Grass Valley Xnews Vertigo Suite v.5.0 User Manual
Page 114
Xnews User Manual
8-7
Clip Assets: Opening and editing the Mark In/Out settings
Overview of the embedded Mark In/Out Editor interface in iNEWS
Figure
and the following descriptions provide an overview of the features and
components of the embedded Mark In/Out Editor that is used by Xnews in iNEWS systems
to set a clip’s trim values.
N
OTE
Unlike the standalone ENPS version (
), the embedded Mark In/Out Editor does not
have the ability to preview the clip’s playout.
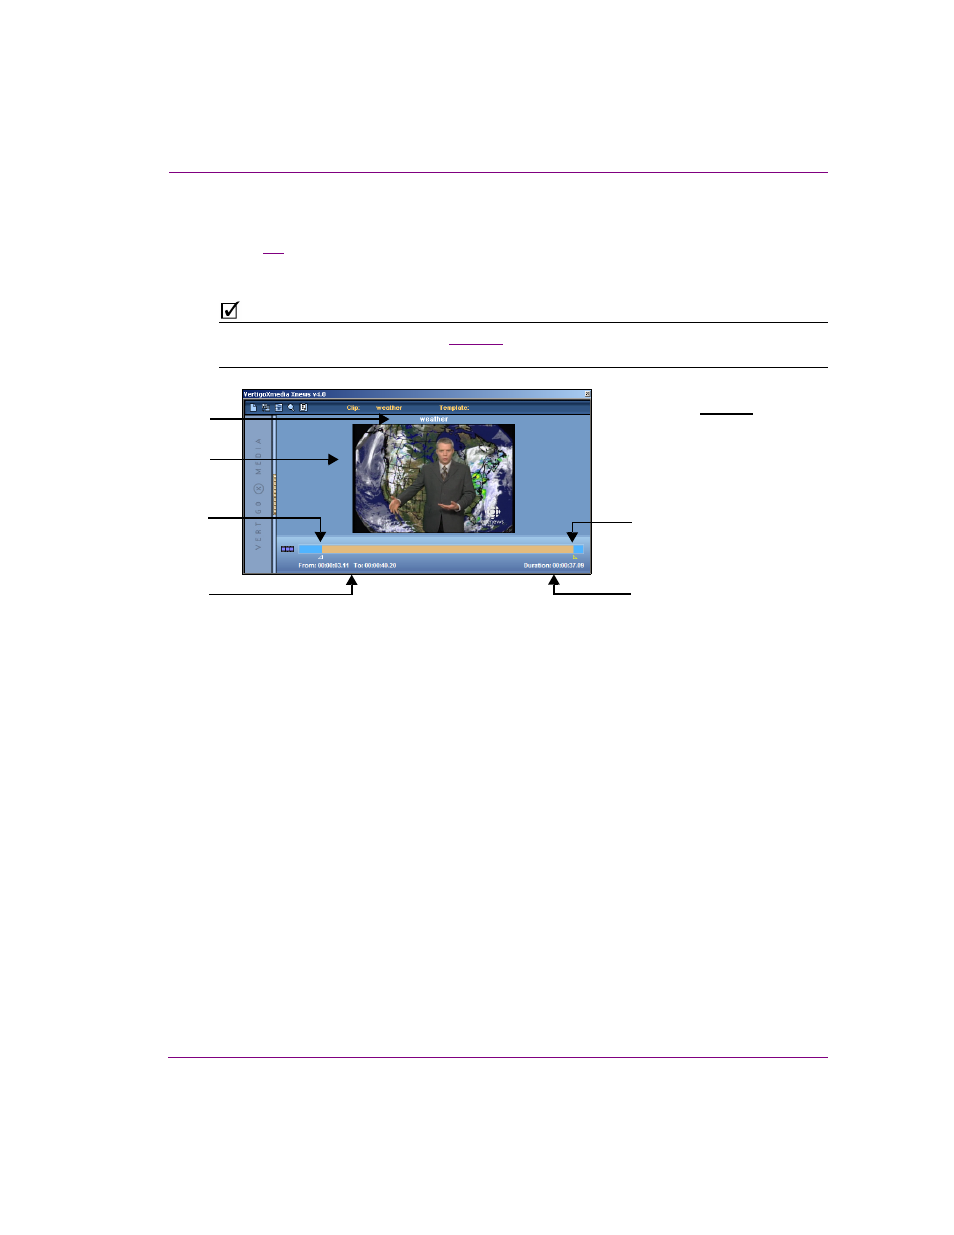
Figure 8-7. The Mark In/Out Editor is embedded in the Xnews interface for iNEWS systems
1.
Clip name: The name of the video clip asset that has been opened appears at the top
of the Mark In/Out Editor window.
2.
Proxy Image: If available, a thumbnail image of a frame within the clip file is displayed
to help visually identify the clip.
3.
Clip Trim In: Dragging the C
LIP
T
RIM
I
N
handle allows you to crop the beginning of the
clip by setting a new location from where the clip will begin to play. The original clip
asset remains unchanged, but the trim setting is applied to the clip in the story. You can
also set the Trim In by placing the current position line (yellow line) on the desired
frame, then right-click and choose the S
ET
T
RIM
I
N
command.
4.
From and To times: Displays the adjusted length of the clip after taking into
consideration the new trim settings. The value displayed is in time code format. The
time reported in the F
ROM
field is where the clip will start from, and the T
O
field
represents the point where the clip will stop playing.
5.
Clip Trim Out: Dragging the C
LIP
T
RIM
O
UT
handle allows you to crop the ending of the
clip by setting a new location where the clip will finish playing. The original clip asset
remains unchanged, but the trim setting is applied to the clip in the story. You can also
set the Trim Out by placing the current position line (yellow line) on the desired frame,
then right-click and choose the S
ET
T
RIM
O
UT
command.
6.
Duration: Displays the total amount of time the clip will take to play out taking into
consideration the new trim settings. The value displayed is in time code format.
1
4
6
Legend
1. Clip Name
2. Proxy image
3. Clip Trim In
4. From & To Times
5. Clip Trim Out
6. Duration
2
3
5