Chapter 4 recording clips – Grass Valley K2 AppCenter v.7.2 User Manual
Page 48
48
K2 AppCenter User Manual
05 April 2010
Chapter 4 Recording clips
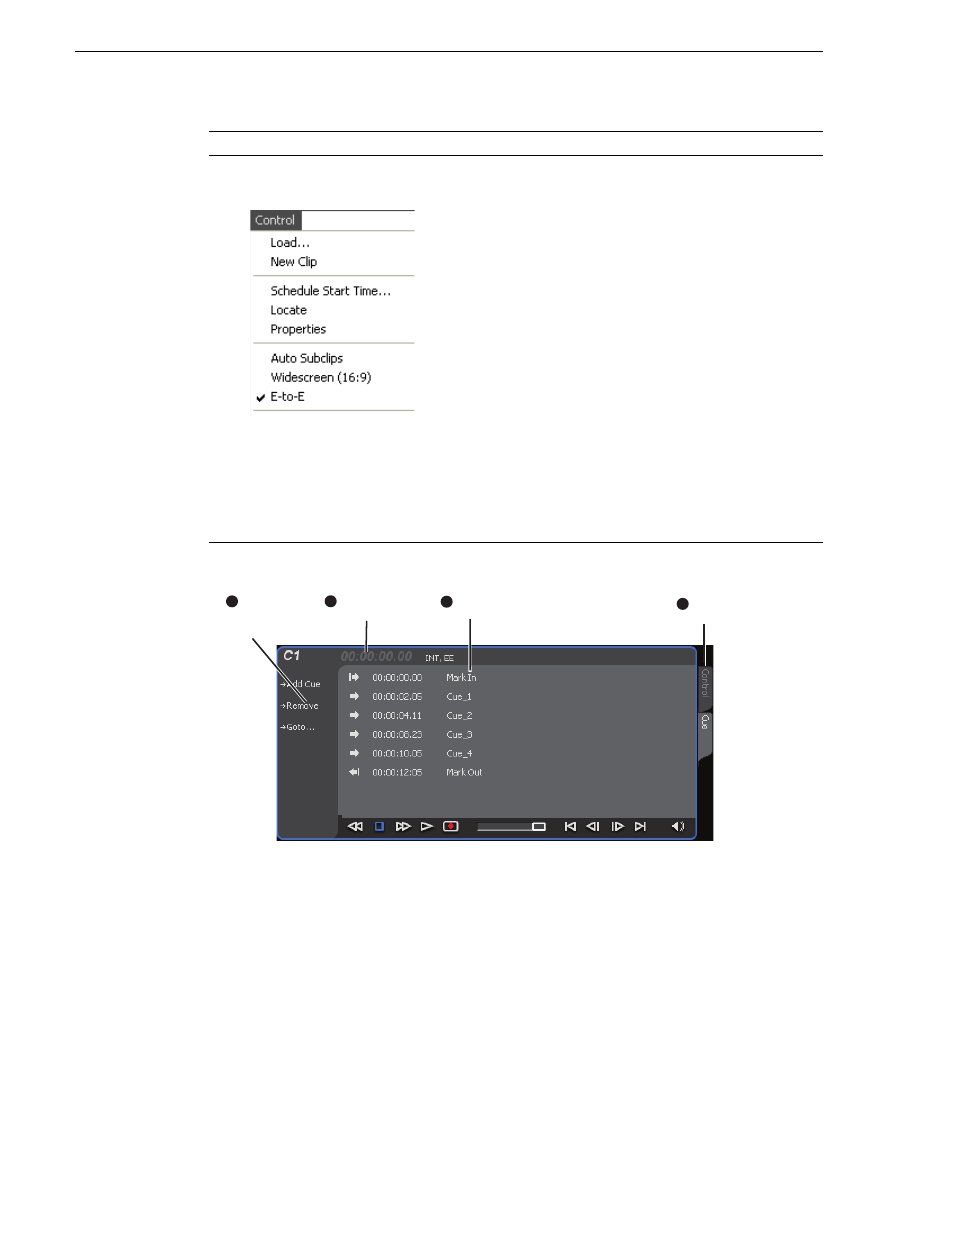
Guide to using the Recorder/Player application: Cue view
Recorder Control Menu
Load Clip– Opens the Load Clip dialog box.
New Clip – Used to create and name clip prior to starting the
recording. If a clip is already loaded, selecting New Clip ejects the
current clip and creates a new one.
Schedule Start Time – Opens the Trigger At entry box so a start time
can be entered.
Locate – Locates the currently loaded clip in the Clips pane.
Properties – Opens the Properties dialog for the currently loaded
clip.
Auto Subclips– The auto subclip check box changes the way that the
subclip mode behaves. When it is NOT checked, clips have to be
accepted manually. When it is checked, a subclip will be created as
soon as you set a mark out.
Widescreen – Sets the channel for recording widescreen format.
(720p and 1080i clips are always recorded in widescreen, whether
this is selected or not.)
E-to-E (LoopThru) mode – When selected, the following occurs:
“EE” is displayed on the channel pane, next to the Timecode Source
indicator; when no clip is loaded, the signal that is currently present
at the channel input is passed through; when a record operation stops
the clip remains in the Recorder. The signal that is currently present
at the channel input passes through (video, audio, and timecode).
Control
Description and User Operation
Mark in/out
Cue List
2
3
4
Assignable
Buttons
(Default buttons
are shown)
1
Current
Timecode
View
Tabs