Gui layout, Myxaml – Wavetronix Click 500 (programmable controller) (CLK-500) - Developer Guide User Manual
Page 132

CHAPTER 11 • CLICK SUPERVISOR SUPPORT 131
GUI Layout
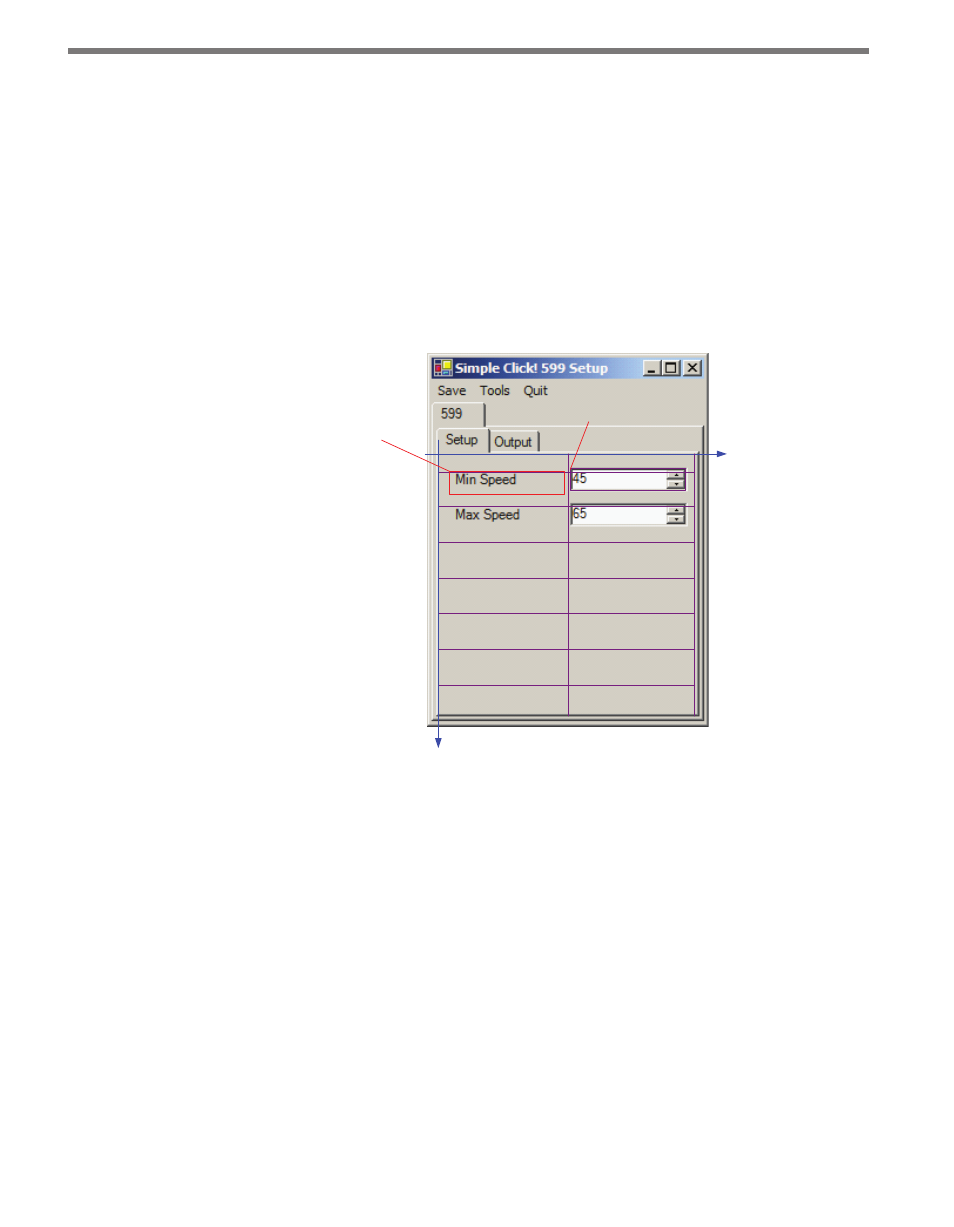
Laying out the controls is simple with a little planning. The controls are placed at locations
based on an x-y coordinate system. The pixel size of the entire Click Supervisor footprint
is 240 by 320.
Since, the origin of the system is in the upper-left corner of the panel associated with the
tab, you will have about 220 by 220 pixels for the layout of the controls.
Allow a small margin between the edges of the panel and your controls. If you arrange the
controls in evenly-spaced rows, the display will appear more organized (see Figure 11.7).
x
y
(0,0)
(0,220)
Location (x=10,y=15)
Size (100,20)
(240,0)
Location (x=110,y=12)
Size (100,20)
(x,15)
(x,45)
(x,75)
(x,105)
(x,135)
(x,165)
(x,195)
ROW 1
ROW 2
ROW 3
ROW 4
ROW 5
ROW 6
ROW 7
(110,y)
(220,y)
Figure 11.7 – GUI Layout Example
Figure 11.7 shows a layout with seven rows for controls. A label for each control can be
placed on the left side of the screen. The control itself can be placed on the right side by
placing the location of the control about 110 pixels from the left (x=100). It may be helpful
to create a mockup of your layout in a design program.
Myxaml
The Myxaml file is the tag-file format that allows you to build your custom GUI without
recompiling Click Supervisor. It is easiest to use an existing Myxaml file as an example and
then modify it for your needs in a text editor. If you are making an Expert driver that uses
all of the system configuration variables, you should copy this entire portion of the file and
then modify the OEM portion of the file.
The following text snippet shows some of the tags used to specify the increment/decrement
