Fig.4 – Kenwood TM-741A User Manual
Page 69
Attention! The text in this document has been recognized automatically. To view the original document, you can use the "Original mode".
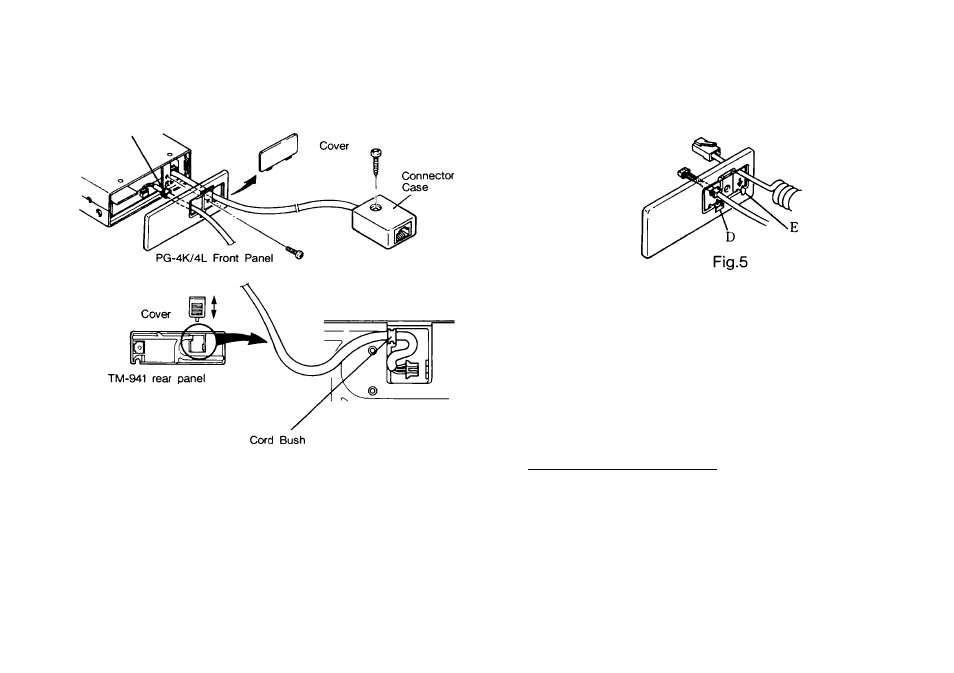
4. Remove the cover on the front of the PG-4K/4L front
panel, and pass the microphone cable and front panel
cable through the opening.(Fig.4)
Cord Bush
Fig.4
5. Connect the PG-4K/4L microphone cable to the
microphone connector. Push the connectors together
until they click. (Fig.4)
6. Attach the PG-4K/4L front panel to the transceiver
with a binding screw and replace the cover. (Fig.4)
7. Fit the cord bushing on the panel cable into the front
panel (Fig.5-D), fix the panel cable, and install the
cover. (Fig.4-A)
8
.
Connect the microphone to the other connector of the
microphone cable. Attach the connector in any
convenient position with a screw.
Slide the small cover off of the front panel unit as
shown in the accompaning illustration.(Fig.4-B)
Gently lift up on the cable near the grommet to
disengage it from the front panel. Then gently pull
the cable assembly to left to disconnect the white 4
pin connector.
Push the white connector on the PG-4K/4L to right
into the front panel socket._______________________
NOTE:
The key on the connector should be up, as shown.
Push the grommet down into its slot, and route the
cable as desired in the slots on the rear of the front
panel. Replace the cover to complete the cabling.
(Fig.4-C)
69