2. ctcss unit (tsu-7), 3. dtmf unit (dtu-2), Ctcss unit (tsu-7) – Kenwood TM-741A User Manual
Page 65: Dtmf unit (dtu-2)
Attention! The text in this document has been recognized automatically. To view the original document, you can use the "Original mode".
INSTALLING OPTIONAL ACCESSORIES
CAUTION
Before installation, be sure to disconnect the DC
power supply, or damage may occur to the
equipment.
7-2. CTCSS UNIT (TSU-7)
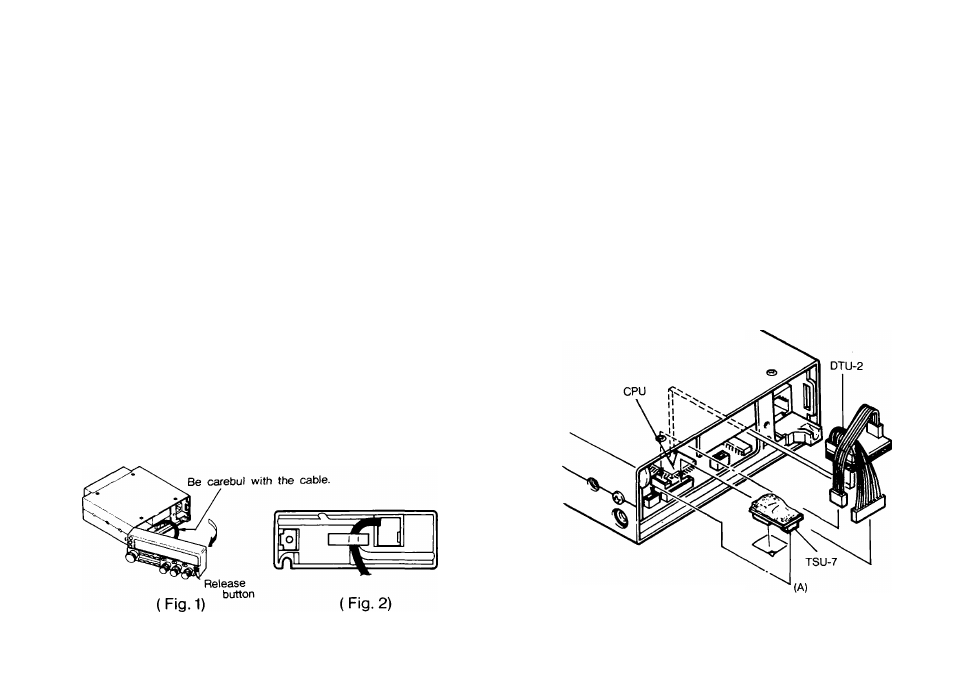
1. Slide the release button on the front panel to the
right. Pull the front panel toward you from the right,
then remove the whole panel unit. Be careful with
the cord connecting the front panel unit to the main
unit. (Fig. 1)
2. Remove the backing from the cushion provided with
the TSU-7 and attach it to the back of the TSU-7 as
shown in Fig. 3.
3. Remove the backing from the other side of the small
cushion. (Fig. 3)
4. Insert the CTCSS connector directly into the TSU-7
connector on the PC board, then gently push it down
until it seats. ( Fig. 3)
5. Replace the front panel back, taking care not to trap
the connecting cord. The connecting cord is easier to
manage when it is put in the groove on the back of the
panel.( Fig. 2)
7-3. DTMF UNIT (DTU-2)
7-3-1. Installation
1. Slide the release button on the front panel to the
right. Pull the front panel toward you from the right,
then remove the whole panel unit. Be careful with the
cord connecting the front panel unit and the main
unit. (Fig. 1)
2. Remove the backing from the cushion provided with
the DTU-2 and attach it to the back of the DTU-2 as
shown in Fig. 3.
3. Use the cable supplied with the DTU-2 and attach the
two connectors to the main unit. (Fig. 3)
4. Attach the DTMF unit to the main unit. ( Fig. 3)
5. Replace the front panel back, taking care not to trap
the connecting cord. The connecting cord is easier to
manage when it is put in the groove on the back of the
panel.(Fig. 2)
(Fig. 3)
65