Panasonic NVS7EG User Manual
Panasonic, Nv-s7, Svusb
Attention! The text in this document has been recognized automatically. To view the original document, you can use the "Original mode".
This manual is related to the following products:
Table of contents
Document Outline
- Panasonic
- \-
- Information for Your Safety Informationen für Ihre Sicherheit Informations relatives à votre sécurité
- Checklist for the Standard Accessories Prüf liste für das mitgelieferte Zubehör Liste des accessoires
- Contents
- Table des matières
- Controls and Functions
- 1 Rewind/Review Button [REW/Q] (P- 38,48,50,92,94)
- 2 Play Button [PLAY] (p. 48,92)
- 3 Fast Forward/Cue Button [Q^FF] (p. 38,50,94)
- 4 Stop Button [STOP] (p. 92)
- 5 Pause Button [PAUSE] (p. 48,94)
- 6 Tracking/Date/Time Shift Button [DATE/TIME SHIFT. TRACKING] (p. 26,92)
- 7 Tracking/Date/Time Set Button [DATE/TIME SET.TRACKING] (p. 26, 92)
- 8 Remaining Tape Time Button [TAPE] (p. 36)
- 1 Rückspul-/Review-Taste [REW/Q] (S. 39, 49, 51,93, 95)
- 2 Wiedergabe-Taste [PLAY] (S. 49, 93)
- 3 Schnellvorlauf-/Cue-Taste [[El/FF] (S. 39,51,95)
- 4 Stop-Taste [STOP] (S. 93)
- 5 Pausentaste [PAUSE] (S. 49,95)
- 6 Spurlage-Reglertaste und Weiterschalt-Taste für Datum-/ Uhrzelt-Einstellung [DATE/TIME SHIFT-TRACKING]
- 7 Einstelltaste für Datum/Uhrzeit [DATE/TIME SET-TRACKING] (S. 27,93)
- 8 Bandrestzeit-Anzeigetaste [TAPE] (S. 37)
- 1 Touche de rebobinage/repérage arrière [REW/@]
- 2 Touche de lecture [PLAY] (p. 49, 93)
- 3 Touche d’avance rapide/repérage avant [(EEYFF]
- 4 Touche d’arrêt [STOP] (p. 93)
- 5 Touche de pause [PAUSE] (p. 49,95)
- 6 Touche de déplacement de l’alignement de la date et de l’heure [DATE/TIME SHIFT-TRACKING] (p. 27, 93)
- 7 Touche de réglage de l’alignement date/heure [DATBTIME SET.TRACKING] (p. 27, 93)
- 8 Touche de temps restant sur la bande [TAPE] (p. 37)
- Controls and Functions (conVd)
- 9 Operation Switch [OPERATE]
- 10 Snapshot Button [SNAPSHOT REC] (p. 54)
- 11 Zoom Buttons [W]/[T] (p. 60,68,74,76,80)
- 12 Shoulder Strap Holders (p. 32)
- 13 Lens Cap (p. 30,46,74,76,98)
- 14 Stereo Microphone
- 15 Fade Button [FADE] (p. 62)
- 16 Date/Time Button [DATE/TIME] (p. 26,28)
- 17 Focus +1- Buttons [FOCUS -t-/—] (p. 80)
- 9 Betriebs-Ein-/Aus-Schalter [OPERATE]
- 10 Schnappschuß-Aufnahmetaste [SNAPSHOT REC] (S. 55)
- 11 Zoom-Tasten [W] und [T] (S. 61,69,75,77, 81)
- 12 Halterungen für Schultertrageriemen (S. 33)
- 13 Objektivdeckel (S. 31,47,75, 77, 99)
- 14 Stereo-Mikrofon
- 15 Ein-/Ausblendtaste [FADE] (S. 63)
- 16 Datum-/Uhrzeit-Einblendtaste [DATE/TIME] (S. 27, 29)
- 17 Scharfeinstell (+)/(-)-Tasten [FOCUS +!-] (S. 81)
- 9 Interrupteur de mode de fonctionnement [OPERATE]
- 10 Touche d'instantané [SNAPSHOT REC] (p. 55)
- 11 Touches de zoom [W]/[T] (P. 61,69,75,77,81 )
- 12 Pattes d’attache de la bandoulière (p. 33)
- 13 Capuchon d'objectif (p. 31,47, 75, 77, 99)
- 14 Microphone stéréo
- 15 Touche de fondu [FADE] (p. 63)
- 16 Touche de la date et de l’heure [DATE/TIME] (p. 27,29)
- Controls and Functions (cont’d)
- 18 Digital Image Stabilizer Button [I. STABILIZER] (p. 42,52)
- 19 Digital Zoom Button [DIGITAL ZOOM] (p. 60)
- 20 Still/Strobe Button [STILUSTROBE] (p. 56,58)
- 21 Focus Button [FOCUS] (p. 78,80)
- 22 White Balance Button [W.B] (p. 72,74,76)
- 23 Iris Close/Open Buttons [IRIS CLOSE]/[IRIS OPEN] (p. 64)
- 24 On-Screen Display/Memory Button [OSD/M] (p. 38,40)
- 25 Reset Button [RESET] (p. 38)
- 26 S-VHS/Tape Speed Selector Button [S-VHS/SP • LP]
- 27 Shutter Speed Select Button [SHUTTER] (p. 70)
- Controls and Functions (cont’d)
- 28 DC Input Socket (p. 22)
- 29 Start/Stop Button (p. 46,48,52, 56,58,62,68,82,84)
- 30 Cassette Compartment Opening Knob (p. 34,46,48,92, 98)
- 31 Grip Belt (p. 30)
- 32 Cassette Eject Button [EJECT] (p. 34)
- 33 Digital Mode Cover (p. 54, 66,82, 84)
- 34 Gain Button [GAIN UP](p.66)
- 35 Digital Wipe Button [WIPE] (p. 82)
- 36 Digital Mix Button [MIX] (p. 84)
- 37 Digital Start Button [START] (p. 82,84)
- 28 Gleichstrom-Eingangsbuchse (S. 23)
- 29 Aufnahme-Start-ZStop-Taste
- 30 Cassettenfach-Öffnungsknopf (S. 35,47,49, 93, 99)
- 31 Handgriff-Riemen (S. 31)
- 32 Cassettenauswurftaste [EJECT] (S. 35)
- 33 Digital-Betriebsart-Schieber (S. 55, 67, 83, 85)
- 34 Aufhellungs-Taste [GAIN UP] (S. 67)
- 35 Digital-Rollschnitt-Taste [WIPE] (S. 83)
- 36 Digital-Misch-Taste [MIX] (S. 85)
- 37 Digital-Start-Taste [START] (S. 83, 85)
- 28 Prise d’entrée CC(p. 23)
- 29 Touche marcheZarrêt (p. 47,49, 53, 57, 59, 63, 69, 83,85)
- 30 Bouton d’ouverture du logement de la cassette (p. 35,47,49, 93, 99)
- 31 Courroie de poignée (p. 31 )
- 32 Touche d’éjection de la cassette [EJECT] (p. 35)
- 33 Cache du mode numérique (p. 55,67,83,85)
- 34 Touche de gain [GAIN UP] (p. 67)
- 35 Touche numérique de fondu effacé [WIPE] (p. 83)
- 36 Touche de mixage numérique [MIX] (p. 85)
- 37 Touche de mise en circuit de la fonction numérique [START] (p. 83,85)
- Controls and Functions (cont’d)
- 38 Mode Selector Switch (p. 64,70,74,76,78,80)
- 39 Video Output Socket (p. 86,88,96)
- 40 RF DC Output Socket (p. 88)
- 41 Audio Output Socket (p. 86,88,96)
- 42 Eyepiece Corrector Ring (p. 28)
- 43 Eyecup (p. 28,98)
- 44 Viewfinder (p. 28,46,98)
- 45 Cassette Compartment (p. 34)
- 46 External Microphone Socket
- 47 S-Video Output Socket (p. 86,96)
- 48 New Edit Socket (p. 96)
- 49 Tripod Receptacle
- 50 Button Type Battery Holder (p. 24)
- 46
- 47
- 48
- 38 Betriebsart-Wahlschalter (S. 65,71,75, 77, 79,81)
- 38 Sélecteur de mode (p. 65, 71, 75, 77, 79, 81 )
- 39 Prise de sortie vidéo (p. 87, 89, 97)
- 40 Prise de sortie HF CC (p. 89)
- 41 Prise de sortie audio (p. 87, 89, 97)
- 43 Oeilleton (p. 29, 99)
- Viseur électronique (p. 29,47, 99)
- Logement de la cassette (p. 35)
- Prise de micro extérieur
- Prise de sortie S-Vidéo (p. 87,97)
- Prise de post-synchronisation (p. 97)
- 50 Support de pile-bouton (p. 25)
- S-VHS Format
- Compatibility of VTRs and Tapes
- Das S-VHS Videoformat
- Le format S-VHS
- Kompatibilität von Videorecordern und Cassetten
- Compatibilité des magnétoscopes et des cassettes
- Using the Battery Pack
- 1) Charge the Battery Pack
- Press the rear portion down until it iocks with a click.
- O Connect the Power Cable of the AC Adaptor to the mains.
- Note:
- ■ Charging Time and Maximum Time for Continuous Shooting
- ■ To Eject the Battery Pack...
- Slide the Battery Eject Lever in the direction of the arrow and...
- Remove the Battery Pack.
- Notes:
- 1) Charge the Battery Pack
- Verwendung des Akkus
- Le bloc-batterie
- Using the Battery Pack (cont’d)
- Verwendung des Akkus (Fortsetzung)
- Le bloc-batterie (suite)
- ■ Fonction de décharge^ recharge
- Fixer ie bioc-batterie à i’adaptateur CA.
- Das Netzkabei des Netzadapters ans Netz anschiießen.
- O Die Entlade-» Lade-Taste länger als 1 Sekunde gedrückt halten.
- ■ Wenn der Aufladevorgang beendet ist. erlischt die Ladeanzeigelampe ©.
- ■ Verwendung der Ladezustand-Markierung
- Brancher le câble de l’adaptateur sur le secteur.
- vJ Appuyer sur la touche de décharge^ recharge pendant plus d’une seconde.
- ■ Lorsque la recharge est terminée, le témoin de recharge © s'éteint.
- ■ Repère de confirmation de recharge
- Using the Battery Pack (cant'd)
- Using the AC Adaptor or the Car Battery Cord (optional)
- Verwendung des Akkus (Fortsetzung)
- Verwendung des Netzadapters oder des Auto-/Boots-Akku- Anschlußkabels (Sonderzubehör)
- Le bloc-batterie (suite)
- Uadaptateur CA et le cordon pour batterie de voiture (en option)
- Setting the Clock
- Einstellen der Uhrzeit
- Réglage de l’horloge
- Setting the Clock (conVd)
- Réglage de l’horloge (suite)
- Recording the Date and Time during Shooting
- Extending the Viewfinder/Adjustihg the Eyepiece Corrector
- Adjusting the Grip Beit/Removing the Lens Cap
- Verstellen des Handgriff-Riemens/ Abnehmen des Objektivdeckels
- Réglage de la courroie de poignée! Comment enlever le capuchon de l’objectif.
- Attaching the Shoulder Strap
- Adjusting the Angle of the Viewfinder
- Befestigen des
- Schultertrageriemens
- Comment fixer ia bandouiière
- Réglage de l’angle du viseur électronique
- Inserting the Video Cassette
- Preventing Accidental Erasure of Recordings
- Einsetzen einer Videocassette
- Comment introduire la cassette vidéo
- Schutz einer Aufnahme vor unbeabsichtigtem Löschen
- Comment éviter que des enregistrements ne soient effacés accidenteliement
- Confirming the Remaining Tape Time
- Kontrollieren der Bandrestzeit
- Confirmation du temps restant sur la bande
- Using the Tape Counter Indication
- Benutzung der Bandzählwerk- Anzeige
- Indication du compteur de bande
- Using the On-Screen Display Function
- Index Signais (VISS)
- Benutzung der Anzeigeneinblend- Funktion im Sucher
- Fonction d’affichage sur l’écran
- Index-Signale (VISS)
- Les signaux d’index (ViSS)
- Holding the Movie Camera for Shooting
- Halten des Kamerarecorders beim Aufnehmen
- Comment tenir le caméscope
- Holding the Movie Camera for Shooting (contd)
- Halten des Kamerarecorders beim Aufnehmen (Fortsetzung)
- Comment tenir le caméscope (suite)
- Shooting
- ■ How to Shoot from the Beginning of the Video Cassette.
- 1 Fold up the Viewfinder.
- 2 Attach the charged Battery Pack.
- 3 Press and slide to “CAMERA”.
- 4 Insert a cassette with intact erasure prevention tab.
- Extend the Viewfinder.
- S-LP”, “SP’
- 6 Press to select “S-SP’ or “LP”.
- / Remove the Lens Cap.
- 8 Press the Start/Stop Button.
- Aufnehmen
- Comment filmer une séquence
- Shooting with Clean Edits
- Überprüfen einer aufgenommenen Szene
- Comment vérifier les séquences enregistrées
- Auf nehmen mit sauberen Szenenübergängen
- Comment faire des reprises naturelles
- Searching for a Previously Shot Scene
- Wiederauffinden einer früher aufgenommenen Szene
- Comment retrouver une séquence déjà enregistrée
- Shooting with the Digitai Image Stabilizer Function
- Auf nehmen mit der Bildstabilisator- Funktion
- Taking a Snapshot
- Auf nehmen einer Schnappschuß- Aufnahme
- Enregistrement d’instantanés
- Shooting a Still Picture
- Auf nehmen einer Standbild- Aufnahme
- Enregistrement d’images fixes
- Shooting with Strobe Effect
- Aufnehmen mit Stroboskop-Effekt
- L’effet stroboscopique
- Shooting with the Zoom Function
- Auf nehmen mit Zoomen
- Prise de vues en zoom
- Shooting with the Fade Function
- Auf nehmen mit Ein- und Ausbienden
- La fonction d’ouverture et fermeture en fondu
- Shooting Landscapes at Dusk or Other Evening Scenes
- Shooting Backiit Scenes
- Using the Iris Adjustment Function
- 1 Set the Mode Selector Switch to “MANUAL”.
- ^ Press either Button.
- Den Betriebsart-Wahlschalter auf „LOW LIGHT“ stellen.
- Placer le sélecteur de mode sur “LOW LIGHT”.
- 1 Den Betriebsart-Wahlschalter auf „MANUAL“ stellen.
- ^ Eine der beiden Tasten drücken.
- 1 Placer le sélecteur de mode sur “MANUAL”.
- ^ Appuyer sur Tune des deux touches.
- Shooting in the Dark
- Aufnehmen im Dunkeln
- Prise de vues dans l’obscurité
- Shooting with the Macro Function
- Auf nehmen mit der Makro-Funktion
- La fonction macro
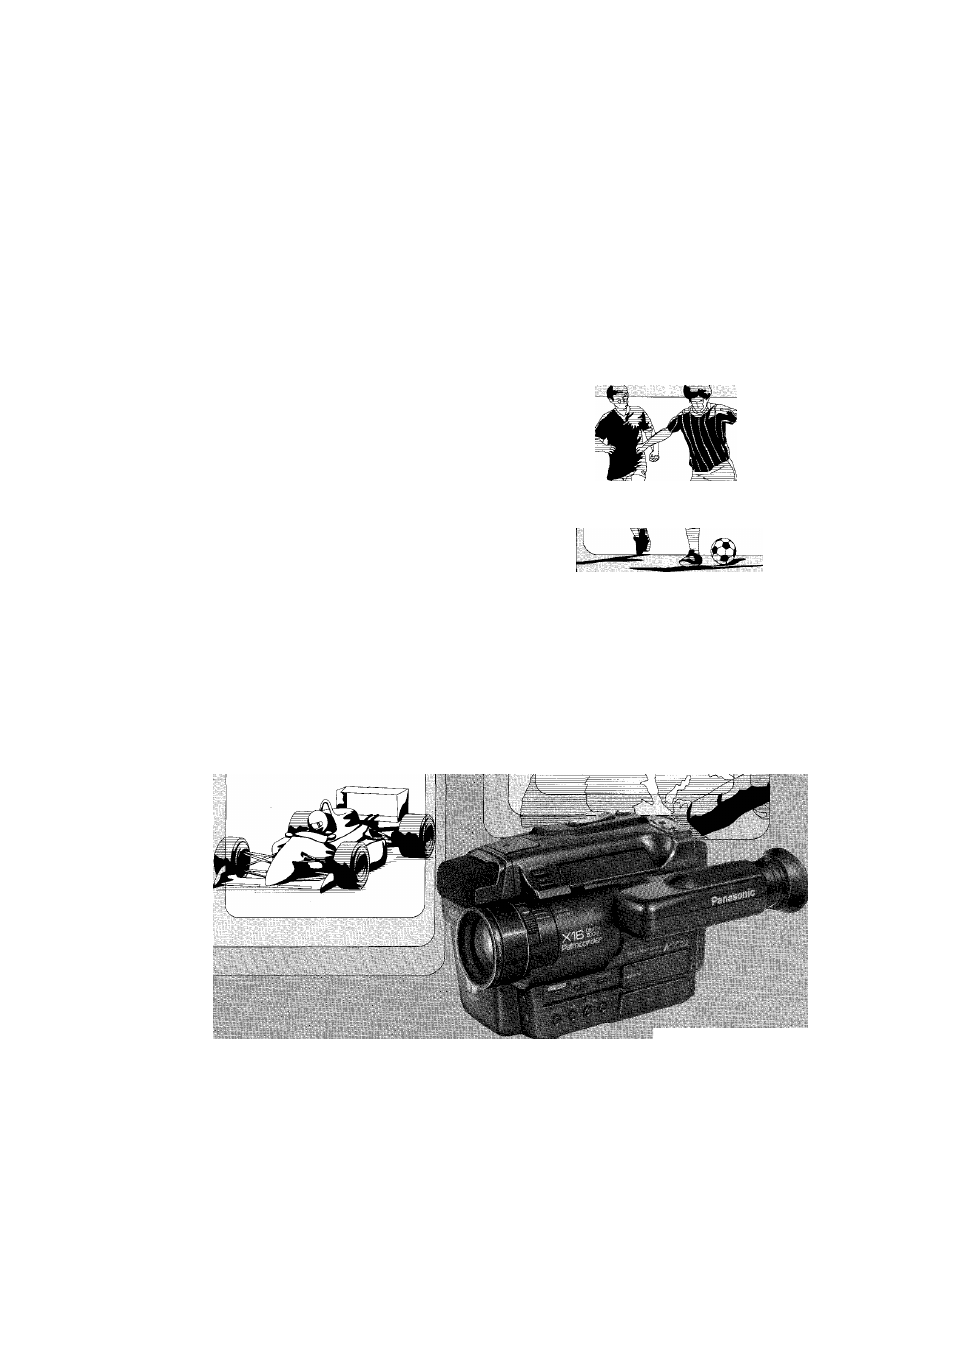
- Shooting Fast-Moving Subjects
- Auf nehmen von Motiven mit schneiier Bewegung
- Comment fiimer des sujets se dépiaçant rapidement
- Automatic White Baiance Adjustment
- Automatischer Weißabgleich
- Réglage automatique de la balance des blancs
- Manual White Balance Adlustment
- Using the Manual White Balance Adjustment Function
- 1 Attach the Lens Cap to the Lens.
- 2 Set to “MANUAL”.
- 3 Keep pressed until the screen in the Viewfinder becomes completely white.
- Keep pressed for more than 1 second.
- Manueller Weißabgleich
- Réglage manuel de la balance des blancs
- utilisation du régiage manuei
- Using the Manual White Balance Adjustment Function
- 1 Set to “MANUAL”.
- 2 Remove the Lens Cap.
- 3 Point the Movie Camera at a some white paper or at some other pureiy white object.
- 4 Keep pressed untii the screen in the
- Viewfinder becomes completeiy white''.'
- 5 Keep pressed for more than 1 second.
- Manueller Weißabgleich (Fortsetzung)
- Réglage manuel de la balance des blancs (suite)
- Focusing
- Scharfeinstellung
- Mise au point
- Focusing (cont’d)
- Scharfeinstellung (Fortsetzung)
- Mise au point (suite)
- Inserting a Still Picture with Wipe Editing
- Einfügen eines Standbiides mit der Funktion „Wipe“ in eine iaufende Aufnahme
- Comment insérer une image fixe en fondu effacé
- Fading Over or Superimposing a Stiii Picture onto the Moving Picture
-
- Benutzung der Funktion „Digital Image Mix“
- 1 Den Schieber ganz nach links schieben, bis er hörbar einrastet.
- ^ Drücken.
- Drücken.
- 1 Faire glisser le cache vers la gauche jusqu’au verrouillage, signalé par un déclic.
- 2 Appuyer.
- Appuyer.
- H Drücken.
- 5 Erneut drücken.
- Appuyer.
- O Appuyer à nouveau.
- Playback via a TV Set (Connections)
- Wiedergabe über ein Fernsehgerät (Anschlußverbindungen )
- Lecture sur téléviseur (branchements)
- Playback via a TV Set (cont’d)
- Wiedergabe über ein Fernsehgerät (Fortsetzung)
- Lecture sur téléviseur (suite)
- Playback on a Video Tape Recorder
- (VTR)
- Using the Supplied Cassette Adaptor
- 1 Push the Cover upward and remove it.
- 2 Insert the supplied battery and reattach the Covers
- 3 Slide the Open Button.
- 4 Insert the recorded Compact Video Cassette and close the Top Cover.
- 5 Insert the Cassette Adaptor into your VTR.
- 6 Start the piayback operation of the VTR.
- Wiedergabe auf einem Heimvideorecorder
- Lecture sur magnétoscope
- utilisation de l’adaptateur de cassette
- Playback
- •The recorded tape can be played back in the Viewfinder or on a connected TV set.
- 1 Insert the recorded video cassette.
- 2 Press and slide to “VTR”.
- 3 Press.
- 4 Press.
- J Press both the [< TRACKING] and [TRACKING ►] Buttons simultaneously.
- Eliminate any noise bars by adjusting the tracking with the [◄ TRACKING] or [TRACKING ►] Button.
- Wiedergabe
- Lecture
- Playback (Confd)
- Wiedergabe (Fortsetzung)
- Lecture (suite)
- Repérage avant et arrière et arrêt sur image pendant la lecture normale
- Le repérage avant
- Appuyer et maintenir enfoncé.
- . Gedrücktheiten.
- . Appuyer et maintenir enfoncé.
- ö Drücken.
- Drücken, um das Band mit hoher Geschwindigkeit vorzuspulen.
- Drücken, um das Band mit hoher Geschwindigkeit zurückzuspulen.
- 0 Appuyer.
- Appuyer pour faire défiler la bande en avant à grande vitesse.
- Appuyer pour faire défiler la bande en arrière à grande vitesse.
- Copying (Dubbing)
- Überspielen (Kopieren)
- Repiquage (copie de bande à bande)
- After Use
- Cleaning
- Nach dem Gebrauch
- Après la prise de vues
- Reinigung
- Nettoyage du viseur électronique
- VITCSignals
- VITC-Signale
- Les signaux VITC
- Cautions
- Cautions (conVd)
- Vorsichtsmaßnahmen
- Vorsichtsmaßnahmen
- (Fortsetzung)
- Précautions
- Précautions (suite)
- Before Requesting Service
- Vor Inanspruchnahme des Kundendienstes
- Avant de faire appel à un technicien
- Quick Reference Guide to the Indications in the Viewfinder
- Quick Reference Guide to the indications in the Viewfinder (cont’d)
- Übersicht über die Anzeigen im Suchermonitor (Fortsetzung)
- Indications dans ie viseur électronique (suite)
- Specifications
- NV-S7^G, E
- Power Source;
- Video Recording System: Tape Speed:
- TapeFormat: Recording/Piayback Time:
- VIDEO
- Output Level:
- AUDIO
- Viewfinder:
- Video Horizontal Resolution Colour:
- Signal-to Noise Ratio:
- Audio Frequency Response:
- VW-AS1E
- Power Source:
- Technische Daten
- Spécifications
- Optional Accessories Sonderzubehör-Sortinient Accessoires en option
- Warning!Alarm Indications in the Viewfinder Warn- und Alarm-Anzeigen im Suchermonitor Indications d’avertissement!alarme dans le viseut électronique
- \-