Installing tape drives – Dell PowerVault 160T LTO2 (Tape Library) User Manual
Page 11
Getting Started: Dell PowerVault 160T Tape Library User's Guide
file:///C|/Users/greshma_dhanarajan/Desktop/ug/getstart.htm[5/16/2013 10:08:14 AM]
Installing Tape Drives
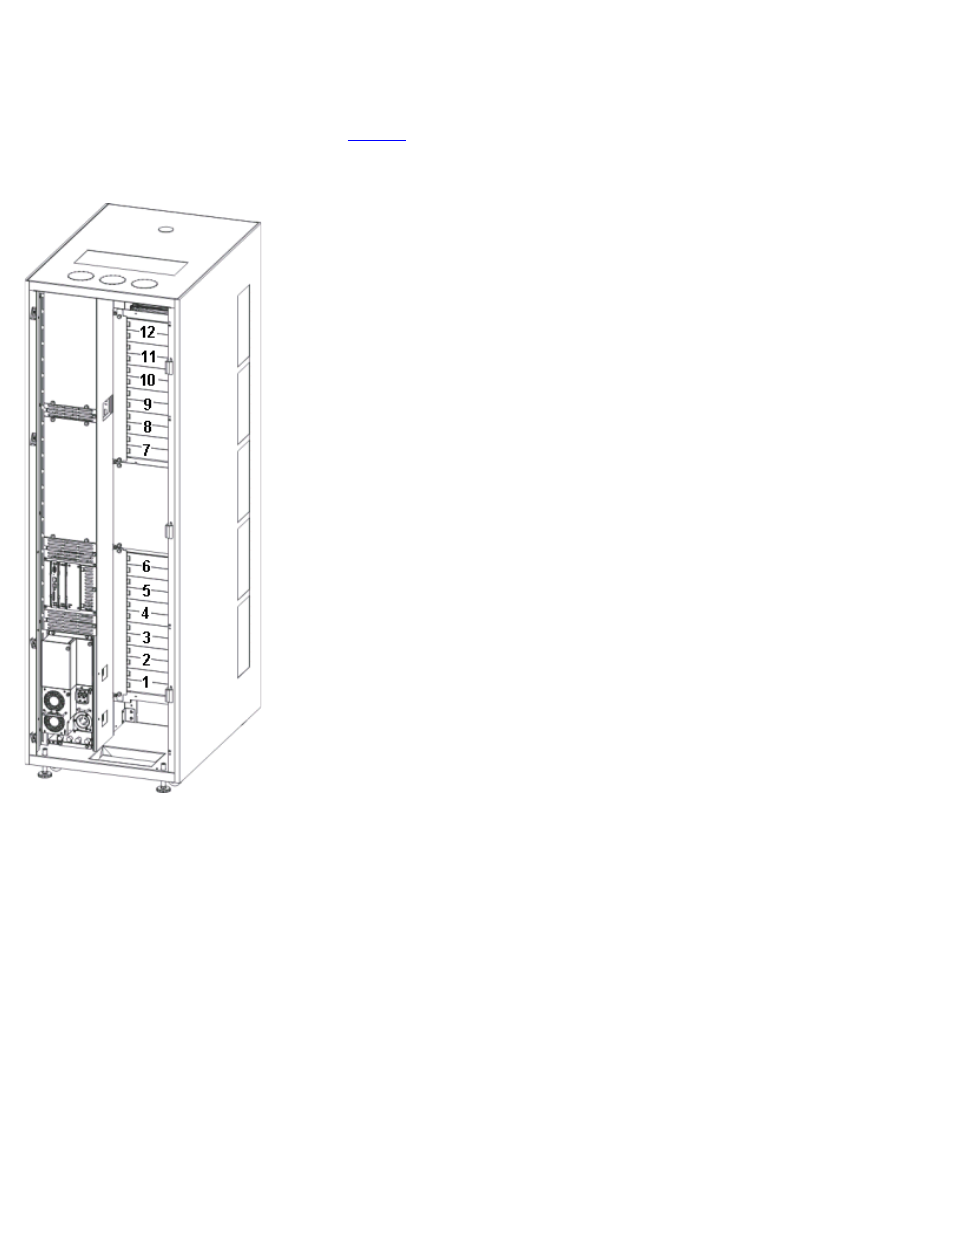
The library can contain up to 12 full-height and 24 half-height tape drives. Tape drives should be added moving bottom to
top starting with the lower drive cluster (see
). When the lower drive cluster is filled, begin adding tape drives to the
bottom position in the upper drive cluster.
Figure 3. Drive Installation Locations
Required tools: 2.5 mm hex wrench, Phillips screwdriver
1. Open the front door.
2. Using a 2.5 mm hex wrench, unscrew the retaining screws (2 screws per plate) that secure the cover plate(s) over the
target drive slot.
3. Close the front door.
4. Open the back door.
5. In the corresponding drive location, using the Phillips screwdriver or your fingers, unscrew the one retaining
thumbscrew and remove the corresponding drive cover plate(s).
6. Using the markings on the drive slot, install the drive slowly so the guide rails engage. The installed drive should be
flush with no gaps above or below it.
Use the bottom of the empty drive cluster as a guide if you are installing a drive in the Drive 1 or Drive 7 position. If a
drive is installed below the slot where you are adding a drive, use the top of the drive below as a guide. For example, if
you are adding a drive in Drive 9, use the drive in Drive 8 as a guide.
Figure 4. Fibre Channel Tape Drive