Entering stitch data – Brother PC 6500 User Manual
Page 82
79
Note
Make sure that the embroidery unit is not attached.
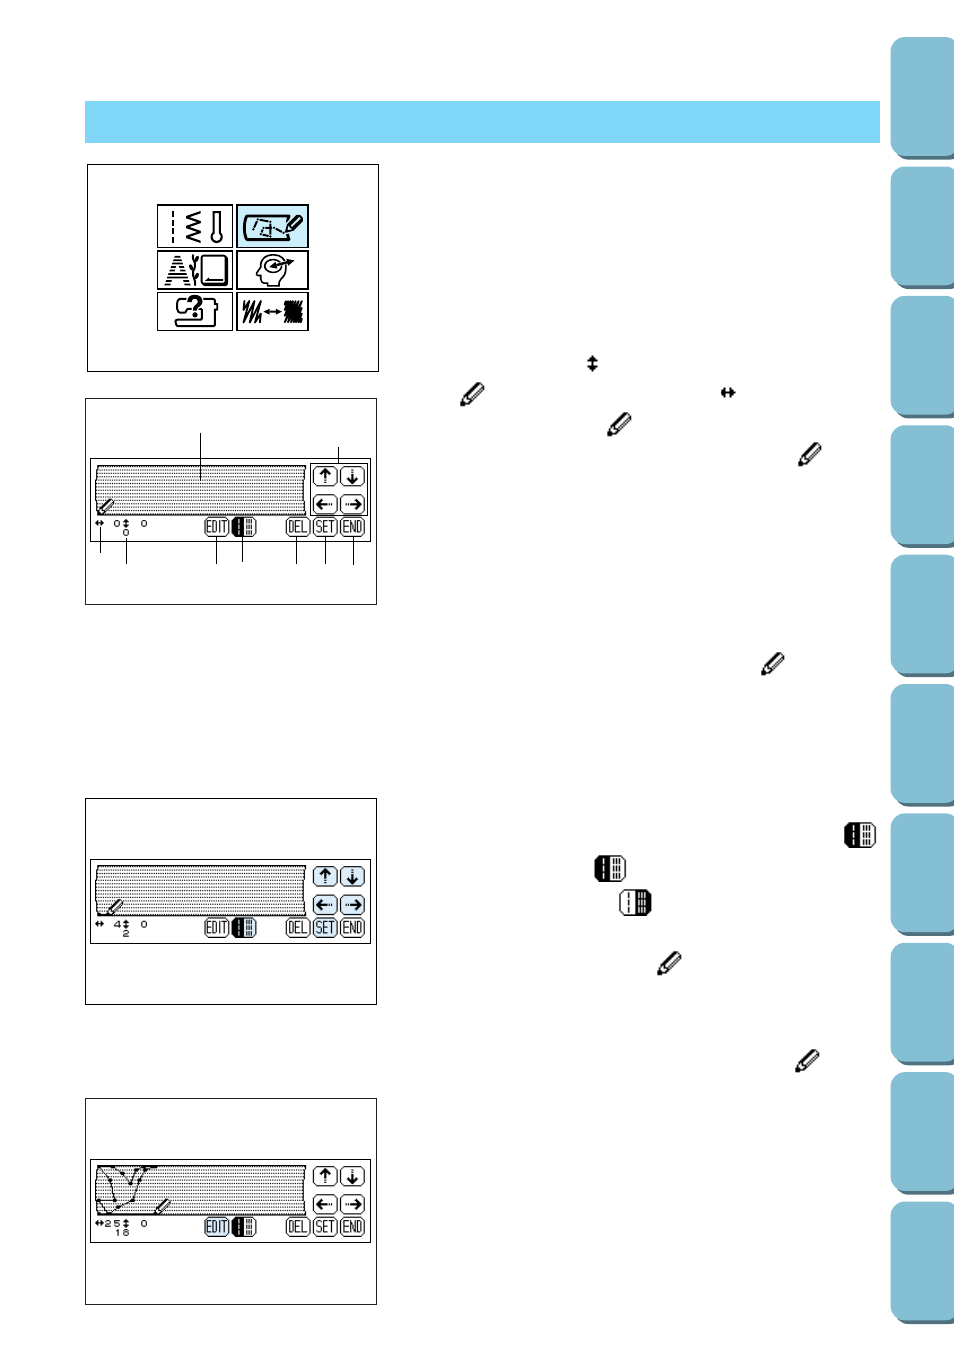
1. Press the MY CUSTOM STITCH key.
1
MY CUSTOM STITCH key
1
This area displays the stitch that is being created.
2
The number beside
indicates the y coordinate of the tip
of
, and the number beside
indicates the x
coordinate of the tip of
.
3
This number indicates the point indicated by
within
the stitch design.
4
Press this key to display a screen that allows you to change
a set point. (Refer to page 81 for more details.)
5
Press this key to select whether one stitch or three stitches
are sewn between two points.
6
Press this key to erase the last point that has been set.
7
Press this key to add the point indicated by
.
8
Press this key to finish creating the stitch and display the
screen that allows you to see the entered stitch. (Refer to
3. Select whether one stitch or three stitches will be sewn
between the first two points.To sew one stitch, press
so that it appears as
; to sew three stitches, touch the
key so that it appears as
.
4. Use the arrow keys to move
to the coordinates of the
first point that was made on the grid sheet (from step 2 on
5. Press the SET key to add the point indicated by
.
6. Repeat steps 3 through 5 for each point that you have
drawn on the grid sheet until the stitch design is drawn on
the screen as a continuous line.
Note
If you make a mistake while setting points, press the DEL key to
erase the last point set.
7. Once you have finished entering the stitch data, press the
END key.
ENTERING STITCH DATA
1
1
2
3
4 5
9
6 7 8