Needle, Checking the needle changing the needle, Changing the needle – Brother PC 6500 User Manual
Page 23: Checking the needle
20
NEEDLE
Changing the needle
6
A 75/11 needle is installed in the machine when you purchase it.
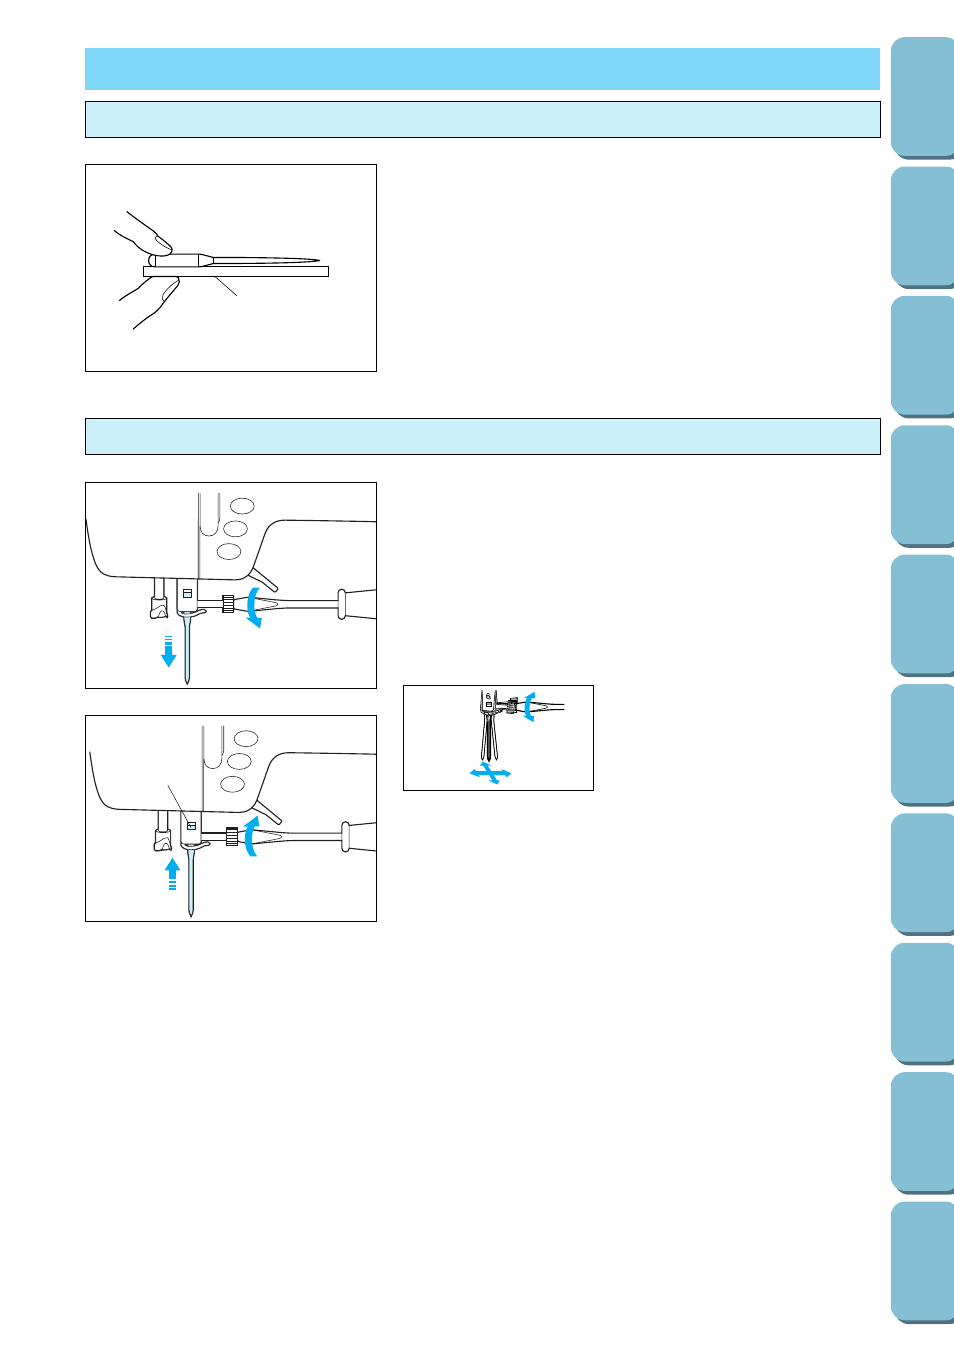
1. Press the needle position button to raise the needle.
2. Turn off the sewing machine and lower the presser foot
lever.
3. Loosen the needle clamp screw with a screwdriver.
4. Pull out the needle.
CAUTION
Do not apply a strong force when
loosening or tightening the
needle clamp screw, otherwise
certain parts of the machine may
be damaged.
5. With the flat side of the needle facing toward the back, insert
the needle as far up as possible so that it touches the
needle stopper. Fasten the screw securely with a
screwdriver.
1
Needle stopper
6. Turn the sewing machine on.
Checking the needle
1
Place the flat side of the needle on a flat surface and check that
the needle is not bent up, down, or to either side. If the needle
is bent, it should be thrown away to prevent damage to your
project or to the machine.
1
Flat surface (needle plate, glass, ruler, etc.)
6
1