Allied Telesis AT-SBx81CFC960 User Manual
Page 173
SwitchBlade x8106 Chassis Switch and AT-SBx81CFC960 Card Installation Guide
Section II: Installing the Chassis
173
Powering On the AT-SBxPWRSYS1 AC System Power Supply
The procedure in this section explains how to power on the AT-
SBxPWRSYS1 AC Power Supplies in slots C and D on the front panel. If
you have not installed the power supplies, refer to “Installing the AT-
SBxPWRSYS1 AC System Power Supply” on page 109 for installation
instructions.
Note
If the chassis has both AT-SBxPWRSYS1 and AT-SBxPWRPOE1
Power Supplies, you may power on the power supplies in any order
or simultaneously.
To power on the chassis, perform the following procedure:
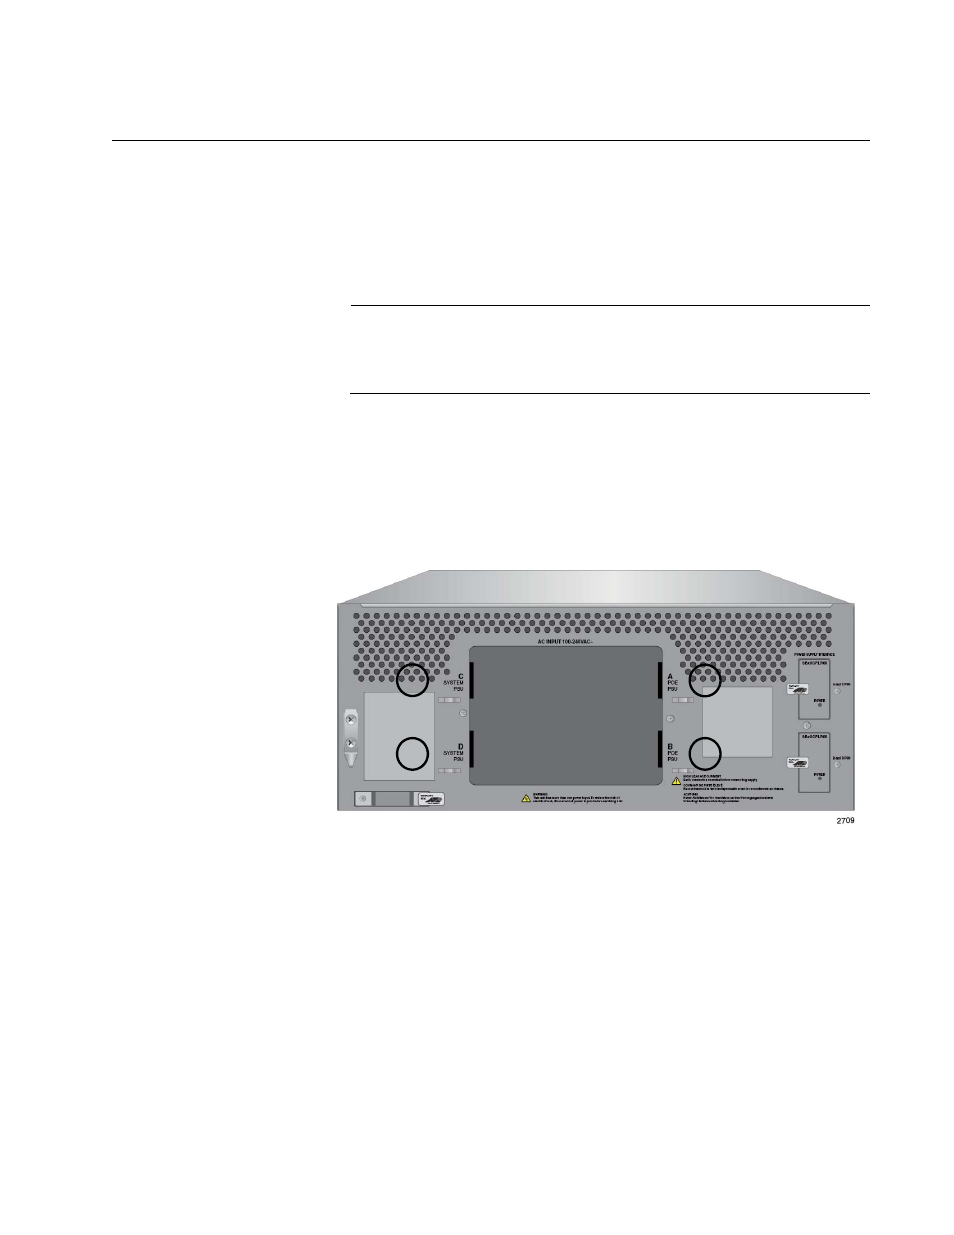
1. Identify AC sockets C and D in the recessed panel on the back panel
of the chassis, shown in Figure 113. These sockets are for the AT-
SBxPWRSYS1 System Power Supplies in slots C and D on the front
panel of the chassis.
Figure 113. AC Sockets on the Rear Panel of the AT-SBx8106 Chassis
2. Plug the AC power cord that comes with the power supply into a plug
whose corresponding slot on the front panel has a system power
supply.
If there are two system power supplies, you may power on either
supply first. In the illustration in Figure 114 on page 174 an AC power
cord is connected to connector D for the system power supply in slot D
on the front panel.
A
D
C
B