Cm ad e in u sa – Campbell Scientific CR10X Measurement and Control System User Manual
Page 227
SECTION 14. INSTALLATION AND MAINTENANCE
14-11
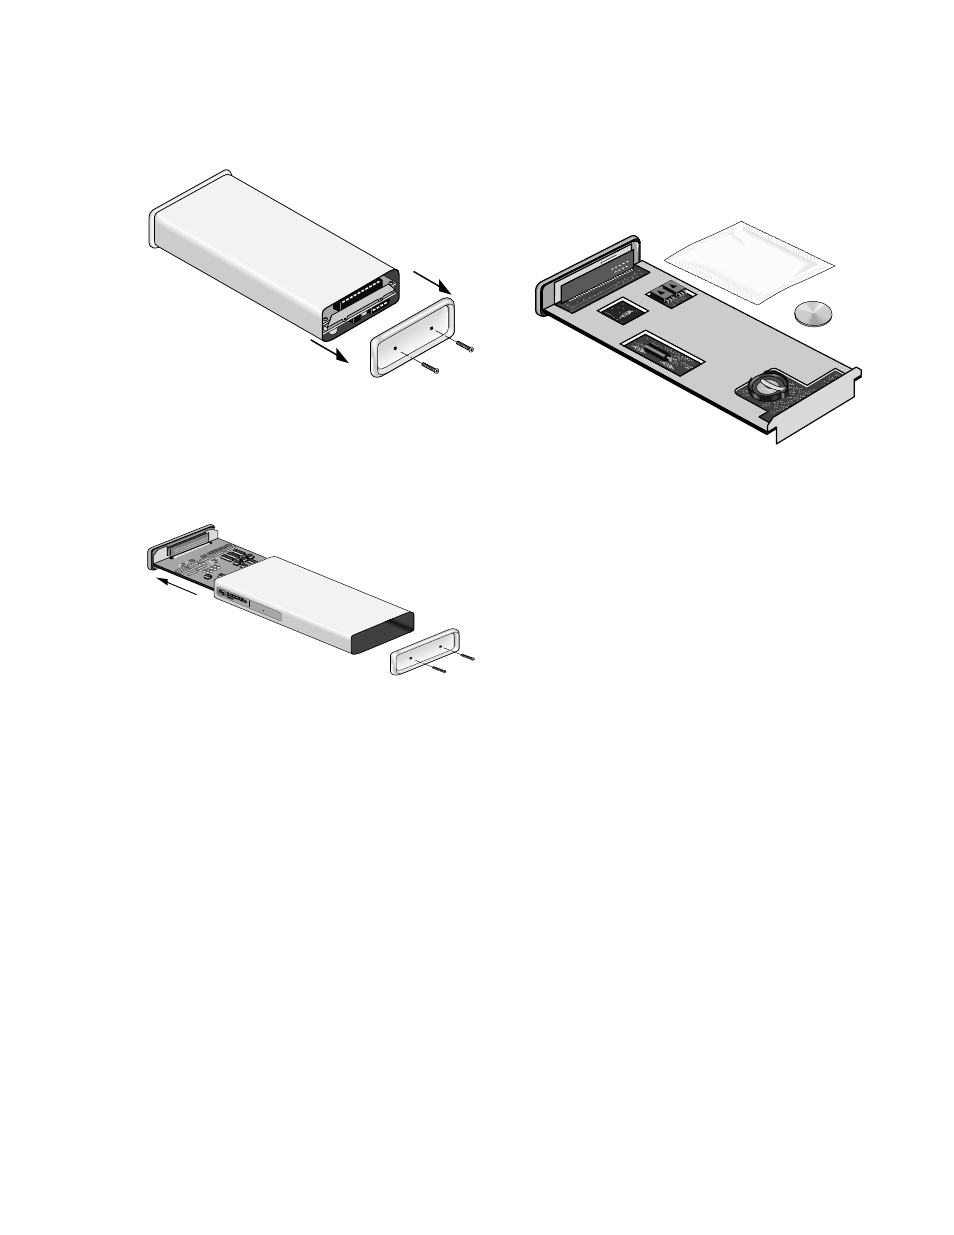
Remove the 2 screws holding on the end cap
without the connectors, and the end cap itself.
FIGURE 14.11-2. Removing End Cap
Hold the can and by pressing on the end of the
circuit board exposed when the end cap was
removed, press out the circuit board.
CR10X
M
EA
SU
RR
EM
EN
T A
ND
C
ON
TR
OL
M
OU
LE
firm
wa
re 1
98
3, 1
98
6, 1
99
5
S/N: X 1020
C
M
AD
E IN
U
SA
FIGURE 14.11-3. Removing Circuit Board
from Case
The coin cell is held in place by a spring clamp.
It can be removed by grabbing the edge of the
cell with your fingers or by inverting the circuit
board and lifting the spring clip with a fingernail
until the cell falls out.
DESI PAK
SPE
CIFICATIO
N MIL-D-3464 TYPE &
II
REACTIVA
TIO
N TIME IN GA
B 16 HOURS AT 250 F
0
DESICCANT
ACTIVATED
BAGG
ED FOR
CONTENTS
1/6
UNIT
PACKAG
E USE
AND STATIC
DEHUM
IDIFICATIO
N
DO NOT E
AT
UN
ITED
DES
ICCANTS
-GATES
P.O. BOX 105 BELEN, NEW
MEXICO 87002
DESI PAK
SPECIFICATIO
N MIL-D-3464 TYPE &
II
REACTIVATIO
N TIME IN GAB 16 H
OU
RS AT 250 F
0
DESICCANT
ACTIVATED
BAGGED FOR
CONTENTS
1/6
UNIT
PACKAGE USE
AND STATIC
DEHUMIDIFICATION
DO N
OT E
AT
UN
ITED
DES
ICCANTS
-GATES
P.O
. BO
X 105 BELEN, NEW
MEXICO 87002
FIGURE 14.11-4. CR10X Lithium Battery
Location
The new cell is slipped into place under the clip,
the negative side toward the circuit board and
the positive side touching the clip. Replace the
desiccant taped to the circuit board holder with
a fresh packet before reassembling the CR10X.