Mounting the charge controller, Installation – Outback Power Systems FLEXmax 80 Owners Manual User Manual
Page 11
Installation
900-0009-01-00 Rev
C
9
Mounting the Charge Controller
IMPORTANT:
Install the FLEXmax in an upright position out of direct sunlight.
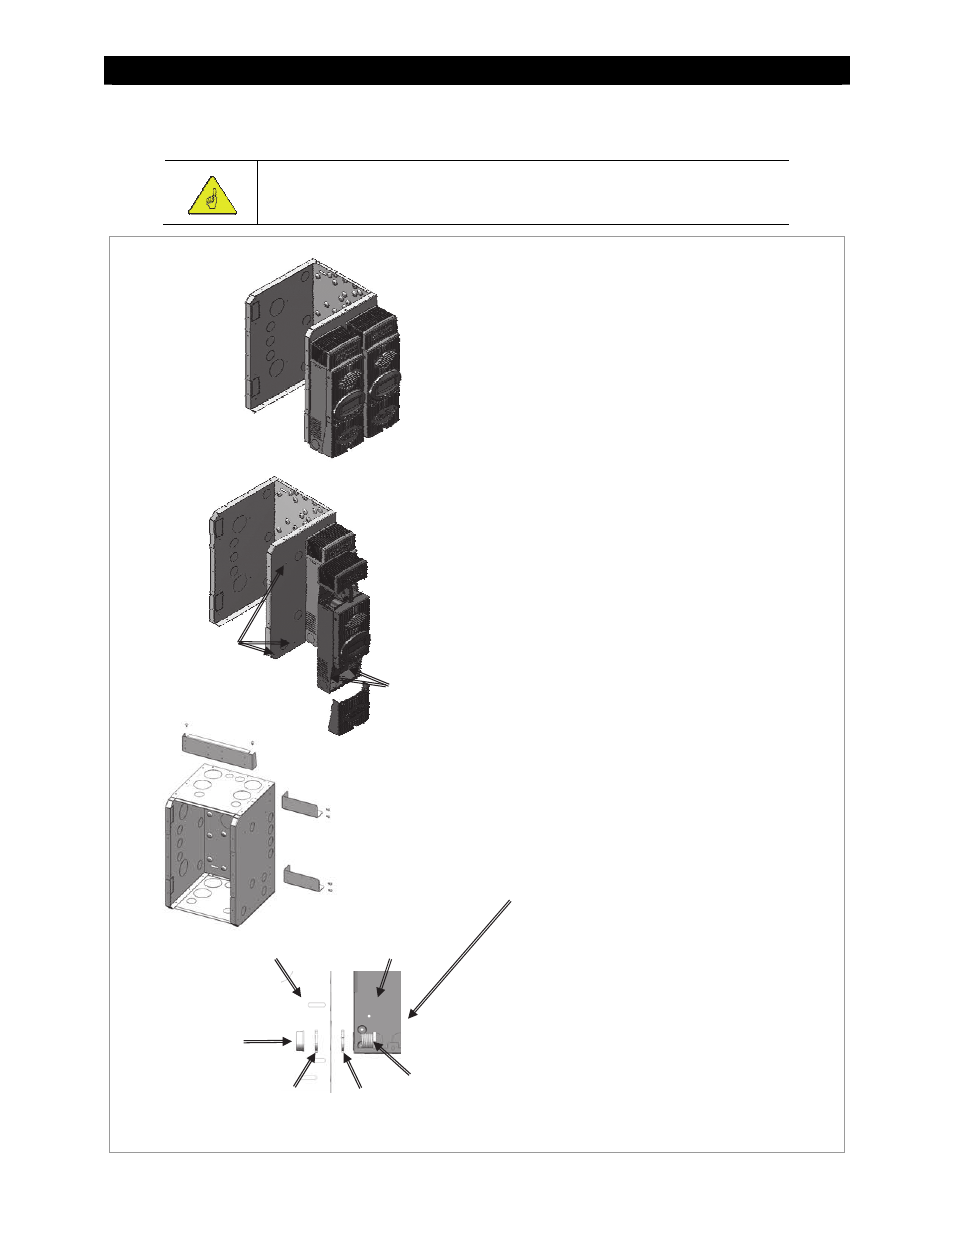
Figure 4
Mounting the Charge Controller
The FLEXmax is designed to attach
directly to OutBack’s FLEXware 500 DC
and FLEXware 1000 DC enclosures
(FLEXware 500 shown) or attach to its
own charge controller brackets (FW-CCB,
FW-CCB2, and FW-CCB2T).
Mounting directly to a FLEXware DC
enclosure:
1. Remove the fan cover and bottom
cover from the FLEXmax.
2. Insert a #10 X 3/8” sheet metal screw
in the top hole on the side of the DC
enclosure. This will act as a hanging
screw for the keyhole slot at the top
center of the FLEXmax.
3. Hang the FLEXmax on the top screw
and line up its bottom two screw
holes with the holes on the enclosure.
4. Insert a #10 x 3/8” sheet metal screw
through each hole and tighten
against the enclosure (screws are
included with each DC enclosure).
5. Keep the cover off until wiring is
completed.
The conduit nipple assembly creates a
sealed connection from the FLEXmax to
the enclosure.
Mounting to Plywood
Use 1-5/8” wood screws to secure the
FLEXmax at the top slotted holes and
other interior lower holes as needed,
making sure the unit is straight and level.
Insert screws
through lower
holes inside
the charge
controller.
Holes for
#10 x 3/8” sheet
metal screws
Conduit
Nipple
DC Enclosure
Charge Controller
(front view)
Bushing
Lock Nut
Lock Nut