Printhead cleaner removal – HP Designjet 5100 Printer series User Manual
Page 53
3-9
Maintain the ink system
HP Designjet 5100 printer Customer Reference Guide
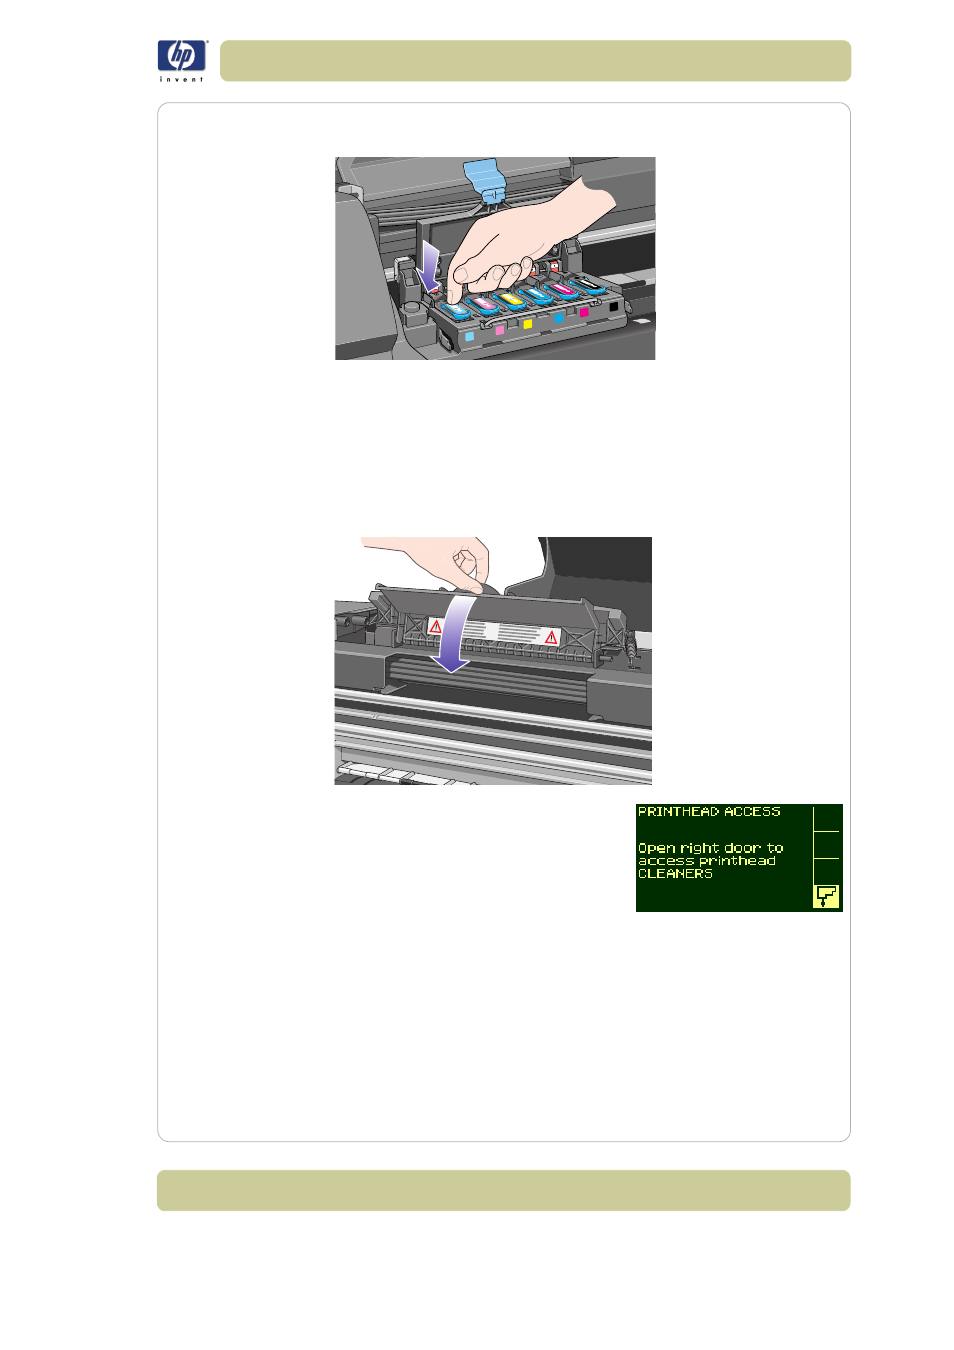
4 When installing the new printhead there may be some resistance, so you
need to press it down firmly but smoothly.
5 Insert any other printheads that need to be installed, and close the carriage
assembly cover. Only when all the printheads have been inserted correctly
and accepted by the printer, will the printer “beep”.
NOTE: If the printer does not “beep” when you insert the printhead and the
“Reseat” or “Failed” message appears on the front panel, the printhead may
need to be reseated.
6 Close the flap over the carriage assembly.
7 Close the window. The front panel displays:
8 Now replace the printhead cleaners for any
printheads that have been changed. See
the next page for details.
CAUTION
Leaving the old printhead cleaner in the printer will
shorten the new printhead’s life and possibly damage
the printer.
Printhead cleaner removal
When removing the printhead cleaners:
Be careful not to get ink on your hands. There may be ink on, around and
inside the replaced printhead cleaner.